
[toc]
Introduction
This post is a continuation of the course Developing an Angular 5 App series if you haven’t gone through the previous posts yet, I strongly recommend you to do that. You can find the links to the previous posts below. In our previous posts, we saw about the Angular 5 updates, an overview of the project and how to set up your first application in Angular 5. In this post, we are going to create few components and modules like routing, navigation, registration forms etc. So at the end of this article, you will be having a registration application with navigation and routing enables. I hope you will like this article.
Developing an Angular 5 App series
These are the previous posts in this series. Please go ahead and have a look.
Source Code
You can always clone or download the source code here
Background
So as I mentioned, here we are going to create an Angular 5 application which contains Registration form, Navigation, Routing etc.
Let’s Develop Our Application
We will be creating our application in a step by step manner so that you can easily follow up. No more talking now and let’s code it.
Creating your first component
As we discussed in our previous posts, a component is a set of combined functionality, in our case, we are going to create a component called Registration whose purpose is to serve all the codes for Registration.
You can create your components in two ways,
- Manually create a file called registration.component.ts, if you opt this method, you will have to register this component in app.module.ts yourself and also creating the template.
- Using a command in NPM command prompt, this is an easy method, as it does all the background work for us.
I am going to opt the second method. To create a component using your command prompt, you will have to run the following command.
ng generate component {component name }
D:\SVenu\FullStackDevelopment\Angular\Angular5\ng5>ng g component registration
Once you run the command, the following processes will be happened.
- create src/app/registration/registration.component.html
- create src/app/registration/registration.component.spec.ts
- create src/app/registration/registration.component.ts
- create src/app/registration/registration.component.scss
- update src/app/app.module.ts (501 bytes)
Now let us go back to our code folder and see the files. You can see your new files in app/registration folder. Here is how our registration.component.ts file looks like.
import { Component, OnInit } from '@angular/core';

@Component({
  selector: 'app-registration',
  templateUrl: './registration.component.html',
  styleUrls: ['./registration.component.scss']
})
export class RegistrationComponent implements OnInit {
  constructor() { }
  ngOnInit() {
  }
}
If you see the code, the command had created all of the code which we need to get started. The same component will be imported and added to our declarations in @NgModule in our app.module.ts. Please go ahead and see the same.
import { BrowserModule } from '@angular/platform-browser';
import { NgModule } from '@angular/core';

import { AppComponent } from './app.component';
import { RegistrationComponent } from './registration/registration.component';


@NgModule({
  declarations: [
    AppComponent,
    RegistrationComponent
  ],
  imports: [
    BrowserModule
  ],
  providers: [],
  bootstrap: [AppComponent]
})
export class AppModule { }
Creating a registration form
Now that we have created our component, let’s edit our component with needed text boxes and button. Go to your registration.component.html file and edit the content as preceding.
<p>
  <input type="text" placeholder="First Name" />
  <input type="text" placeholder="Last Name" />
  <input type="email" placeholder="Email" />
  <input type="password" placeholder="Password" />
  <input type="password" placeholder="Confirm Passwrod" />
  <br/>
  <button>Register</button>
</p>
Creating a route for our new component
Now our registration page is updated, and we are yet to create a route for the same right, let’s create it now and test our registration page.
To create a route you will have to do some set of changes.
Make sure that you have one base element in your src/index.html file
<base href="/">
Now go to your app.module.ts file and import the RouterModule there
import { RouterModule, Routes } from '@angular/router';
Create our Route Array
const myRoots: Routes = [
  { path: 'register', component: RegistrationComponent }
];
Here the path is the route name and component is the component which that path refers to.
Configure the route in imports
Once we create the routing array, it is time to configure it, using RouterModule.forRoot.
@NgModule({
  declarations: [
    AppComponent,
    RegistrationComponent
  ],
  imports: [
    BrowserModule,
    AppRoutingModule,
    RouterModule.forRoot(myRoots)
  ],
  providers: [],
  bootstrap: [AppComponent]
})
Set our router outlet
We have successfully configured our route, now we need to set where this pages/components to appear. To do so, go to your app.component.html and add the router-outlet. So the content of the route components will be displayed after the router-outlet tag.
<!--The content below is only a placeholder and can be replaced.-->
<div style="text-align:center">
  <h1>
    Welcome to {{title}}!
  </h1>

</div>
<router-outlet></router-outlet>
Now if you run our application by following the route as http://localhost:4200/register you can see our registration page as preceding.

Sample_Registration_Form
Isn’t this registration form too basic, let’s style them now?
Style registration page using material design
Before we do anything, we need to install angular-material to our project. So that we can use the styles which are available there.
npm install --save @angular/material @angular/cdk
By any chance, if you get an error as below,
D:\SVenu\FullStackDevelopment\Angular\Angular5\ng5>npm install --save @angular/material @angular/cdk
npm ERR! path D:\SVenu\FullStackDevelopment\Angular\Angular5\ng5\node_modules\fsevents\node_modules\dashdash\node_modules
npm ERR! code EPERM
npm ERR! errno -4048
npm ERR! syscall scandir
npm ERR! Error: EPERM: operation not permitted, scandir 'D:\SVenu\FullStackDevelopment\Angular\Angular5\ng5\node_modules\fsevents\node_modules\dashdash\node_modules'
npm ERR! { Error: EPERM: operation not permitted, scandir 'D:\SVenu\FullStackDevelopment\Angular\Angular5\ng5\node_modules\fsevents\node_modules\dashdash\node_modules'
npm ERR! stack: 'Error: EPERM: operation not permitted, scandir \'D:\\SVenu\\FullStackDevelopment\\Angular\\Angular5\\ng5\\node_modules\\fsevents\\node_modules\\dashdash\\node_modules\'',
npm ERR! errno: -4048,
npm ERR! code: 'EPERM',
npm ERR! syscall: 'scandir',
npm ERR! path: 'D:\\SVenu\\FullStackDevelopment\\Angular\\Angular5\\ng5\\node_modules\\fsevents\\node_modules\\dashdash\\node_modules' }
npm ERR!
npm ERR! Please try running this command again as root/Administrator.
You should try running the following command before you execute the above command again.
cmd.exe npm
You may also need to install the animation as well
npm install --save @angular/animations
Once you have installed it, we need to import the some of the modules in the app.module.ts file as preceding.
import { MatButtonModule, MatCardModule, MatInputModule, MatSnackBarModule, MatToolbarModule } from '@angular/material';
Now add those components to our import list in @NgModule.
@NgModule({
  declarations: [
    AppComponent,
    RegistrationComponent
  ],
  imports: [
    BrowserModule,
    AppRoutingModule,
    MatButtonModule, MatCardModule, MatInputModule, MatSnackBarModule, MatToolbarModule,
    RouterModule.forRoot(myRoots)
  ],
  providers: [],
  bootstrap: [AppComponent]
})
Let’s go back to our registration.component.html file and do some design changes.
<mat-card>
  <mat-input-container>
    <input matInput type="text" placeholder="First Name" />
  </mat-input-container>
  <mat-input-container>
    <input matInput type="text" placeholder="Last Name" />
  </mat-input-container>
  <mat-input-container>
    <input matInput type="email" placeholder="Email" />
  </mat-input-container>
  <mat-input-container>
    <input matInput type="password" placeholder="Password" />
  </mat-input-container>
  <mat-input-container>
    <input matInput type="password" placeholder="Confirm Passwrod" />
  </mat-input-container>
  <br />
  <button mat-raised-button color="primary">Register</button>
</mat-card>
We also need to include one material CSS in our Style.scss file.
@import '~@angular/material/prebuilt-themes/deeppurple-amber.css';
Now let’s run our application and see our registration page.
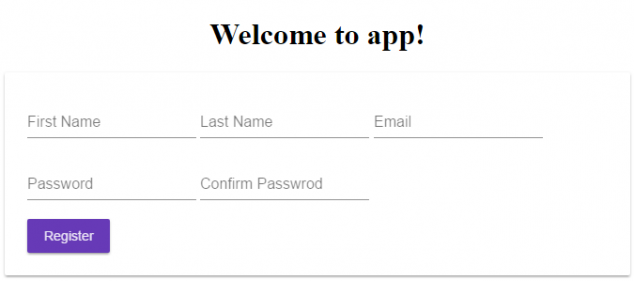
Material_Angular_Form
That’s cool, we have done it.
Create Home and Navigation Components
We know how to create new components now using generate command right, let’s create a new component for Home and Navigation.
ng g component home

ng g component nav
As we used the commands to create the components, the same will be imported in our app.module.ts automatically, so we don’t need to worry about it.
Now let’s edit our nav component and use a material design for the navigation buttons.
<mat-toolbar color="primary">
  <button mat-button routerLink="/">Home</button>
  <button mat-button routerLink="/register">Register</button>
</mat-toolbar>
Here routerLink property specifies the route where we need to redirect to. We are not done yet, we need to use this component on our app.component.html page to see this navigation.
<!--The content below is only a placeholder and can be replaced.-->
<div style="text-align:center">
  <h1>
    Welcome to {{title}}!
  </h1>
  <app-nav></app-nav>
</div>
<router-outlet></router-outlet>
And also add our new route for our HomeComponent. So go to your app.module.ts and edit your route as follows.
const myRoots: Routes = [
  { path: '', component: HomeComponent },
  { path: 'register', component: RegistrationComponent }
];
Let’s give it a try now, I am sure that you will be seeing an output as preceding.
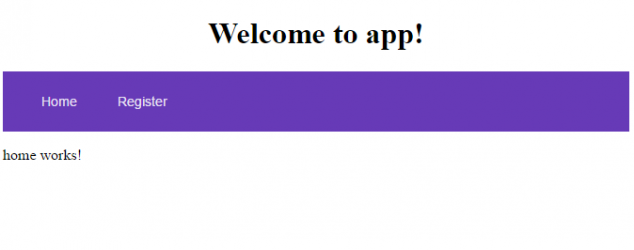
Nav_Demo
That’s all for today. In our next article, we will start to do some validations and set up two-way data binding, so that the model values can be passed to the server. Till then bye.
Conclusion
Thanks a lot for reading. Did I miss anything that you may think which is needed? Could you find this post as useful? I hope you liked this article. Please share me your valuable suggestions and feedback.
Your turn. What do you think?
A blog isn’t a blog without comments, but do try to stay on topic. If you have a question unrelated to this post, you’re better off posting it on C# Corner, Code Project, Stack Overflow, Asp.Net Forum instead of commenting here. Tweet or email me a link to your question there and I’ll definitely try to help if I can.
Kindest Regards
Sibeesh Venu