
Introduction
SharePoint is a huge platform and sometimes we may have to do some tricks to achieve our requirements. I was in a need to make my scanned PDF content to be searchable in the SharePoint online, which I have already achieved in a way, you can see that article here. Please consider this article as the second part of the above-mentioned article. Here in this article, we will make the Scanned PDF and images contents to be searchable in SharePoint online using the new Azure Form Recognizer and Microsoft Flow. Please keep reading.
Background
In our previous article, we learned how to make the Scanned PDFs to be searchable by its contents using the technology called OCR with a third party tool AquaForest. AquaForest is really a cool product and there are many things that you can do, but it is expensive, as I was using that just for the OCR purpose, it was not worth the money I spend. Because of that, I had to find a different option to satisfy my requirements, that is how the Azure Form Recognizer comes into this story. If you have ever used the Azure Computer Vision AI, you can see that there we use OCR to read the content of the image files, unfortunately, that doesn’t work well with PDF files. The Azure Form Recognizer removes that limitation.
Azure Form Recognizer is part of the Cognitive Services Family, if you are new to Cognitive Service, please feel free to read some of my articles on the same topics.
Update the Document Library List
As you all know that the SharePoint search will work with the content of the list and the metadata. So my idea here is to create a new column Metadata in the Document library list and then Azure Form Recognizer result to this field so that we search with the content this list entry, that is, our Scanned PDF will be available in the search result. Don’t worry if it sounds too complex, in fact, it is way too easy.

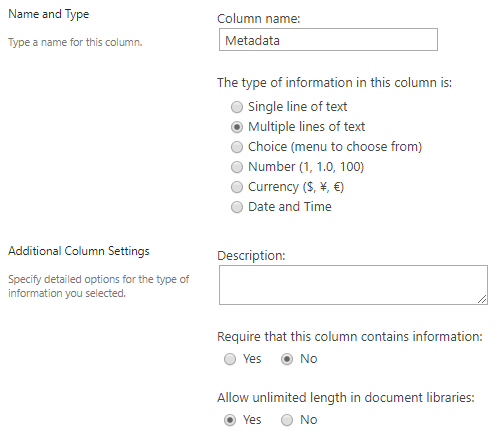
The reason why I am using a separate column here is to get the full control over the column and to set the Multiline support and allow unlimited length.
Creating the Flow to make the scanned PDF/Image contents to be searchable
Setting up Azure Form Recognizer
Now we need to create an Azure Form Recognizer, it is as simple as you create any other services in Azure. Go to the Azure Portal and search for the Form Recognizer, and create one.
Train your Form Recognizer Model
Now it is time to train our model so that the Form Recognizer can give us the appropriate output. You can do this step either by using the Web UI Console given by Microsoft or Curl.
If you are running the commands in Windows 10, run it with Bash or use the Invoke-WebRequest in PowerShell.
Where to run commands?
Using the web console is very easy so, I will use that. Before we run that we need to upload our sample document to the Azure Blob. Let’s do that now.
Configure Azure Storage Account and Upload Blob
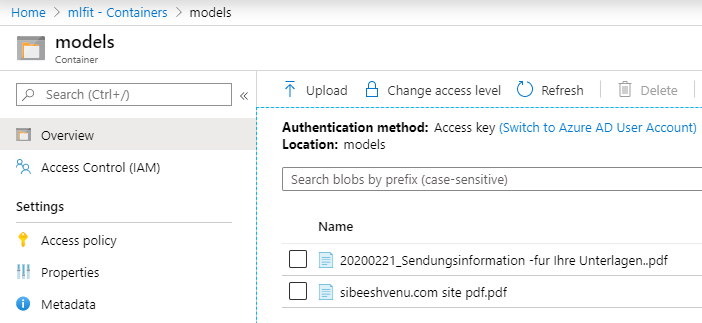
Creating a storage account is really straightforward, search for Storage Account in the portal, and then fill the form as per your wish. Once you create the account, go to the resource and click on the Containers, under the Blob service menu. Now we need to create a container so that we can save the sample blob files inside. For now, I created this container with the name “models”. And then I uploaded 2 PDF files.

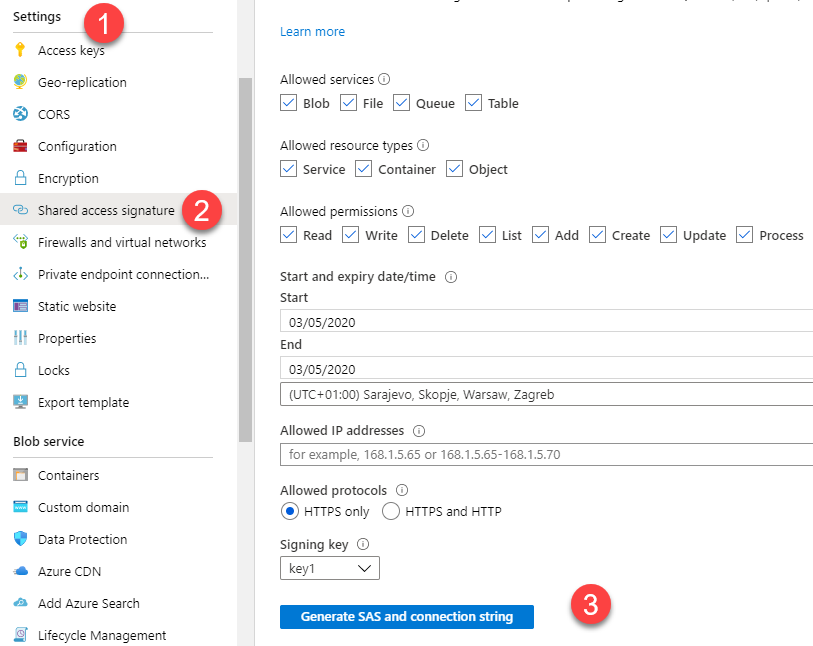
As mentioned here in the Microsoft Doc, now we need to get the SAS URL with our container name in it. Go to the Settings menu and click on the Share access signature and then click on the Generate SAS and connection string.

Now copy the Blob Service SAS URL and add your container name to the URL right after the windows.net/ so the end SAS URL will be looking like the below URL.
https://mlfit.blob.core.windows.net/models?sv=2019-02-02&ss=bfqgt&srt=shco&sp=rwdlhfacup&se=2020-03-05T16:51:40Z&st=2020-03-05T08:51:40Z&spr=https&sig=MSN0%2BhGHDGSDGW7jH2tOTGwh8I%2Bld%2BvcYAYTFGDSGH6mUyzsCAQXVoo%3DHere the “models” is my container name.
Train your model
Now go to the console and fill all the details as below.

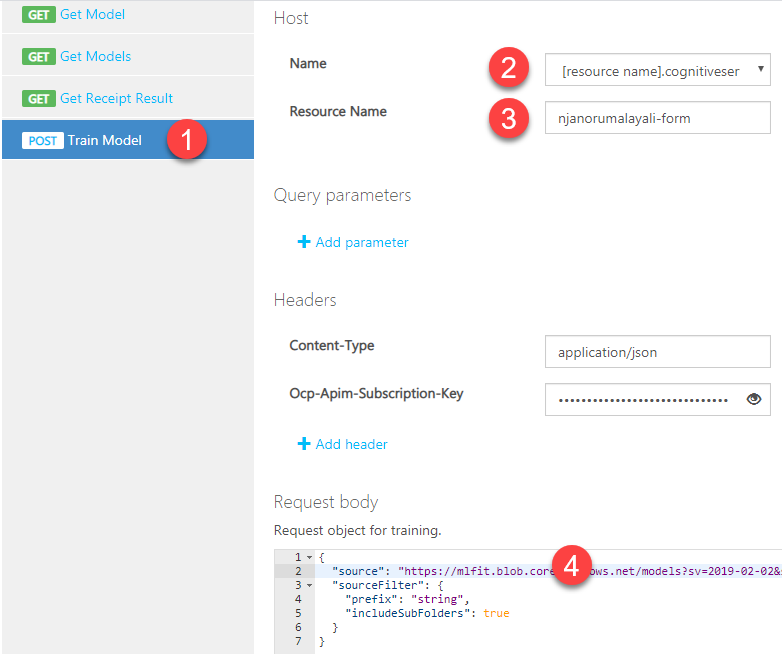
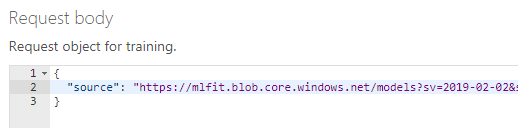
Here the resource name is the name of your Form Recognizer resource, Ocp-Apim-Subscription-Key is the key of that service, you can use key1 or key2. And in the Request body, edit the source property with your SAS URL. Then hit the send button. Now if everything goes well, you should get the output as below.

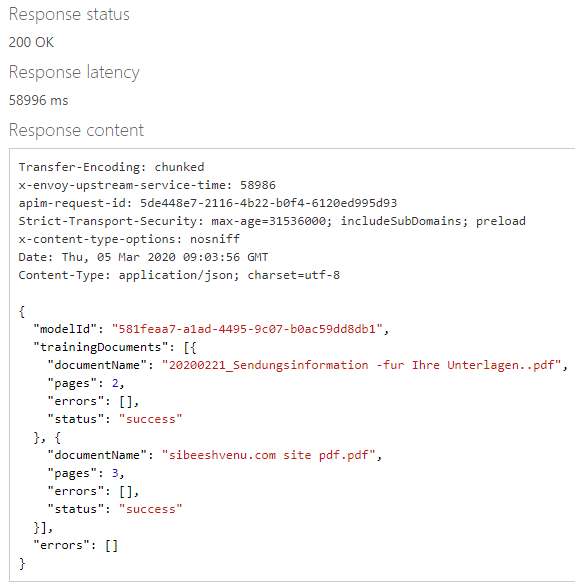
Please make a note of the modelId from the result, as we will use this in our Flow. If you are getting the error ” No valid blobs found in the specified Azure blob container”, then most probably it is because of the source filter we apply in the Request body, just remove that and hit the send button again.
{
  "error": {
    "code": "2024",
    "innerError": {
      "requestId": "78df3a9b-ae2c-47a7-900c-8fa78f5a5a15"
    },
    "message": "No valid blobs found in the specified Azure blob container."
  }
}
You can also try out the different API calls like “Get Models”, “Get Model”, etc. As that is not relevant to this article, I am not going to try them. The one thing to notice here is that the more you train, the more accurate the result will be.
Set up the Flow
If you are not sure about how you can create a flow, please look at the “Create a Flow” section here. Once you have the basic flow with the connector “When a file is created”, we can initialize our variables which we are going to use later.

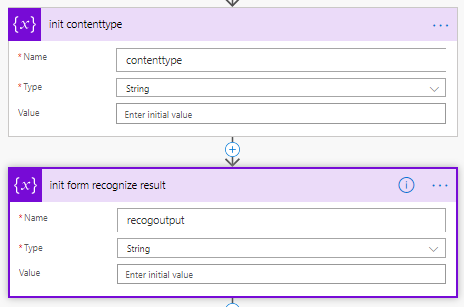
One variable is to save the content type of the file we get and the other is to save the result of the Form Recognize Analyze API. Let’s move on to the next step now.

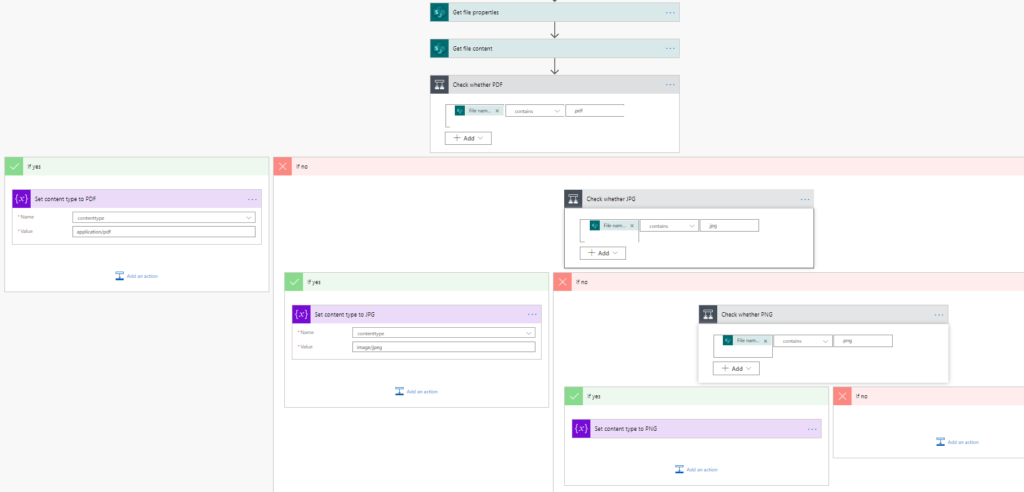
As you can see that the Flow is just like the programming tasks we do, we can use if, if-else, switch and many more. Try out these functions in your Flow when you get time.
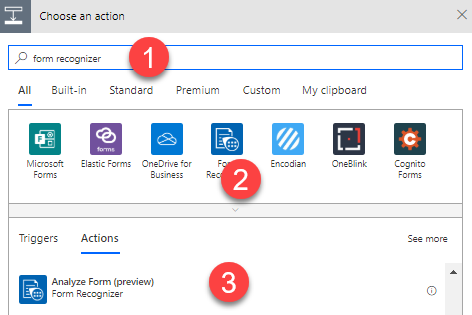
So now we have a dynamic value in our contenttype variable. Let’s add the Analyze Form task, just search for the “Form Recognizer” and then select the action Analyze Form.

Now it will ask for you to enter the key of your Azure Form Recognizer, and a connection name. Once you give that, you can paste your modelId you got from the Train Model API call. In the end, this is how your Analyze Form action will look like.

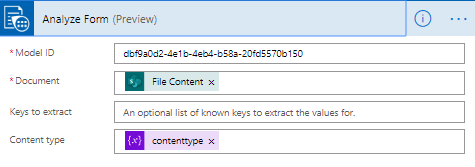
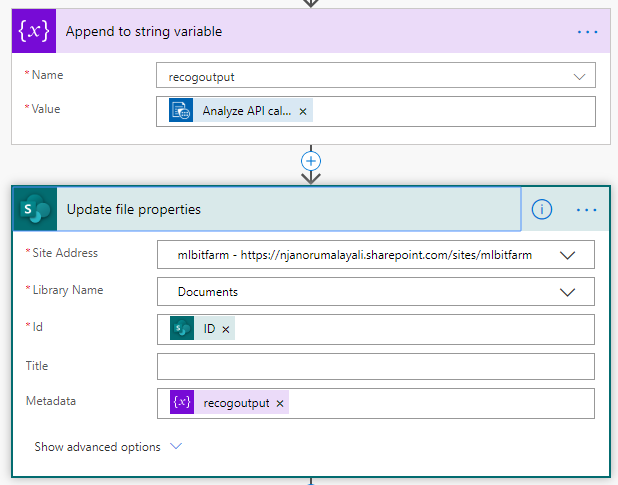
You can see that we use the contenttype string variable here. Now we can append the value of the Analyze Form result to our recogoutput variable. And in the next step, we can save this information to the Metadata field that we created earlier for the Document library. Sounds good?

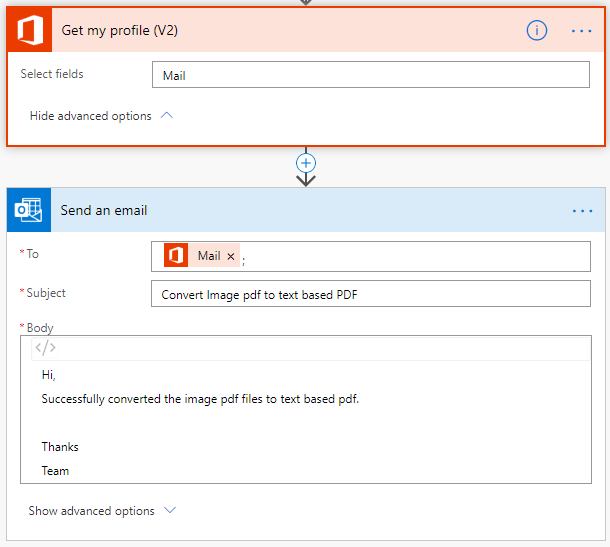
Now we are done with the Flow creation and if you wish you can send mails to the people about this conversion from the Scanned PDF to the Searchable PDF.

Below are the full steps of my flow.


Now we can test our flow. Cool right?
Test the Flow
To test, add a PDF document and an image to your Document Library and the flow will be triggered automatically. You can see the running status from the portal. Once the flow is run, you can see the result like below.

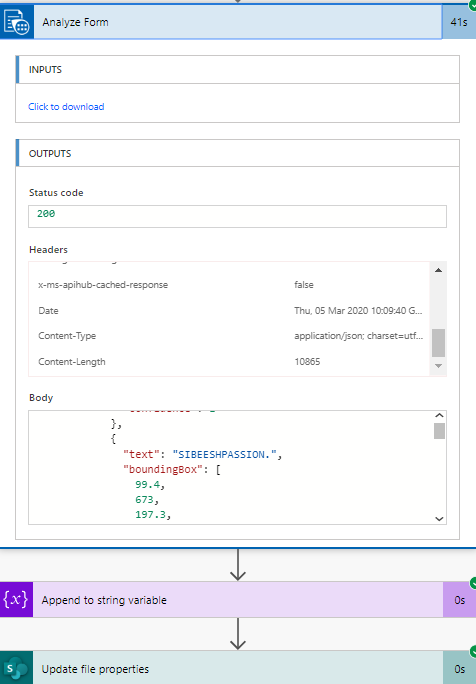
Now just go back to your Document library and see the data in the Metadata column, this will be the Body data that we get from the Analyze Form action. Now the only thing pending is to do some search actions. Can’t wait to do that.

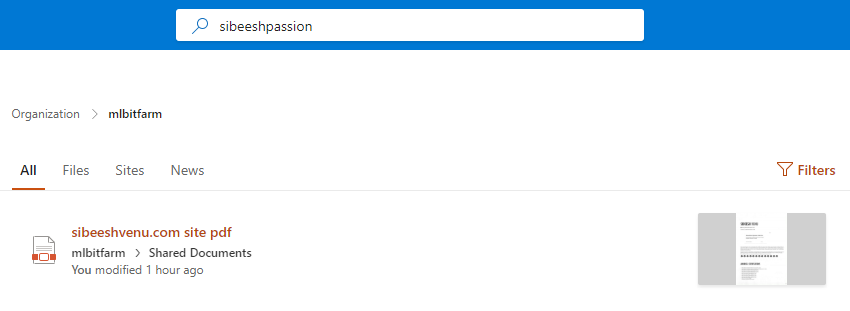

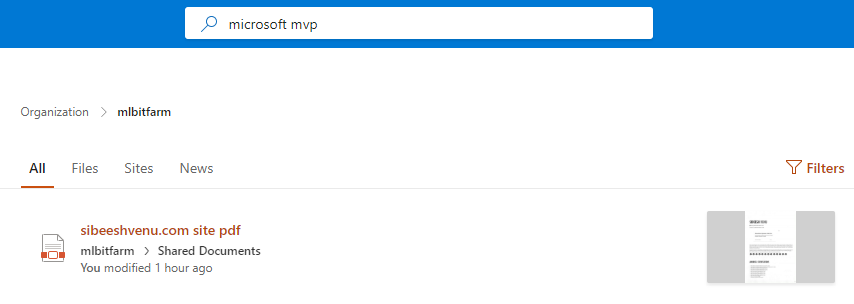
Now try out with as many PDFs and Images you can, I will leave this to you.
Conclusion
Thanks a lot for staying with me for a long time and reading this article. I hope now you have learned about
- creating Azure Form Recognizer
- using Azure Form Recognizer to read text from PDF and Images
- training Azure Form Recognizer
- using Azure Storage Account
- creating a flow in SharePoint online
- creating the steps in Flow
- use the connections in Flow
- send mails from Flow
If you have learned anything else from this article, please let me know in the comment section.
Follow me
If you like this article, consider following me, haha!.
Your turn. What do you think?
Thanks a lot for reading. Did I miss anything that you may think which is needed in this article? Could you find this post useful? Kindly do not forget to share your feedback.
Kindest Regards
Sibeesh Venu