
[toc]
Introduction
Creating an Azure Stream Analytics job and working with them is always a fun. And what if there is a tool which helps you create a stream solution in Visual Studio so that you don’t want to go over the browser and do some manual button clicks? That’s where the Azure Data Lake and Stream Analytics Tool extension come into the play. In my previous post, we have already discussed what is an Azure Stream Analytics job and how can we work with the same, if you haven’t read the same, please read it. Now let’s go and use the extension.
Background
Recently, I started working with Azure IoT Device Kit, which is a wonderful micro controller board, it can send a lot of information like temperature, humidity to the Azure cloud, as it has a lot of inbuilt sensors. Now in this article, we will create a Visual Studio solution for our Stream Analytics Job so that the same can be moved to a source control and can be easily managed.
Please be noted that the Extension we are going to use is not yet supported with Visual Studio 2019, and if you try to create the same in VS2019, you will get an error as the version of Visual Studio is not supported
The extension is not supported in VS2019
Setting up the Environment
I am assuming that you have a valid Azure Subscription and you have access to create the resouces in it.
Modify Visual Studio with Required Workloads
Let’s go to our Visual Studio installer and modify the workloads now.

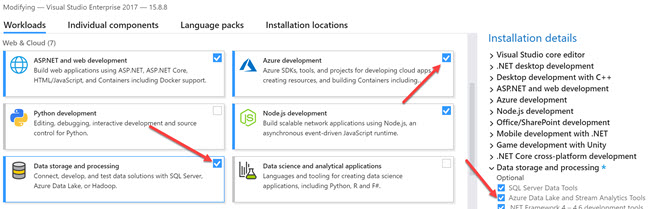
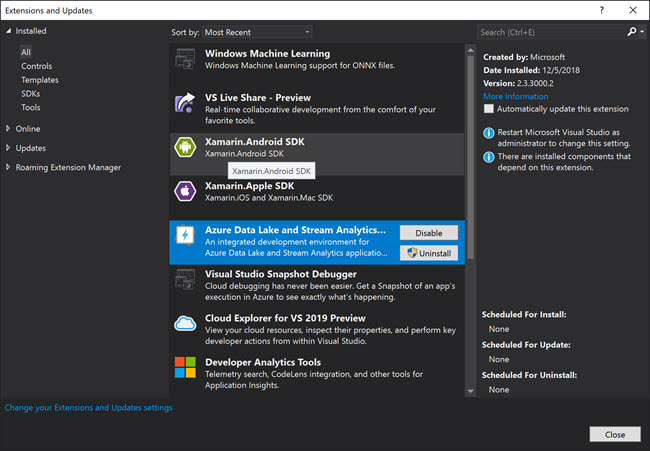
Once the workloads are modified, make sure that the extension is available in your Extensions, you can do that by going to Tools -> Extension menu.

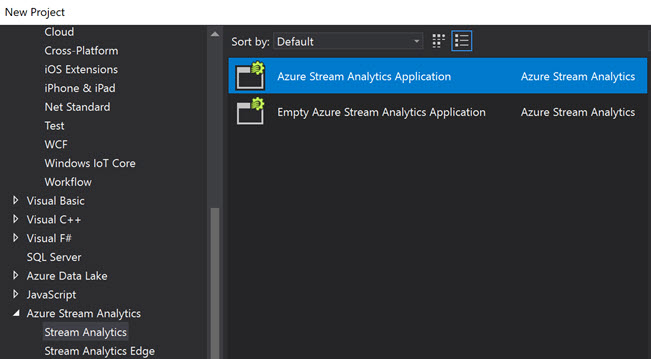
Creating a New Stream Analytics Project
Once the Extension is enabled, you should be able to create a new Azure Stream Analytics Application.

The new project will be containing the below files.
- Input.json
- Output.json
- JobConfig.json
- Script.asaql
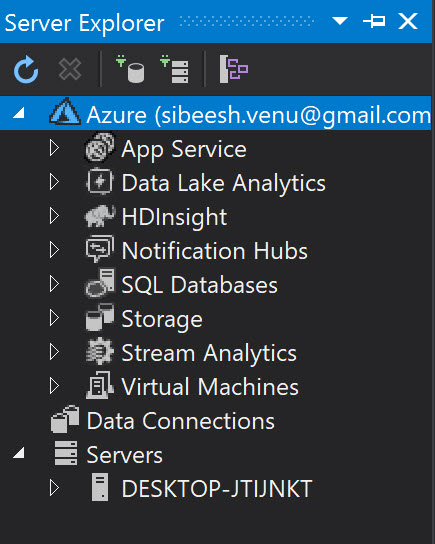
To configure your subscription, please make sure that you have added your Subscription in the Server Explorer.

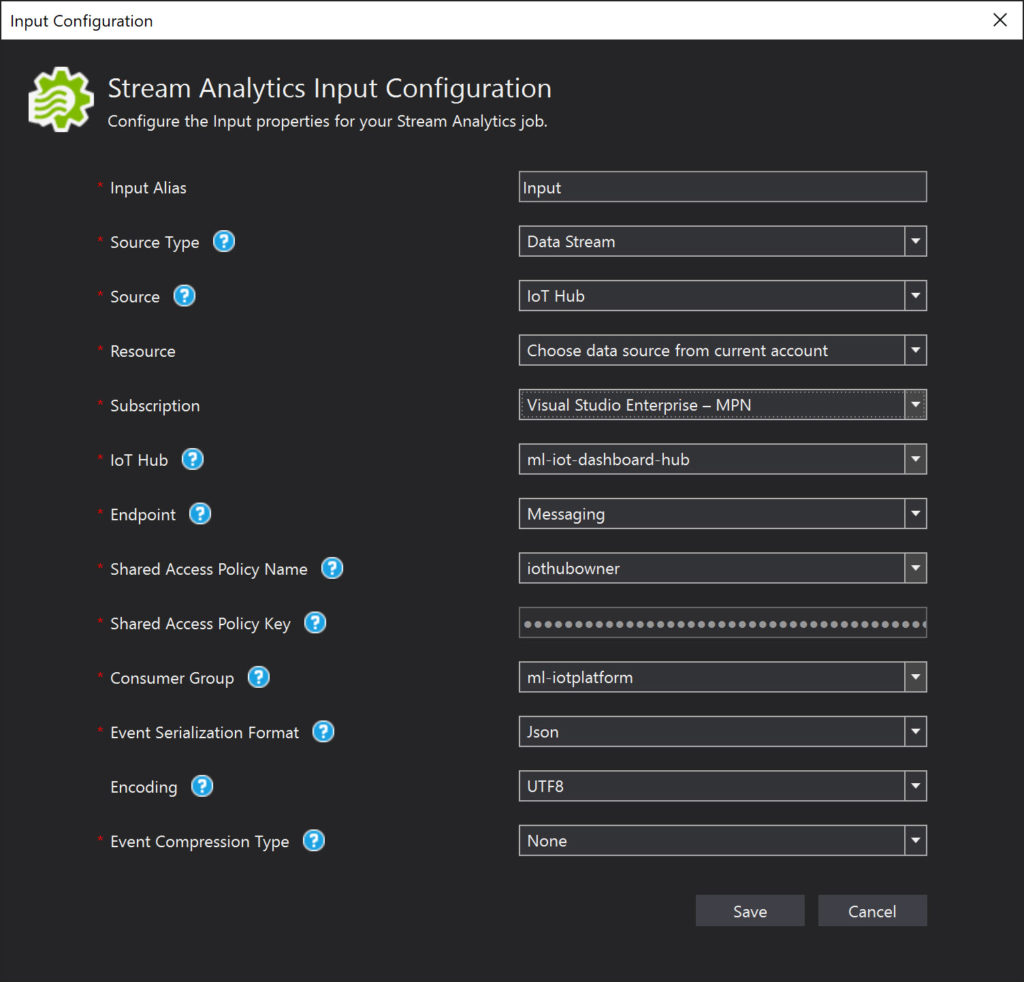
The Input.json file is the replica of your Input job topology, on the file will give you the configuration page to configure the details.

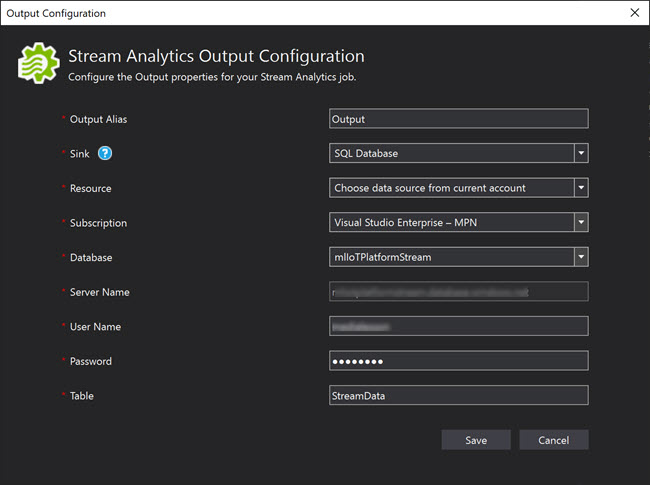
The Output.json file is your output job topology, you can have as many outputs you need. In my case it is just one, SQL Server Database.

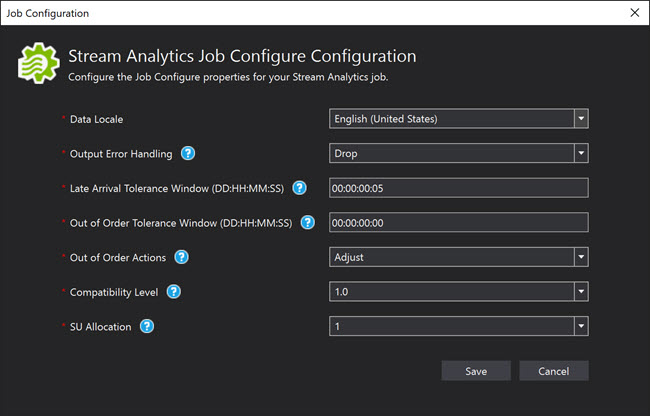
You can always configure your job using the JobConfig.json file. When you configure the Job, you need to be sure about the values you are providing and what are the needs of them.
Data Locale is your locale input. The option Output Error Handling is for handling the situation when the events fail to be written to the output, you can select either Drop or Retry. The Late Arrival Tolerance Window is the timeframe which you can wait for the event to reach the IoT hub, the time difference is between the event timestamp and the system time.

And the Script.asaql is the file where you need to add your custom query which gets data from the input and send it to the output.
SELECT
    messageId,
    deviceId,
    temperature,
    humidity,
    pressure,
    pointInfo,
    IoTHub,
    EventEnqueuedUtcTime,
    EventProcessedUtcTime,
    PartitionId
INTO
    streamoutputs
FROM
    streaminputs
Once everything is done, you are ready to submit the same to the Azure. You can either create a new job or use the existing one.


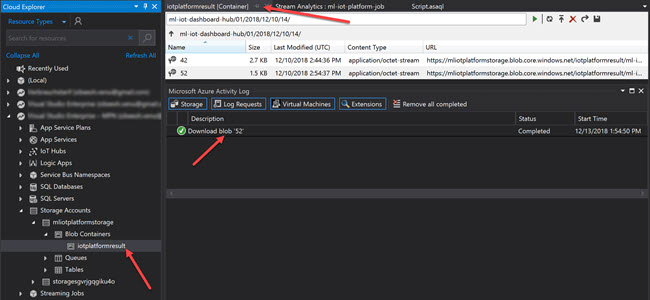
When you submit, you can see that a new Stream Analytics view will get opened and the job will be starting automatically. You can always see the blobs created under your container by going to the cloud explorer.

Now just right click on your solution and select “Add solution to Source Control and then push the same to your git repository. Once you have added the solution to the source control, your team members can easily update the Input and Output configuration and have a history of the same.
Conclusion
In this article, we have learned how to,
- set up the Visual Studio for using Data Lake and Stream Analytics tool
- use the Data Lake and Stream Analytics tool
- configure the Input for Stream Analytics
- configure the Stream Analytics Job
- Use the created package in another solution
Your turn. What do you think?
Thanks a lot for reading. I will come back with another post on the same topic very soon. Did I miss anything that you may think which is needed? Could you find this post as useful? Kindly do not forget to share me your feedback.
Kindest Regards
Sibeesh Venu