

Introduction
Working with Microsoft Graph is fun, but it can get way too complex when the requirement is getting complex. Recently, I was working with such a requirement. I wanted to load users from different tenants, usually, this is too easy, and you just need an admin user in the tenant to load all the users using Graph API. But, in our case, there is no guarantee that the logged-in user is actually present in that tenant. And when the user tries to get the users from a different tenant, the Graph API returns an Unauthorized error, which is obvious and well handled.
So, we wanted something that can always perform these actions, no matter the logged-in user is present or not in the tenant given. I started with adding the Delegated permission to the Azure AD app registration, and in the end, the result was the same. Then I came to know about the application permission of Azure AD application registration and that sounded worth a try.
Here in this post, I will be sharing how did I achieve this requirement, it is not that problematic as it sounds.
Azure AD Application Set Up
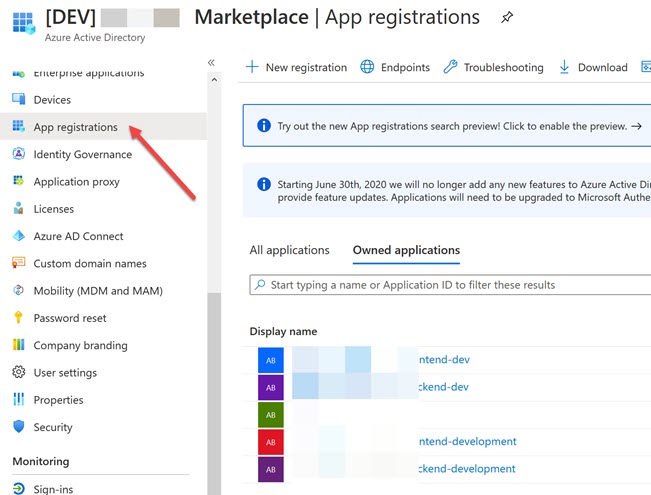
Go to your Azure AD and select the App registration menu from the left pane. This will open the window where you can create and manage your app registrations.
When you are registering a new Azure AD application, make sure to select Multi-Tenant Support and give a redirect URL.

Now let’s say that you have created your application and now open the application and click on the permission menu from the left-pane.
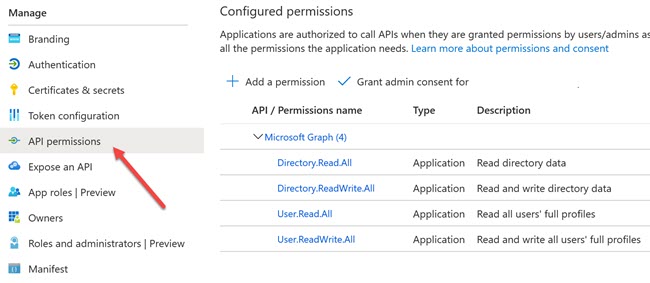
As you can see that, all the permission types are Application, instead of the delegated ones. This will make sure that our application gets the privilege to act without a user, and will act as a Daemon user in the end. Please be careful in giving the application permissions as those are critical and should only be used when it is needed. So, just select only the permissions needed to complete your requirements.
Now, to make it work, we also need to set up a Client Secret in our application, which will then be used when we create a token. To do that, click on the Certificate & Secrets menu from the left pane. And click on the +New client secret.
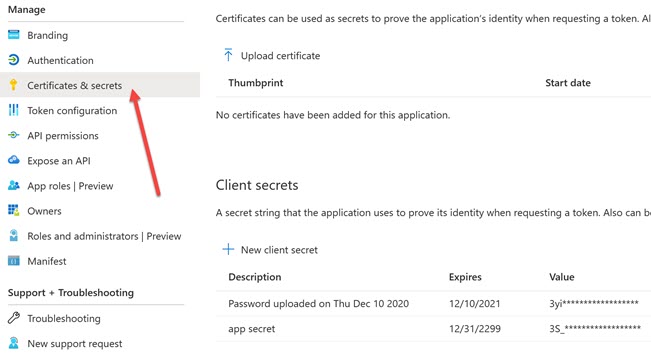
Remember to make a note of the secret as you will not be able to see the values later. Now that our application is ready for action, let us write some code.
Code to Get Users from Multiple Tenants
I do this in my .Net Core API application, and I have a module called Admin which does all the Admin related kinds of stuff. Here I have configured my application using a vertical layered architecture, thus this admin module is independent of any other features in our application. Having said that, let’s look at the code in AdminController.
As you can see that, nothing fancy there. Here I am just calling the method in the Admin Service and some error handlings. Let’s look at the code in the Admin Service.
Here I have some custom error handling and also I am doing some logic related to my requirement, but the important part here is” var users = await _graphFacade.GetUsersUsingGraph(selectedTenant);” Let’ see that now.
I am a fan of keeping things separate, and that is the reason why you are seeing a lot of separations here. I promise that there will only be one more. Here we have a GraphAuthService, and that is when I actually create the graph client and return the provider. Shall we see that now?
Here we are creating a client credential provider with our tenant given and then create a graph client using that provider. Sounds good? We are getting all the other values from our configuration. In the non-development environment, I am loading the secret from a Key Vault, and for the development environment I load them using the secret.json file, I have already written a blog post about this, you can read it here.
As per your need, you should select the authentication provider, this post will help you choose one. And we use this client in our façade service to get all the users. You have already seen that. Follow this link to install all the dependencies, in short, install both “Microsoft. Graph” and “Microsoft.Graph.Auth” Nuget packages at least.
Execution
It is mandatory that you should have a UI application where an admin can grant access to our application, you can also prepare a URLS and sent it to your admin to give the consent, but the UI approach is more feasible. I have an application already that does this. Let’s run it now and see whether we are able to fetch the users from the different tenants or not.
In short, when the consent is given a new service principal of our application will be created in the tenant to which the admin is granted the consent. You can see this in the Enterprise application section in your Azure AD, check the left-side-pane. This is how the consent screen will look like.
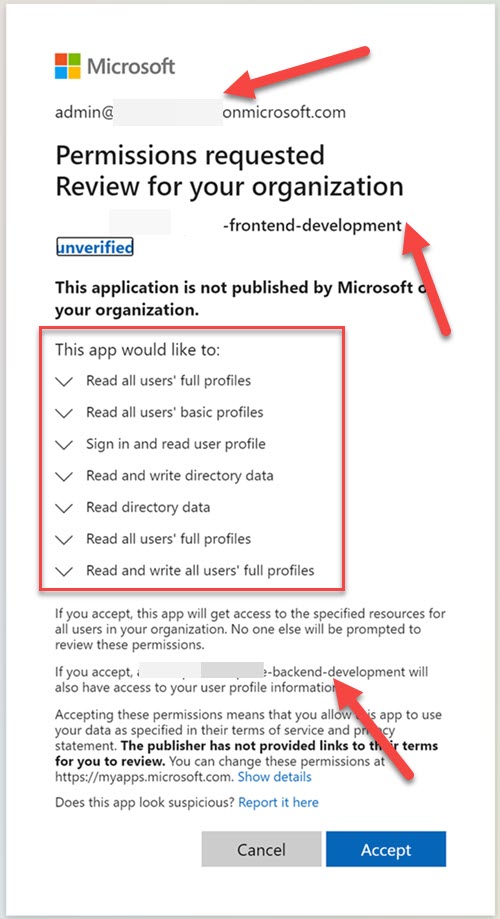
Now, as you can see that in the above image, whatever permission our application is requesting, is showing in the consent screen, and some admins will not give the consent if they see a lot of permissions there. This is the reason why it is important to choose the permissions that are needed. In my case, I have one Azure app for the front end and one for the backend, that is the reason why my backend application name is mentioned in the consent screen.
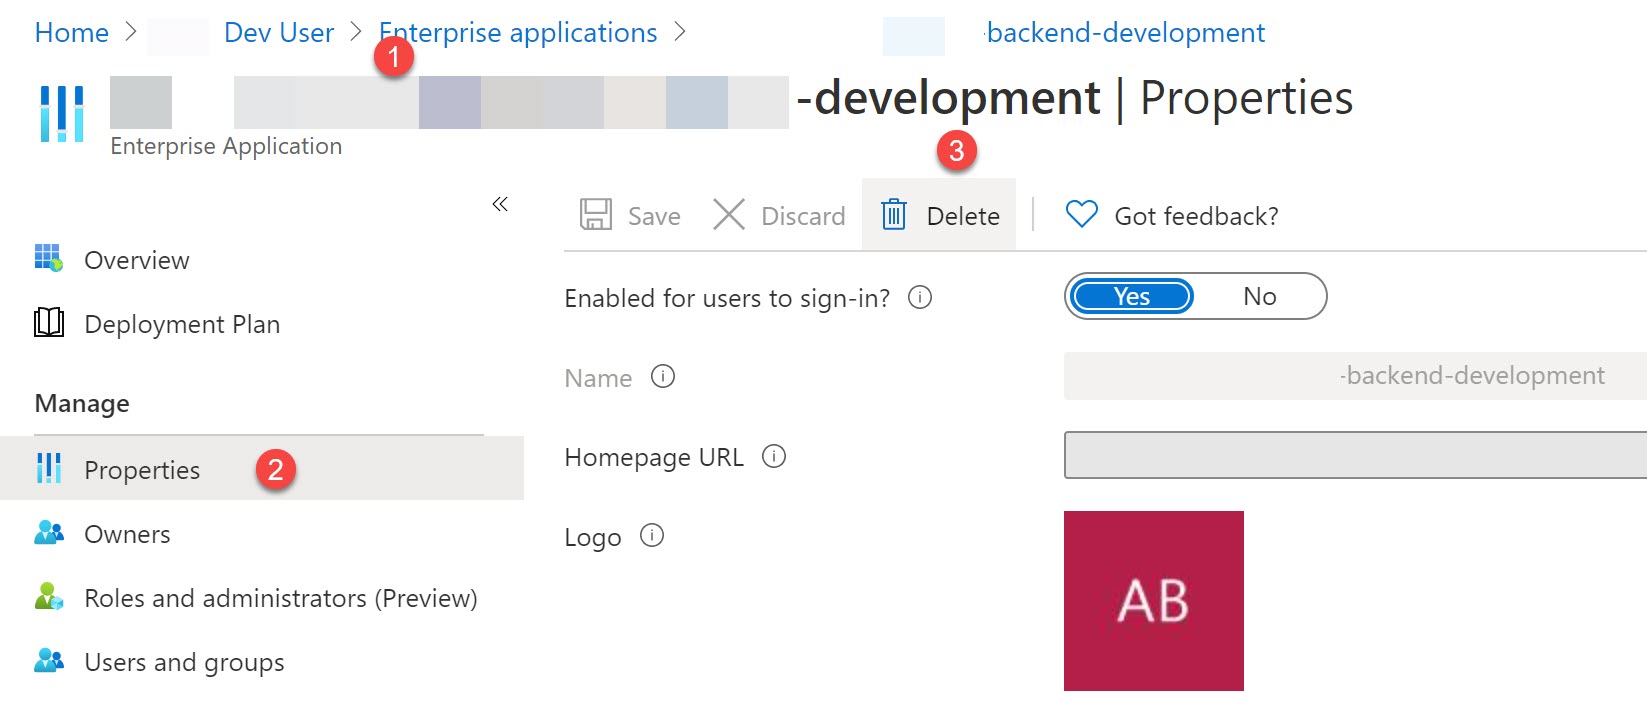
You can update the permissions of your application anytime you wish, and delete the consent given by going to the Enterprise application section in the Azure AD (remember that this is something that you do in the tenant where the application consent is given) and click on the Delete button in the Properties window.
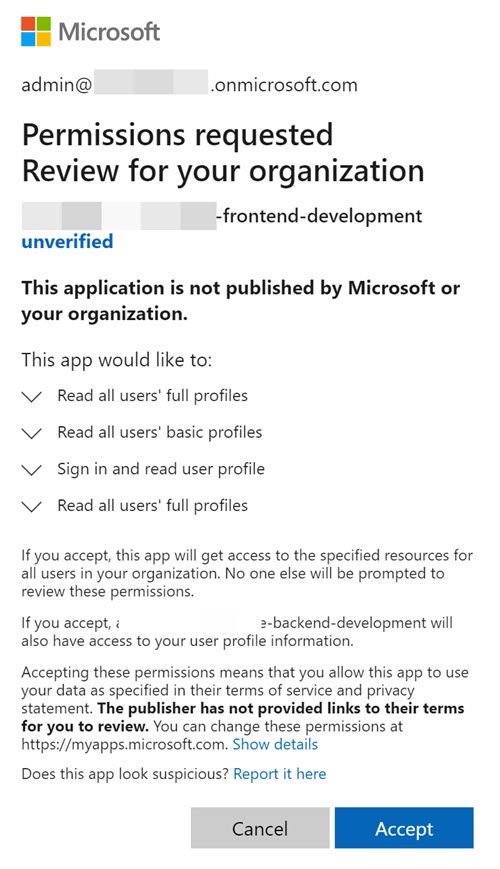
Now I have updated my application API permission to use only “User.Read.All” permission and let’s see the consent screen now.
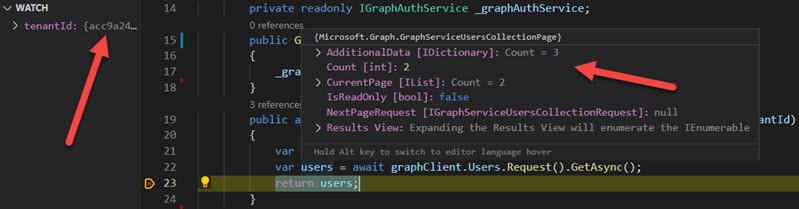
As my requirement is to fetch only the users, this would still work as it is and here are the debug screenshots to show you that this is actually working.

Conclusion
Congratulations and thanks a lot for being with me this far. In this post, we have seen that how we can get the users from different tenants using the Azure AD App registration with application permission. Happy Coding!.
About the Author
I am yet another developer who is passionate about writing and video creation. I have written close to 500 blogs on my blog. And I upload videos on my YouTube channels Njan Oru Malayali and Sibeesh Passion. Please feel free to follow me.
Your turn. What do you think?
Thanks a lot for reading. Did I miss anything that you may think is needed in this article? Could you find this post useful? Kindly do not forget to share your feedback.
Kindest Regards
Sibeesh Venu