
[toc]
Introduction
Here, in this post we are going to a see how we can install Asp.Net Core Docker in our Windows. Before we start, it would be useful if we say something about the Docker right? Docker is a container software platform where container is everything we need to make our software run. The container is light in weight. You can read more about the Docker here. I hope you will like this. Now let’s begin.
Background
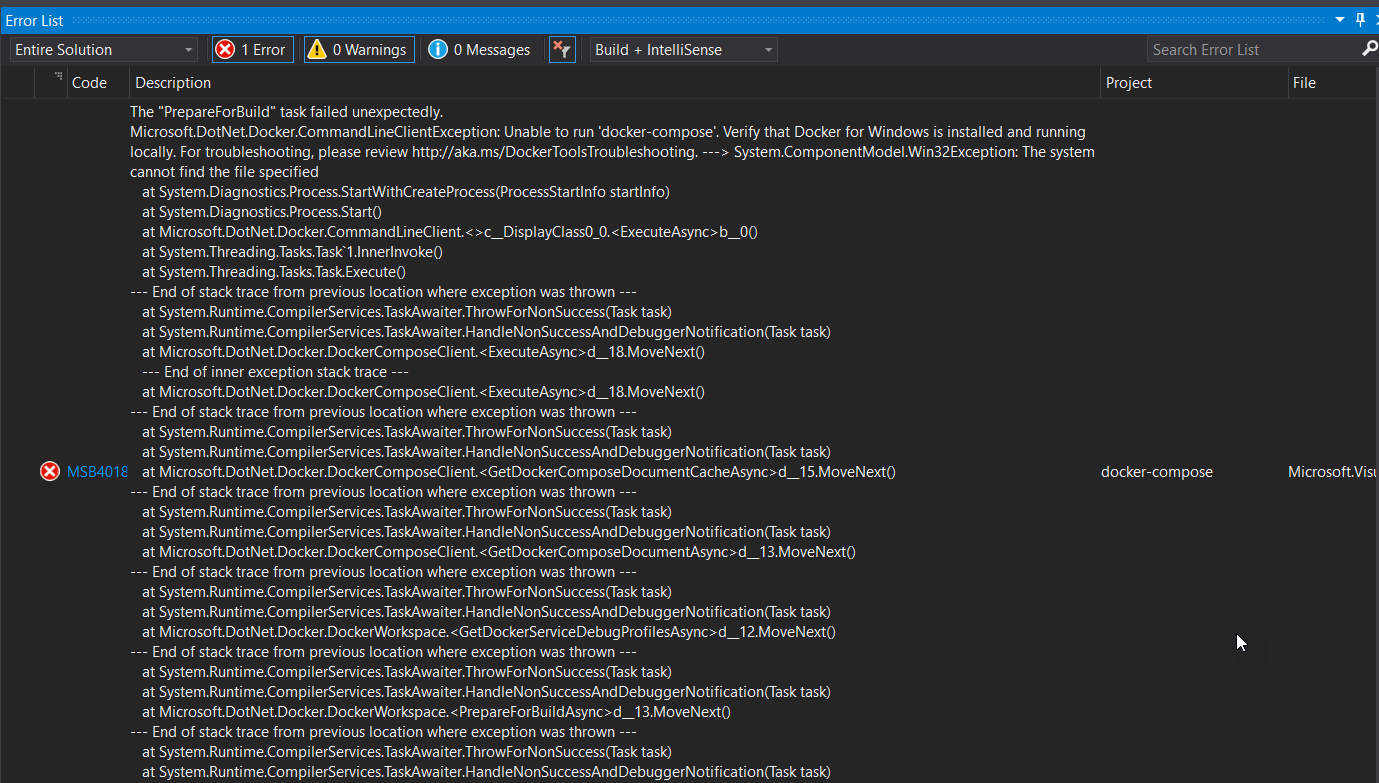
Today, I was just trying to create a Asp.Net Docker application in Visual Studio 2017. Unfortunately I was getting an error as preceding.
Error MSB4018 The “PrepareForBuild” task failed unexpectedly.
Microsoft.DotNet.Docker.CommandLineClientException: Unable to run ‘docker-compose’. Verify that Docker for Windows is installed and running locally. For troubleshooting, please review http://aka.ms/DockerToolsTroubleshooting. —> System.ComponentModel.Win32Exception: The system cannot find the file specified
Then I came to know that I have not installed Docker in my machine yet, so I decided to do that.
Asp Net Core Docker Error
Installing Docker For Windows
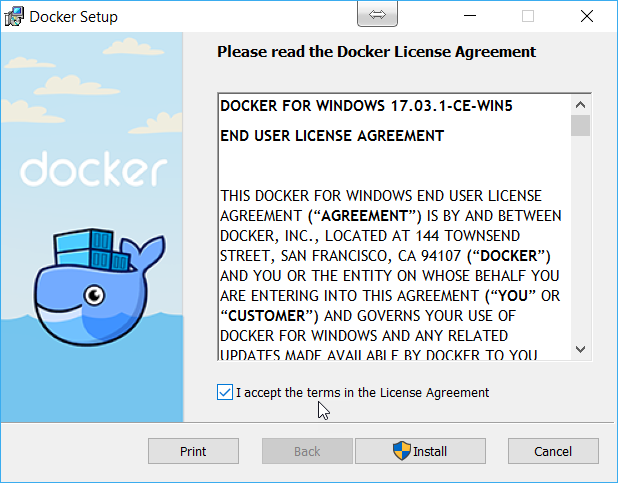
You can install the Docker from here. Once you downloaded the set up file, please run the file.
Docker For Windows
Start and test the Docker
Once you installed the Docker, now it is time to test whether everything is installed correctly or not. Before that make sure that the Docker is starting.

Docker is Starting
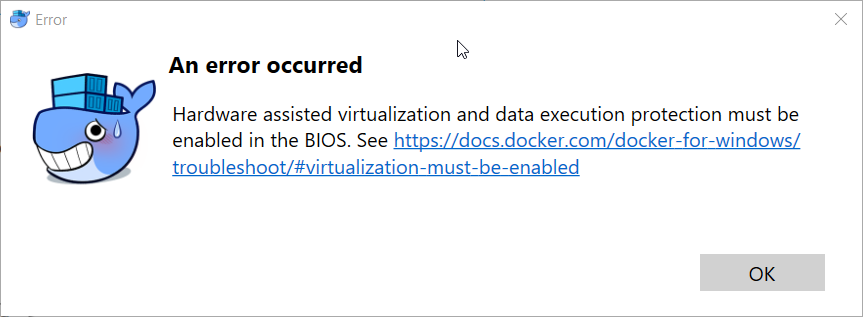
There is a hight possibility that to get an error “Hardware assisted virtulization and data execution protection must be enabled in the BIOS” as preceding image.
Docker Error
Before you go and change the settings in BIOS, check in Task Manager window as well.
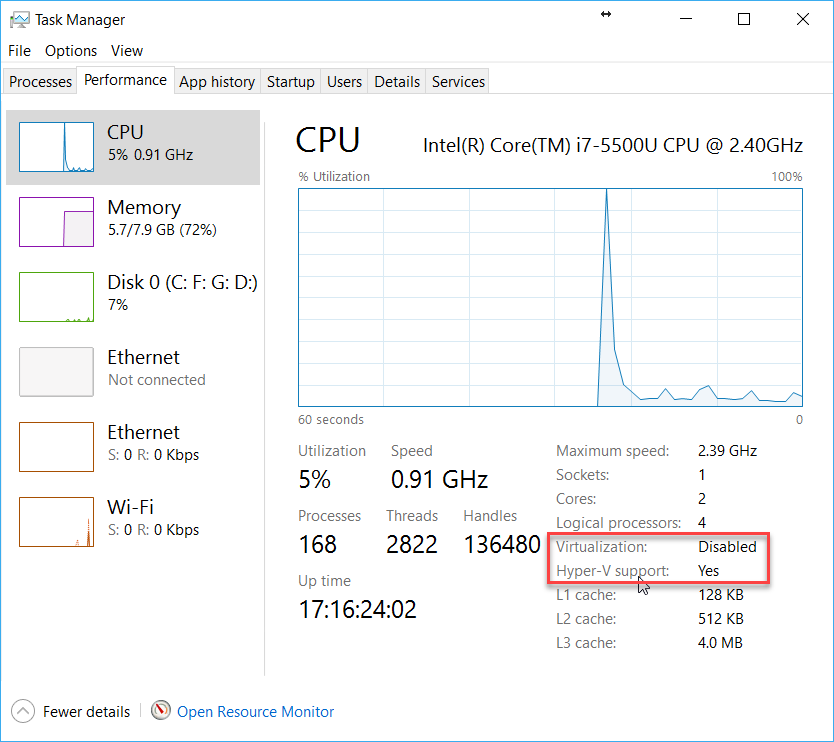
Hyper V support and Virtulization
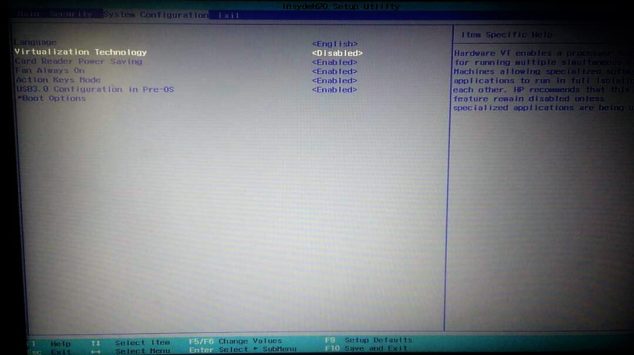
Enabling Virtulization in BIOS
To Enable the Virtulization in BIOS, go to System Configuration -> Click on Virtulization Technology and Enable it.
BIOS Settings
After the restart, the Docker will ask you to start the service. Go ahead and do that.
Setting up Docker
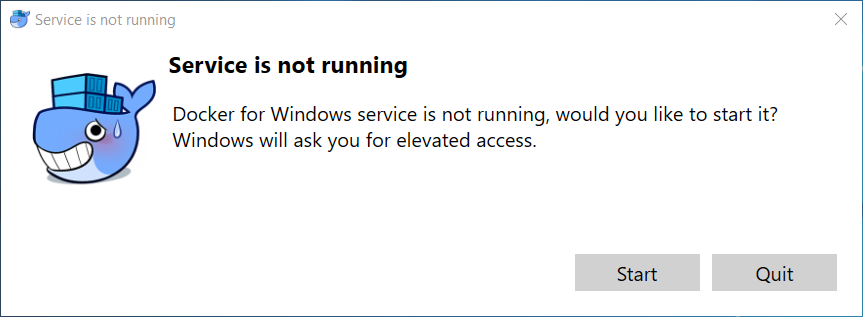
Docker Service Is Not Runnig Window
Now again, if you are getting an error as “Error MSB4018 The “PrepareForLaunch” task failed unexpectedly.
Microsoft.DotNet.Docker.CommandLineClientException: Creating network “dockercompose3875147227_default” with the default driver
Building linq_basic_to_advanced Service ‘linq_basic_to_advanced’ failed to build: Get https://registry-1.docker.io/v2/: net/http: request canceled while waiting for connection (Client.Timeout exceeded while awaiting headers).”, you need to change your shared drive settings in Docker.
Right click and click on the settings.
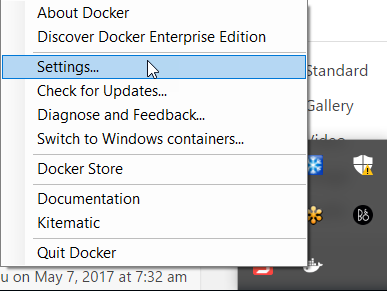
Docker Settings
Click on the Shared Drives and select the drive that hosts your project and the drive where %USERPROFILE% resides.
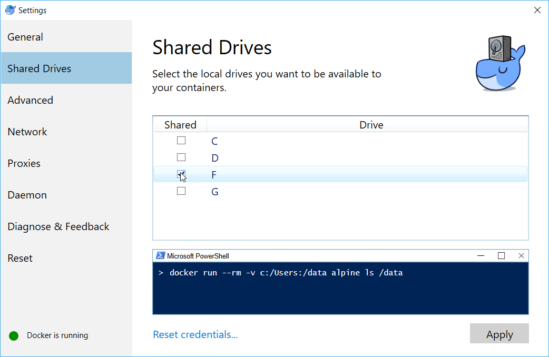
Shared Drive in Docker
Click on Apply and type your filesystem passwor in the following pop up. Now if you are running the Edge version of Docker Community Edition for Windows, after the install you may be able to login with your Docker ID and password.
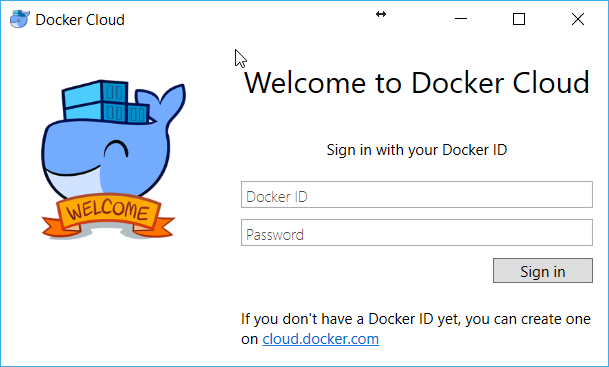
Docker SignIn page
We have enough settings for now, shall we just check whether the installation is done perfectly or not? To check, go to the command window and type the command as docker run hello-world.

Docker Check From Command Window
You can also check the Docker version with the command docker –version
Conclusion
Did I miss anything that you may think which is needed? Could you find this post as useful? I hope you liked this article. Please share me your valuable suggestions and feedback.
Your turn. What do you think?
A blog isn’t a blog without comments, but do try to stay on topic. If you have a question unrelated to this post, you’re better off posting it on C# Corner, Code Project, Stack Overflow, Asp.Net Forum instead of commenting here. Tweet or email me a link to your question there and I’ll definitely try to help if I can.
Kindest Regards
Sibeesh Venu