
[toc]
Introduction
In this post we will see how we can perform CRUD application in our SQL database using Node JS. As you all know Node JS is a run time environment built on Chrome’s V8 JavaScript engine for server side and networking application. And it is an open source which supports cross platforms. Node JS applications are written in pure JavaScript. If you are new to Node JS, I strongly recommend you to read my previous post about Node JS here. Now let’s begin.
Download source code
Background
There was a time where we developers are depended on any server side languages to perform server side actions, few years back a company called Joyent, Inc brought us a solution for this. That is, we can do the server side actions if you know JavaScript. Because of the wonderful idea behind this, it became a great success. You can do server side actions without knowing a single code related to any server side languages like C# and PHP. Here we are going to see how you can do the database actions like Create, Read, Update, Delete using Node JS. I hope you will like this.
Before we start coding our Node JS application, we can set up Node JS tool available for Visual Studio.
Node JS tool for Visual Studio
You can always run your Node JS code by using a command prompt, so setting up this tool is optional. If you install it, you can easily debug and develop Node JS. So I recommend you to install it.
To download the tool, please click on this link. Once you have downloaded the set up file, you can start installing it.
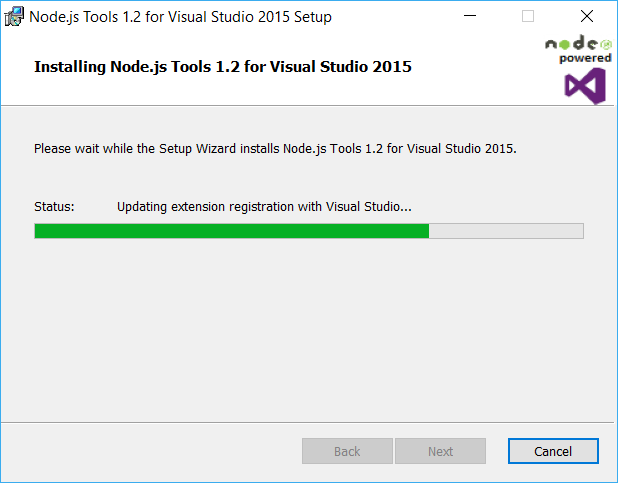
node_js_tool_for_visual_studio
So I hope you have installed the application, Now you can create a Node JS application in our Visual Studio.
Creating Node JS Application In Visual Studio
You can find an option as Node JS in your Add New Project window as follows. Please click on that and create a new project.
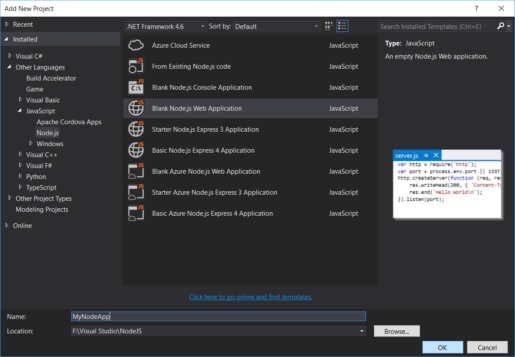
new_node_js_project
Now our Visual Studio is ready for coding, but as I mentioned earlier, we are going to use SQL Server as our database. So we need to do some configuration related to that too. Let’s do it now.
Configure SQL Server For Node JS Development
You need to make sure that the following service are run.
- SQL Server
- SQL Server Agent (Skip it if you are using SQLEXPRESS
- SQL Server Browser
To check the status of these service, you can always services by running services.msc in Run command window. Once you are done, you need to enables some protocols and assign a port to it. Now go to your SQL Server Configuration Manager. Most probably you can find the file in this C:\Windows\SysWOW64 location, if you cant find it start window.
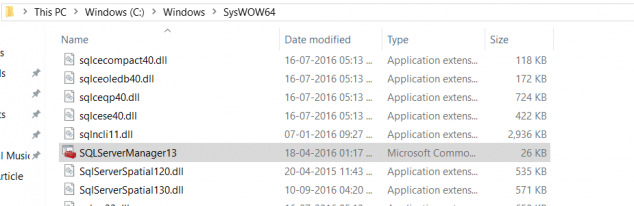
sql_server_manager_location
Now go to SQL Server Network Configuration and click on Protocols for SQLEXPRESS(Your SQL Server) and Enable TCP/IP.

protocols_for_sql_express
Now right click and click on Properties on TCP/IP. Go to to IP Addresses and assign port for all the IP.
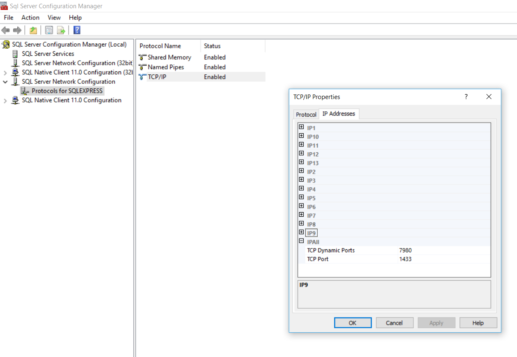
assigning_tcp_ip_port_in_sql_server
If have done it, it is time to set up our database and insert some data. Please do not forget to restart your service, as it is mandatory to get updated the changes we have done in the configurations.
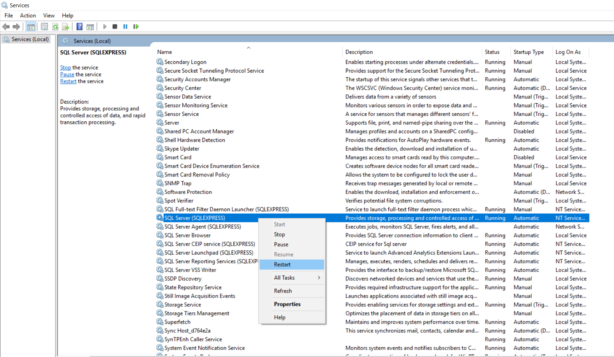
restart_sql_express
Creating database
Here I am creating a database with name “TrialDB”, you can always create a DB by running the query given below.
[sql]
USE [master]
GO
/****** Object: Database [TrialDB] Script Date: 20-11-2016 03:54:53 PM ******/
CREATE DATABASE [TrialDB]
CONTAINMENT = NONE
ON PRIMARY
( NAME = N’TrialDB’, FILENAME = N’C:\Program Files\Microsoft SQL Server\MSSQL13.SQLEXPRESS\MSSQL\DATA\TrialDB.mdf’ , SIZE = 8192KB , MAXSIZE = UNLIMITED, FILEGROWTH = 65536KB )
LOG ON
( NAME = N’TrialDB_log’, FILENAME = N’C:\Program Files\Microsoft SQL Server\MSSQL13.SQLEXPRESS\MSSQL\DATA\TrialDB_log.ldf’ , SIZE = 8192KB , MAXSIZE = 2048GB , FILEGROWTH = 65536KB )
GO
ALTER DATABASE [TrialDB] SET COMPATIBILITY_LEVEL = 130
GO
IF (1 = FULLTEXTSERVICEPROPERTY(‘IsFullTextInstalled’))
begin
EXEC [TrialDB].[dbo].[sp_fulltext_database] @action = ‘enable’
end
GO
ALTER DATABASE [TrialDB] SET ANSI_NULL_DEFAULT OFF
GO
ALTER DATABASE [TrialDB] SET ANSI_NULLS OFF
GO
ALTER DATABASE [TrialDB] SET ANSI_PADDING OFF
GO
ALTER DATABASE [TrialDB] SET ANSI_WARNINGS OFF
GO
ALTER DATABASE [TrialDB] SET ARITHABORT OFF
GO
ALTER DATABASE [TrialDB] SET AUTO_CLOSE OFF
GO
ALTER DATABASE [TrialDB] SET AUTO_SHRINK OFF
GO
ALTER DATABASE [TrialDB] SET AUTO_UPDATE_STATISTICS ON
GO
ALTER DATABASE [TrialDB] SET CURSOR_CLOSE_ON_COMMIT OFF
GO
ALTER DATABASE [TrialDB] SET CURSOR_DEFAULT GLOBAL
GO
ALTER DATABASE [TrialDB] SET CONCAT_NULL_YIELDS_NULL OFF
GO
ALTER DATABASE [TrialDB] SET NUMERIC_ROUNDABORT OFF
GO
ALTER DATABASE [TrialDB] SET QUOTED_IDENTIFIER OFF
GO
ALTER DATABASE [TrialDB] SET RECURSIVE_TRIGGERS OFF
GO
ALTER DATABASE [TrialDB] SET DISABLE_BROKER
GO
ALTER DATABASE [TrialDB] SET AUTO_UPDATE_STATISTICS_ASYNC OFF
GO
ALTER DATABASE [TrialDB] SET DATE_CORRELATION_OPTIMIZATION OFF
GO
ALTER DATABASE [TrialDB] SET TRUSTWORTHY OFF
GO
ALTER DATABASE [TrialDB] SET ALLOW_SNAPSHOT_ISOLATION OFF
GO
ALTER DATABASE [TrialDB] SET PARAMETERIZATION SIMPLE
GO
ALTER DATABASE [TrialDB] SET READ_COMMITTED_SNAPSHOT OFF
GO
ALTER DATABASE [TrialDB] SET HONOR_BROKER_PRIORITY OFF
GO
ALTER DATABASE [TrialDB] SET RECOVERY SIMPLE
GO
ALTER DATABASE [TrialDB] SET MULTI_USER
GO
ALTER DATABASE [TrialDB] SET PAGE_VERIFY CHECKSUM
GO
ALTER DATABASE [TrialDB] SET DB_CHAINING OFF
GO
ALTER DATABASE [TrialDB] SET FILESTREAM( NON_TRANSACTED_ACCESS = OFF )
GO
ALTER DATABASE [TrialDB] SET TARGET_RECOVERY_TIME = 60 SECONDS
GO
ALTER DATABASE [TrialDB] SET DELAYED_DURABILITY = DISABLED
GO
ALTER DATABASE [TrialDB] SET QUERY_STORE = OFF
GO
USE [TrialDB]
GO
ALTER DATABASE SCOPED CONFIGURATION SET MAXDOP = 0;
GO
ALTER DATABASE SCOPED CONFIGURATION FOR SECONDARY SET MAXDOP = PRIMARY;
GO
ALTER DATABASE SCOPED CONFIGURATION SET LEGACY_CARDINALITY_ESTIMATION = OFF;
GO
ALTER DATABASE SCOPED CONFIGURATION FOR SECONDARY SET LEGACY_CARDINALITY_ESTIMATION = PRIMARY;
GO
ALTER DATABASE SCOPED CONFIGURATION SET PARAMETER_SNIFFING = ON;
GO
ALTER DATABASE SCOPED CONFIGURATION FOR SECONDARY SET PARAMETER_SNIFFING = PRIMARY;
GO
ALTER DATABASE SCOPED CONFIGURATION SET QUERY_OPTIMIZER_HOTFIXES = OFF;
GO
ALTER DATABASE SCOPED CONFIGURATION FOR SECONDARY SET QUERY_OPTIMIZER_HOTFIXES = PRIMARY;
GO
ALTER DATABASE [TrialDB] SET READ_WRITE
GO
[/sql]
Create a table and insert data in database
To create a table, you can run the query below.
[sql]
USE [TrialDB]
GO
/****** Object: Table [dbo].[Course] Script Date: 20-11-2016 03:57:30 PM ******/
SET ANSI_NULLS ON
GO
SET QUOTED_IDENTIFIER ON
GO
CREATE TABLE [dbo].[Course](
[CourseID] [int] NOT NULL,
[CourseName] [nvarchar](50) NOT NULL,
[CourseDescription] [nvarchar](100) NULL,
CONSTRAINT [PK_Course] PRIMARY KEY CLUSTERED
(
[CourseID] ASC
)WITH (PAD_INDEX = OFF, STATISTICS_NORECOMPUTE = OFF, IGNORE_DUP_KEY = OFF, ALLOW_ROW_LOCKS = ON, ALLOW_PAGE_LOCKS = ON) ON [PRIMARY]
) ON [PRIMARY]
GO
[/sql]
Now we can insert few data to our newly created table.
[sql]
USE [TrialDB]
GO
INSERT INTO [dbo].[Course]
([CourseID]
,[CourseName]
,[CourseDescription])
VALUES
(1
,’C#’
,’Learn C# in 7 days’)
INSERT INTO [dbo].[Course]
([CourseID]
,[CourseName]
,[CourseDescription])
VALUES
(2
,’Asp.Net’
,’Learn Asp.Net in 7 days’)
INSERT INTO [dbo].[Course]
([CourseID]
,[CourseName]
,[CourseDescription])
VALUES
(3
,’SQL’
,’Learn SQL in 7 days’)
INSERT INTO [dbo].[Course]
([CourseID]
,[CourseName]
,[CourseDescription])
VALUES
(4
,’JavaScript’
,’Learn JavaScript in 7 days’)
GO
[/sql]
So our data is ready, that means we are all set to write our Node JS application. Go to the application we created and you can see a JS file there, normally named as server.js. Here I am going to change the name as App.js.
MSSQL – Microsoft SQL Server client for Node.js
You can find many packages for our day to day life in Node JS, what you need to do all is , just install that package and start using it. Here we are going to use a package called MSSQL.
Node-MSSQL
- Has unified interface for multiple TDS drivers.
- Has built-in connection pooling.
- Supports built-in JSON serialization introduced in SQL Server 2016.
- Supports Stored Procedures, Transactions, Prepared Statements, Bulk Load and TVP.
- Supports serialization of Geography and Geometry CLR types.
- Has smart JS data type to SQL data type mapper.
- Supports Promises, Streams and standard callbacks.
- Supports ES6 tagged template literals.
- Is stable and tested in production environment.
- Is well documented.
You can find more about the package here. You can easily install this package by running the following command in your Nuget Package Manager Console.
[csharp]
npm install mssql
[/csharp]

mssql_node_js_install
Now we can load this package by using a function called require.
[js]
//MSSQL Instance Creation
var sqlInstance = require(“mssql”);
[/js]
Then, you can set the database configurations as preceding.
[js]
/Database configuration
var setUp = {
server: ‘localhost’,
database: ‘TrialDB’,
user: ‘sa’,
password: ‘sa’,
port: 1433
};
[/js]
Once you have a configuration set up, you can connect your database by using connect() function.
[js]
sqlInstance.connect(setUp)
[/js]
Now we can perform the CRUD operations. Are you ready?
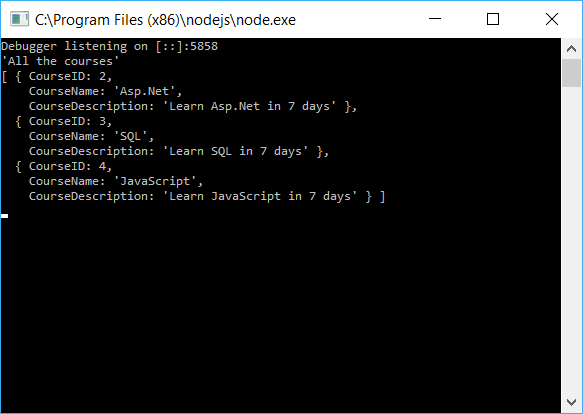
Select all the data from database using Node JS
[js]
// To retrieve all the data – Start
new sqlInstance.Request()
.query(“select * from Course”)
.then(function (dbData) {
if (dbData == null || dbData.length === 0)
return;
console.dir(‘All the courses’);
console.dir(dbData);
})
.catch(function (error) {
console.dir(error);
});
// To retrieve all the data – End
[/js]
Now run your application and see the output as preceding.
node_js_select_all_data_from_database
Select data with where condition from database using Node JS
You can always select a particular record by giving an appropriate select query as follows.
[js]
// To retrieve specicfic data – Start
var value = 2;
new sqlInstance.Request()
.input(“param”, sqlInstance.Int, value)
.query(“select * from Course where CourseID = @param”)
.then(function (dbData) {
if (dbData == null || dbData.length === 0)
return;
console.dir(‘Course with ID = 2’);
console.dir(dbData);
})
.catch(function (error) {
console.dir(error);
});
// To retrieve specicfic data – End
[/js]
So what would be the output of the above code? Any idea?
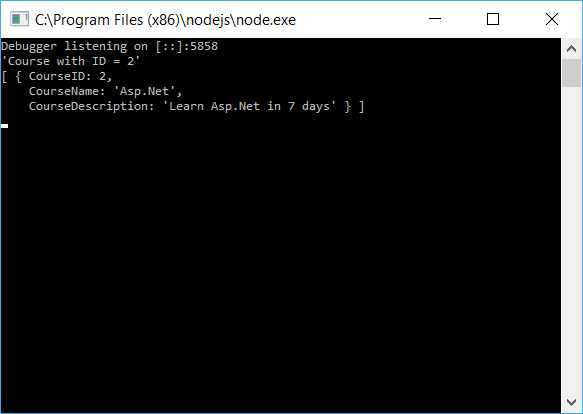
node_js_select_particular_data_from_database
Insert data to database using Node JS
We can always perform some insert query too using Node JS, the difference will be here is, as we have Transactions in SQL we will include that too here. Following code performs an insert operation.
[js]
// Insert data – Start
var dbConn = new sqlInstance.Connection(setUp,
function (err) {
var myTransaction = new sqlInstance.Transaction(dbConn);
myTransaction.begin(function (error) {
var rollBack = false;
myTransaction.on(‘rollback’,
function (aborted) {
rollBack = true;
});
new sqlInstance.Request(myTransaction)
.query(“INSERT INTO [dbo].[Course] ([CourseName],[CourseDescription]) VALUES (‘Node js’, ‘Learn Node JS in 7 days’)”,
function (err, recordset) {
if (err) {
if (!rollBack) {
myTransaction.rollback(function (err) {
console.dir(err);
});
}
} else {
myTransaction.commit().then(function (recordset) {
console.dir(‘Data is inserted successfully!’);
}).catch(function (err) {
console.dir(‘Error in transaction commit ‘ + err);
});
}
});
});
});
// Insert data – End
[/js]
So let’s run it and see the output.

node_js_insert_data_to_database
Delete data from database using Node JS
As we performed insert operation, we can do the same for delete operation as below.
[js]
// Delete data – Start
var delValue = 4;
var dbConn = new sqlInstance.Connection(setUp,
function (err) {
var myTransaction = new sqlInstance.Transaction(dbConn);
myTransaction.begin(function (error) {
var rollBack = false;
myTransaction.on(‘rollback’,
function (aborted) {
rollBack = true;
});
new sqlInstance.Request(myTransaction)
.query(“DELETE FROM [dbo].[Course] WHERE CourseID=” + delValue,
function (err, recordset) {
if (err) {
if (!rollBack) {
myTransaction.rollback(function (err) {
console.dir(err);
});
}
} else {
myTransaction.commit().then(function (recordset) {
console.dir(‘Data is deleted successfully!’);
}).catch(function (err) {
console.dir(‘Error in transaction commit ‘ + err);
});
}
});
});
});
// Delete data – End
[/js]
Now run your application and see whether the data is deleted.
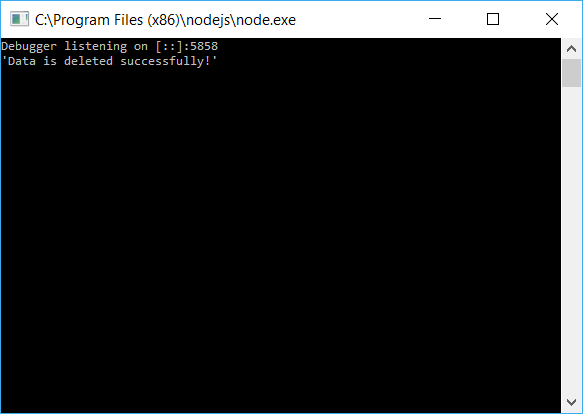
node_js_delete_data_from_database
Update data from database using Node JS
The only action pending here to perform is UPDATE. Am I right? Let’s do that too.
[js]
// Update data – Start
var updValue = 3;
var dbConn = new sqlInstance.Connection(setUp,
function (err) {
var myTransaction = new sqlInstance.Transaction(dbConn);
myTransaction.begin(function (error) {
var rollBack = false;
myTransaction.on(‘rollback’,
function (aborted) {
rollBack = true;
});
new sqlInstance.Request(myTransaction)
.query(“UPDATE [dbo].[Course] SET [CourseName] = ‘Test’ WHERE CourseID=” + updValue,
function (err, recordset) {
if (err) {
if (!rollBack) {
myTransaction.rollback(function (err) {
console.dir(err);
});
}
} else {
myTransaction.commit().then(function (recordset) {
console.dir(‘Data is updated successfully!’);
}).catch(function (err) {
console.dir(‘Error in transaction commit ‘ + err);
});
}
});
});
});
// Update data – End
[/js]
Here goes the output.

node_js_update_data_from_database
You can always download the source code attached to see the complete code and application. Happy coding!.
See also
Conclusion
Did I miss anything that you may think which is needed? Could you find this post as useful? I hope you liked this article. Please share me your valuable suggestions and feedback.
Your turn. What do you think?
A blog isn’t a blog without comments, but do try to stay on topic. If you have a question unrelated to this post, you’re better off posting it on C# Corner, Code Project, Stack Overflow, Asp.Net Forum instead of commenting here. Tweet or email me a link to your question there and I’ll definitely try to help if I can.
Kindest Regards
Sibeesh Venu