

[toc]
Introduction
The word automation means a lot to us, the developers. We hate to do the same work again and again, especially when it comes to some manual work, where we need to do the tasks one by one. With the help of Azure build and release pipelines in Azure DevOps, most of the build and release tasks can be automated. Here in this post, I am going to explain one such task which is SSH Deployment Task. This task is very handy when you want to perform some actions inside your virtual machine by login to the VM via SSH. Let’s jump in to the implementation now then.
Background
In one of my project. I am running a UCS server inside my Azure VM. We can consider the UCS server as a Google Play Store, where we can install and manage the relevant applications. For example, I have created my own application and I am running the same inside the UCS Azure VM. But every time when we have a new changes in the application, we have to update the new application Docker image in the UCS machine by login via SSH, below are some of the operations we do after login to the VM.
- univention-app remove {AppName}
- docker rmi $(docker ps -q)
- univention-app update
- univention-app install {AppName}
We had to set up a release pipeline to make our releases easier.
Working with SSH Deployment Task
As I mentioned earlier, this task will enable you to run your specific shell commands in your Virtual Machine. But to do that, we need to do some amazing things.
Create and Upload the Public Key to Azure VM
To set up our SSH Task we need a SSH Service Connection but to configure the connection we need to generate the Public and Private keys, you can use the below command to generate the same.
ssh-keygen -t rsa -b 2048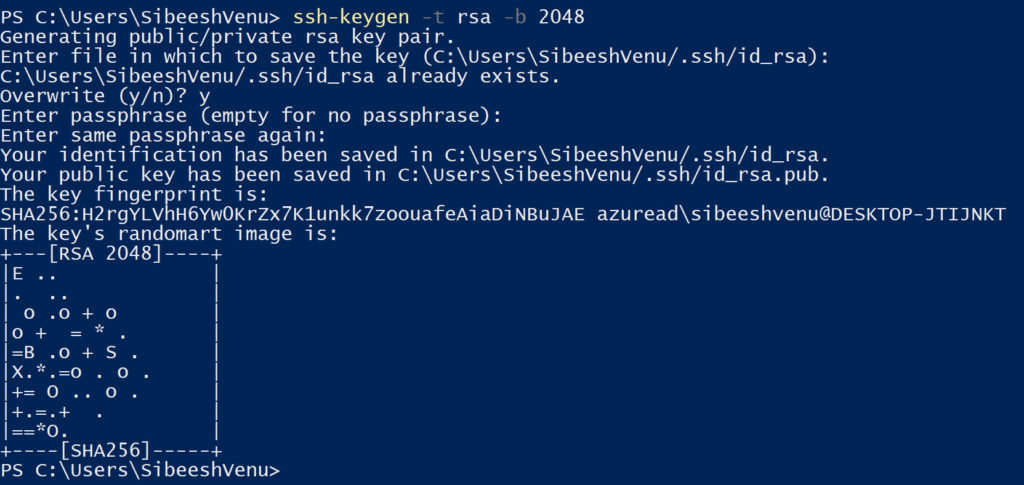
You can either leave the passphrase blank or provide one, if there are keys available in the default location it will ask for the rewrite. Once the key is generated, you can go to the file id_sra pub file which is located at C:\Users\{username}\.ssh folder, and copy the entire content.
Now we can manually SSH into our VM and add our public key to the VMs authorized_keys.
ssh root@IPOnce you are logged in to the VM, you can add the newly generated public key to the authorized_keys.
cd .ssh/
touch authorized_keys
You can add the content by running the preceding command.
echo "<RSA Public Key>" > authorized_keysPlease paste your public key inside the quotation (“”). As we already have our Private and Public key with us, now we can go ahead and create our SSH service connection.
Set Up the SSH Service Connection
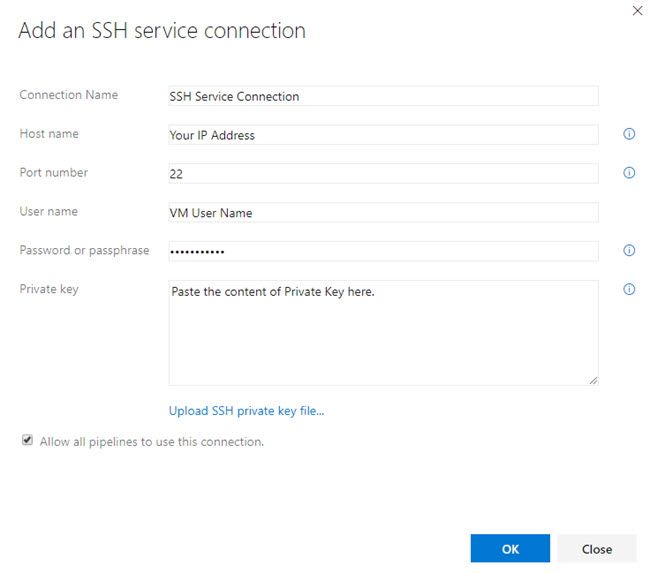
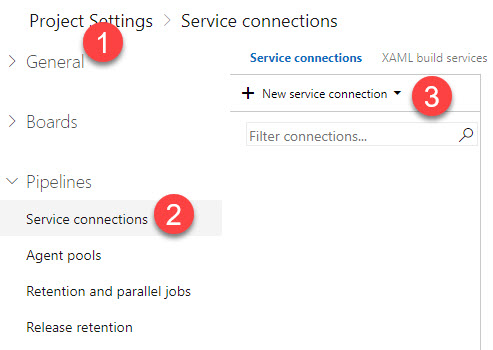
First thing first, let’s create a SSH service connection in our Azure DevOps so that we can use it in our SSH Deployment Task.
Go to your Project Settings in your Azure DevOps project and click on the Service Connections and then click the +New service connection and then select SSH.

In the next dialogue box, you should fill all the details as preceding.

Create the Release Pipeline
Wow!. We have created our Service connection successfully, and now it is time to use it. Go to your Azure DevOps project and click on Pipelines and then Releases. Now click on +New button and then +New release pipeline.
In the next dialogue, you should select the template for your pipeline, in this case, I will select “Empty Job”. Now click on the Tasks and then Agent Job. You can verify the Agent Job details, and once it is done, click on the + icon and then add SSH Task after searching with the keyword “SSH”.


Once the task is added, we can go ahead and set up the configuration.

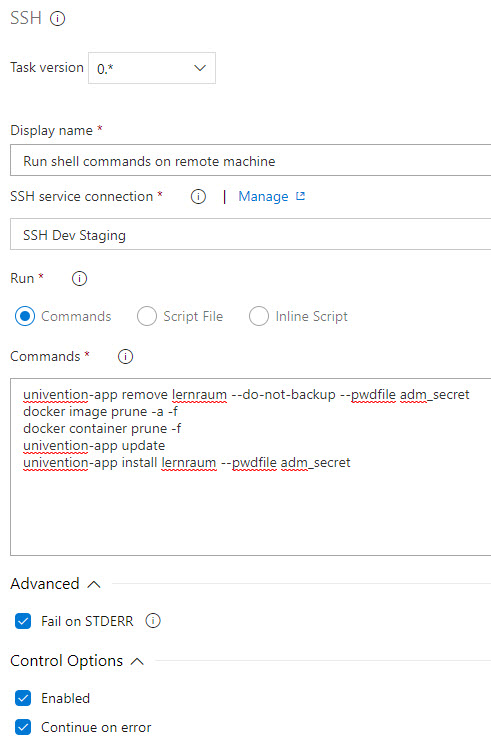
Please remember to use the SSH service connection you have created. You can give the commands to run inside the VM in the commands section, each lines will be considered as a new command. You can always disable the option “Fail on STDER” if you think it is necessary. In my case I had disabled this feature as my UCS machine was running the some background tasks as part of the “univention-app” commands, some of such tasks were returning some errors, as these errors are not part of my releases, and as it is not any impacts in my deployment. Please remember to enable “Continue on error” in such scenarios.
Here, the adm_secret file is the file which contains the password of my UCS Admin Password. You can do this by running the preceding commands.
touch adm-secret;
echso "your secret" > adm_secret
Once your configuration is done, save your release configuration and create a new release. I hope the release will be successful.

Conclusion
In this article, we have learned,
- How to create SSH Service connection in Azure DevOps
- How to create and configure SSH Task in Azure Pipelines
- How to generate Private and Public RSA keys
Please let me know what else you had learned from this Article.
Your turn. What do you think?
Thanks a lot for reading. Did I miss anything that you may think which is needed in this article? Could you find this post as useful? Kindly do not forget to share me your feedback.
Kindest Regards
Sibeesh Venu