
[toc]
Introduction
Here, in this article we are going to a see how we upload contents to our Azure container in our CDN storage in a WordPress folder format. You may be thinking what is so special in WrdPress folder format, what makes the difference in other formats? When I say WordPress folder format, I mean one folder in an another folder. In WordPress we usually have the structure as wwwroot/wp-content/uploads/2017/05/. The real problem is, we can not create a container inside a container. Yeah, you heard it right. But, you don’t need to worry about it, there is always few ways we can achieve this need, in this post I am going to show you that. I hope you will like this. Now let’s begin.
Background
I recently created a Azure CDN for my website, and when I was just trying to upload the files to my Azure storage, I got stuck with the problem, that we can not create a container inside a container.
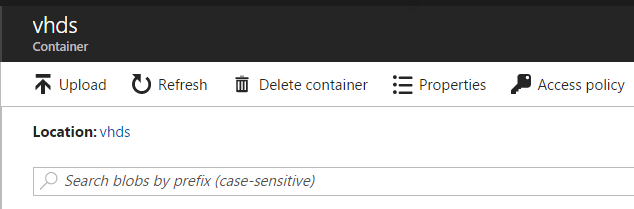
No option to upload a container inside a container
If it is possible, changing URLs of my entire images and other contents would have been pretty much easier, hope you know what I mean? We could have just uploaded the root folder and change the main URL to our CDN endpoint. In my case, change the URL http://sibeeshpassion.com/ to http://cdn.sibeeshpassion.com/ could fix the issues, and with some plugins, we can easily do that.
In this post, we are going to see two possible solution we can use.
Use “/” in the Azure blob
One good thing here is we can always create virtual folders by having the “/” character as a delimiter/part of the blob name to build the hierarchy we need. In our case it is wwwroot/wp-content/uploads/2017/05/. Though the Blob service in Azure storage is based on flat storage scheme, not a hierarchical scheme, we can still specify a character or string delimiter within a blob name to create a virtual hierarchy. For example, we can always create unique blobs as preceding
You can follow this post for getting more information abut this.
Upload the folders via tools like Storage Explorer
This step is pretty much easier than the above mentioned way. Here we are going use the tools like Storage Explorer to do the task for us. Uploading each contents manually and renaming them in hierarchical format would be a tough task, am I right? If you are having around 20-50 images or contents in your site, that won’t be a problem. But my case was bit different, as I had around 5000 images and other contents, so I personally selected this method.
To get started, you will have to download the tool Microsoft Azure Storage Explorer, once you download, please install it and open it.
Now, add your Azure account in Storage Explorer.
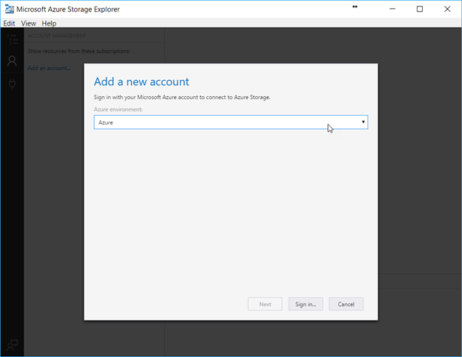
Add Account in Microsoft Azure Storage Explorer
Once you add your account, the tool wish list down all of your storage and resources you have with that account. Now go to your storage account and create a container. Let’s create and name our container as wp-content.
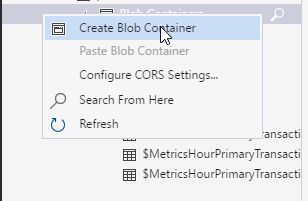
Creating a BLOB Container
Now what is pending from our end is, uploading the folders. Let’s create one sample folder with one image.
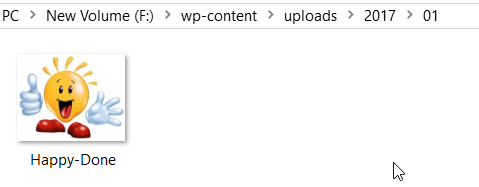
Files and Folders to Upload
Now click on the upload button and select the root folder you need to upload.
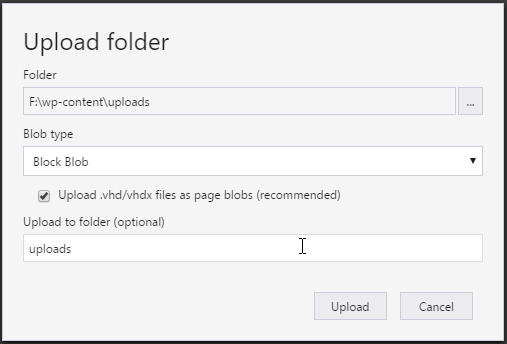
Select the Folder to be Uploaded
Once you are done uploading, I am sure that you can see those files in your storage account. Please be noted that it follows the same hierarchy we needed.
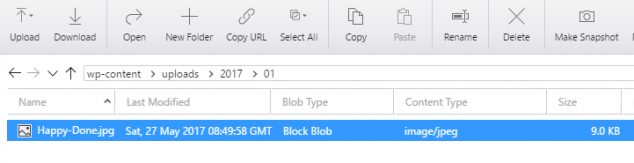
Select the Uploaded Files
Now if you just copy the file URL and open it in the browser, you can see the content you have just uploaded.
Please be noted that, the default access policy of a container is private, thus you will not be able to load the contents via browser. Most probably you will be getting a 404 error. To fix this you will have to change the access policy wither to blob or container. You can follow this post: Fix For 404 ResourceNotFound Error After Uploading to Azure Container
Just for the reference you can always login to your Azure portal and check the blob, there you can find the hierarchical blob.
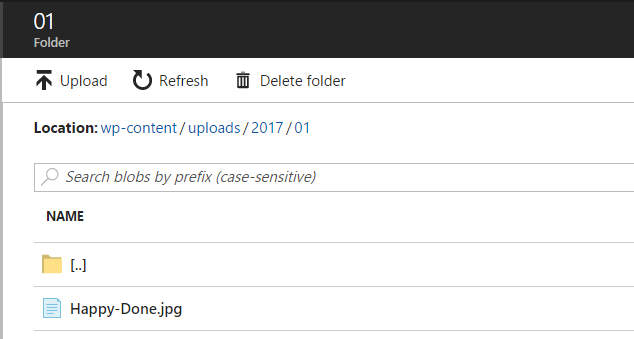
Hierarchy Folder Structure in Azure Storage Container
Thanks for reading, I will come back with another article which explore Azure CDN. Happy Uploading!.
Conclusion
Did I miss anything that you may think which is needed? Could you find this post as useful? I hope you liked this article. Please share me your valuable suggestions and feedback.
Your turn. What do you think?
A blog isn’t a blog without comments, but do try to stay on topic. If you have a question unrelated to this post, you’re better off posting it on C# Corner, Code Project, Stack Overflow, Asp.Net Forum instead of commenting here. Tweet or email me a link to your question there and I’ll definitely try to help if I can.
Kindest Regards
Sibeesh Venu