
In this post we will see how can we use or work with wordpress without installing wamp server in our machine. Most of you might have used wordpress and you might have installed Wamp server too to work with wordpress. Because wampserver is effective tool which helps to work with wordpress. Here I am going to share you an alternative way, that is to use Web Platform Installer instead installing a Wamp server. I hope you will like this.
Background
I was using wamp server to work with wordpress. That is fine, but it will make some conflicts between our IIS and Skype in our machines, since both apache server and IIS and Skype uses same port (port 80) for the operations. If you need some solutions for those issues, you can see here:
WordPress Without Wamp Server
First thing you need to do is, installing Web Platform Installer. You can download this from Microsoft Web Platform Installer. Once you downloaded it, please go ahead and install.
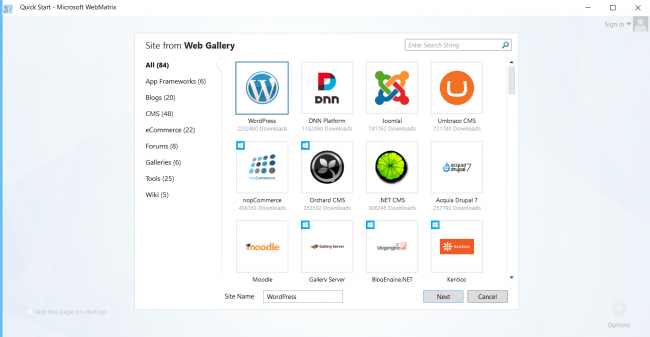
Open Microsoft Web Platform Installer. And search for WordPress.
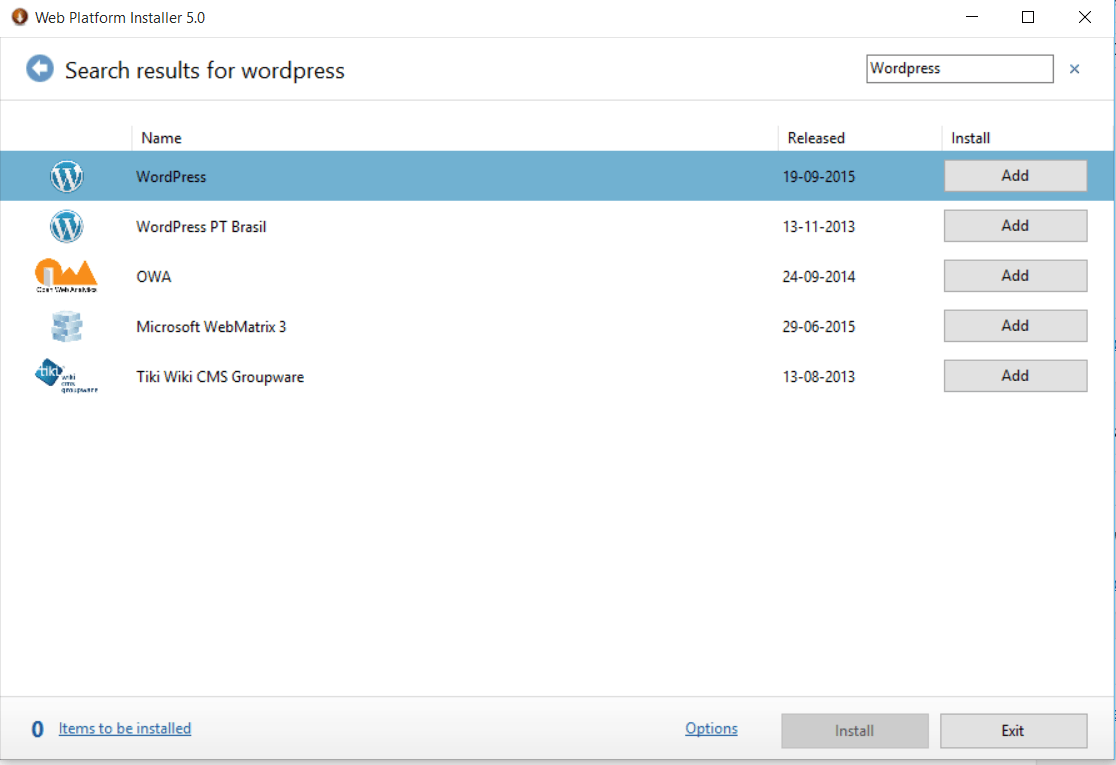
Install WordPress Through Web Platform Installer
Now Select WordPress and click on Add and then click Install. Now you can see MySQL configuration page as follows. Give the password you need to set for root.

My SQL Configuration
Now click on Continue. Now you will be shown the perquisites to be downloaded. Just click I Accept to download MySQL and WordPress.
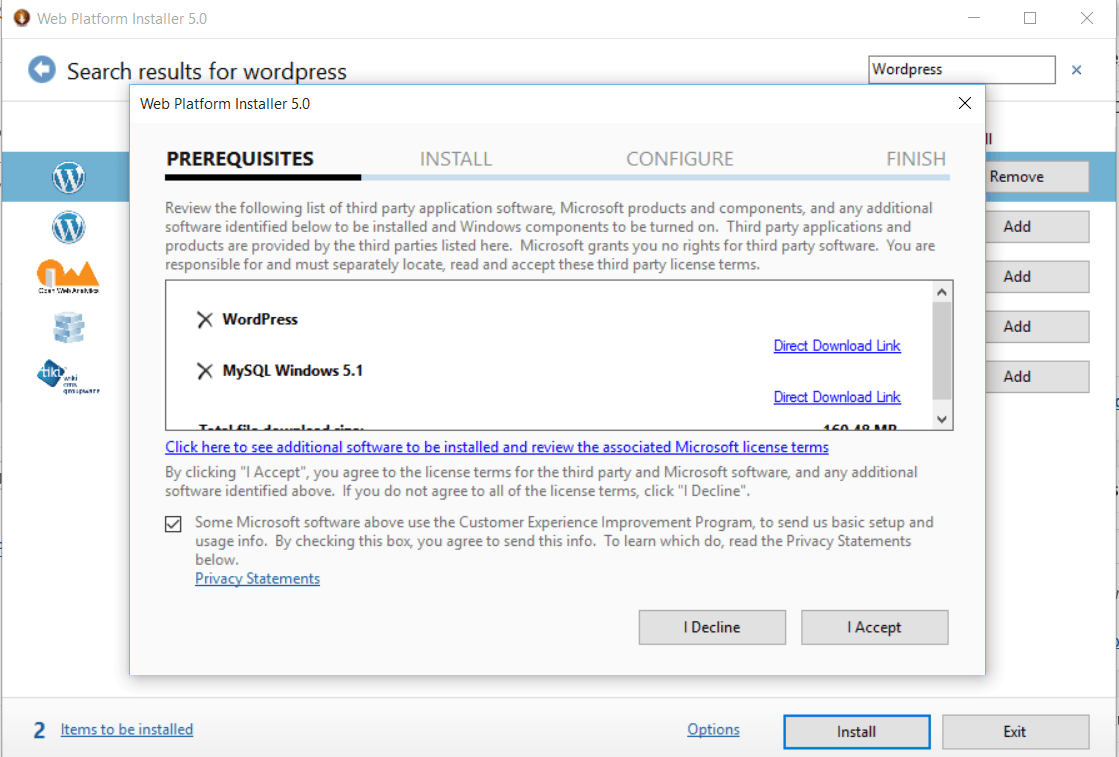
Perquisites to be downloaded
Now just wait for the process to be completed. This process will install WebMatrix which we are going to use as the platform to work with WordPress, MySQL, WordPress, IIS 8 which is compatible with WebMatrix.
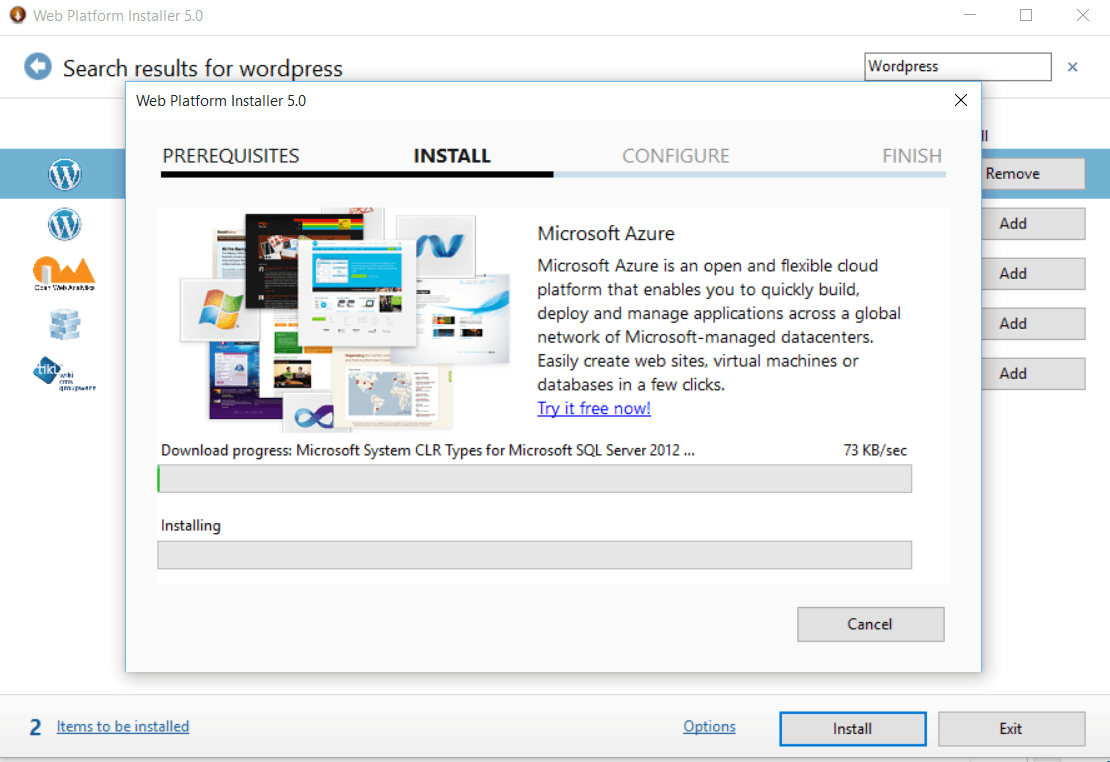
Installing MySQL and WordPress
Note: If you have installed IIS 10 in your machine, the WebMatrix won’t work. To make it work, you may need to uninstall IIS 10 and install IIS 8.
Once you have installed everything. Go to your applications and open WebMatrix.
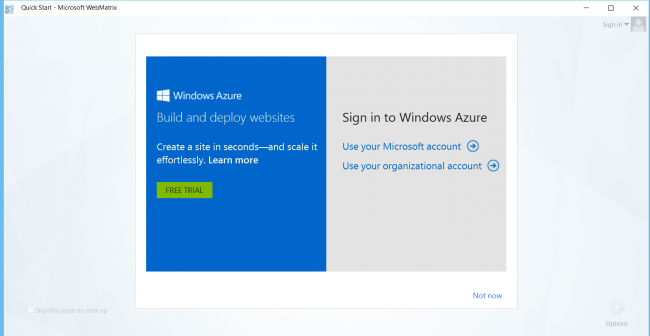
WebMatrix Login
Once you logged in, you can see a home page as follows.
WebMatrix Homepage
Click new–> App Gallery–> WordPress –> Click next.
WordPress in WebMatrix
Type your site name and click next. Finally click OK. Now you can see your wordpress is installed and it will asked for initial set ups. If you are new to set up wordpress I suggest you to see here: Set up WordPress in Your Local
One you have done the initial set up, you will be able to login to your wordpress site. And you can see your files in your WebMatrix application.
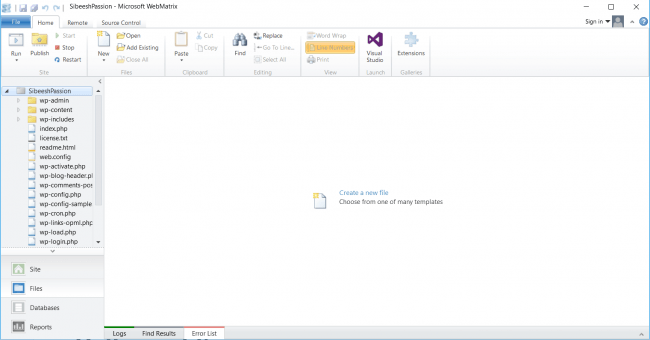
WordPress Site Home In WebMatrix
You can run your wordpress site by clicking the button Run.
You can see your database under database section and also you can see the data and edit.
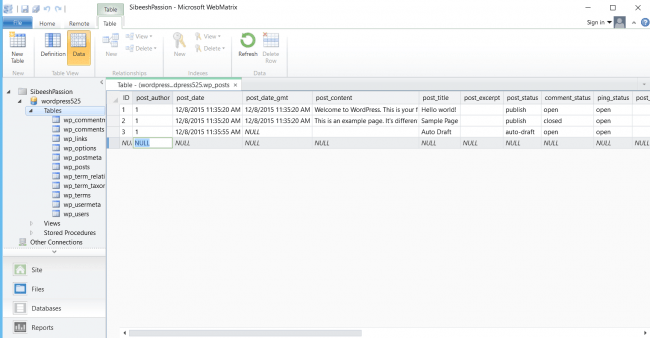
Database In WebMatrix
Change Port In WebMatrix
You can change the port to any number you wish in WebMatrix. For that go to Site tab–> Select your site –> Settings. In the localhost textbox you can edit the port.
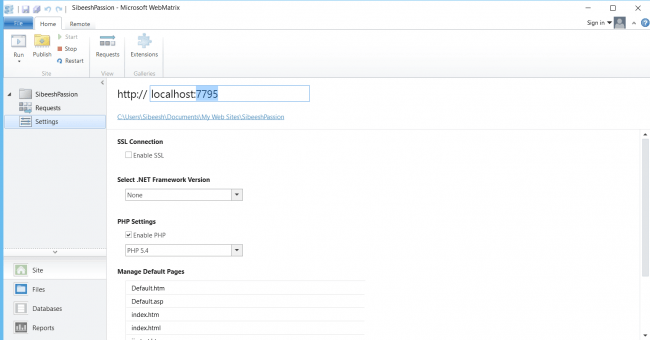
Changing Port In WebMatrix
Have a happy blogging!!!.
Conclusion
Did I miss anything that you may think which is needed? Could you find this post as useful? I hope you liked this article. Please share me your valuable suggestions and feedback.
Your turn. What do you think?
A blog isn’t a blog without comments, but do try to stay on topic. If you have a question unrelated to this post, you’re better off posting it on C# Corner, Code Project, Stack Overflow, Asp.Net Forum instead of commenting here. Tweet or email me a link to your question there and I’ll definitely try to help if I can.
Kindest Regards
Sibeesh Venu