
[toc]
Introduction
In this article, we will learn about CRUD operations in Web API using Angular JS. We will use Visual Studio 2015 to create a Web API and performs the operations. In this project, we are going to create a database and table called tbl_Subcribers which actually contains a list of data. Here we will use Angular JS for all of our client side operations. If you are new to Web API, please read how to retrieve the data from database using Web API here. I am going to explain the complete process in a step by step manner. I hope you will like this.
Download the source code
You can always download the source code here: Web API and Angular JS
Background
Yesterday I have got a call from one of my follower. He asked me about Web API, I have explained to him what are all the things I know about the Web API. But he was not convinced with the information I shared through the phone. At last, he asked me to write an article about Web API in a simple manner. So I agreed to do the same. Here I am dedicating this article to him. I hope he can find this useful.
What is a Web API?
A Web API is a kind of a framework which makes building HTTP services easier than ever. It can be used almost everywhere including a wide range of clients, mobile devices, browsers etc. It contains normal MVC features like Model, Controller, Actions, Routing etc. Support all HTTP verbs like POST, GET, DELETE, PUT.
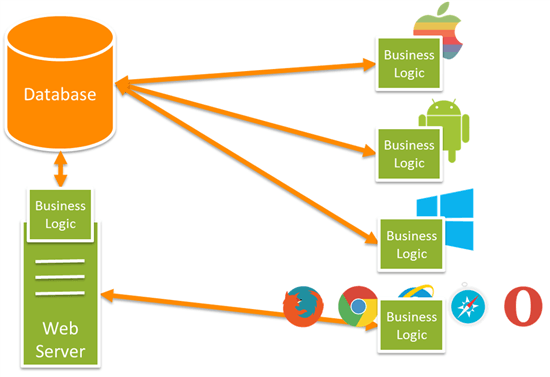
Why Web API
Image Courtesy : blogs.msdn.com
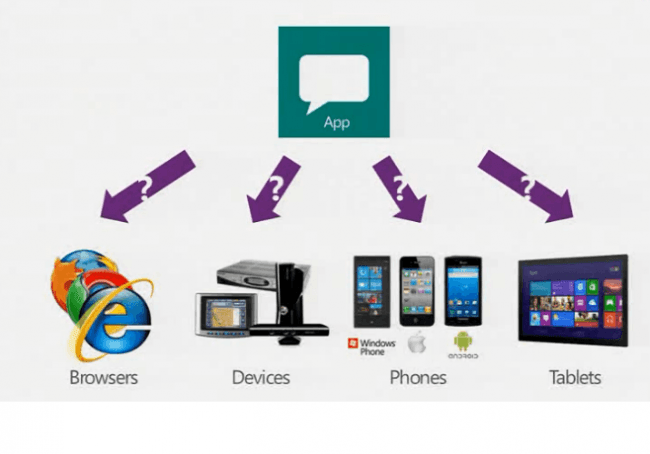
Why Web API
Image Courtesy : forums.asp.net
Using the code
Creating project
We will create our project in Visual Studio 2015. To create a project click File-> New-> Project. And select Web API as a template.
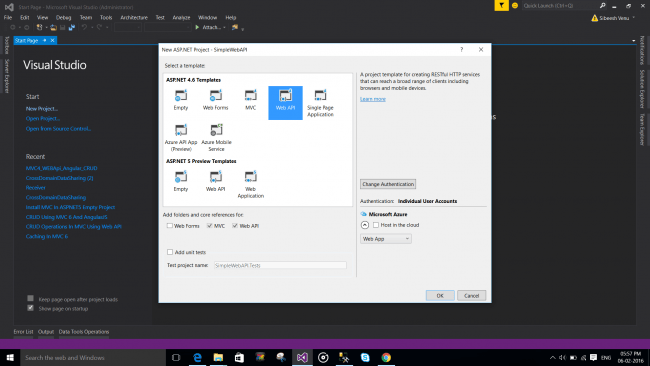
Web API Template
Once you have created a new project, your solution explorer will look like this.
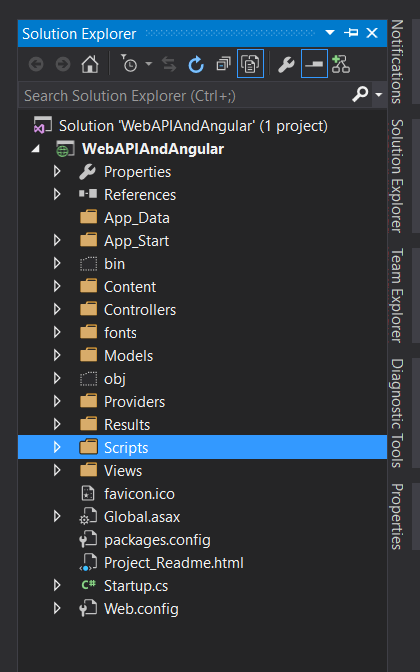
Web API With Angular JS Solution Explorer
As I said, we are going to use Angular JS for all of our client side operations. So the next thing we need to do is, installing the Angular JS from NuGet packages.
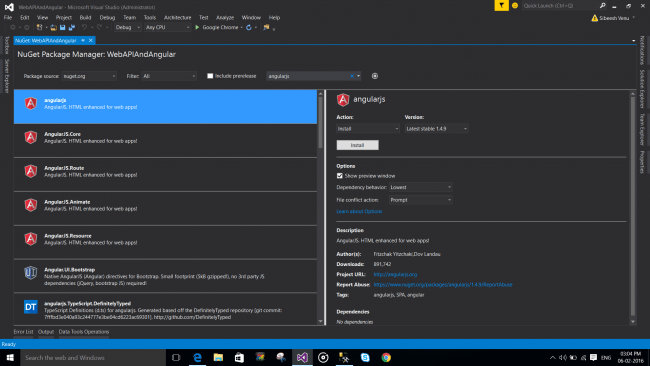
Installing Angular JS
Install Angular JS
Now we will create a control in our project.

CRUD_in_MVC_Using_Web_API_Adding_Control
Now will create a database. Here I am using SQL Server Management Studio With SQL Server Express.
Create Database
Below is the query to create a database.
[sql]
USE [master]
GO
/****** Object: Database [sibeeshpassion] Script Date: 06-02-2016 08:18:42 PM ******/
CREATE DATABASE [sibeeshpassion]
CONTAINMENT = NONE
ON PRIMARY
( NAME = N’sibeeshpassion’, FILENAME = N’C:\Program Files\Microsoft SQL Server\MSSQL12.MSSQLSERVER\MSSQL\DATA\sibeeshpassion.mdf’ , SIZE = 5120KB , MAXSIZE = UNLIMITED, FILEGROWTH = 1024KB )
LOG ON
( NAME = N’sibeeshpassion_log’, FILENAME = N’C:\Program Files\Microsoft SQL Server\MSSQL12.MSSQLSERVER\MSSQL\DATA\sibeeshpassion_log.ldf’ , SIZE = 2048KB , MAXSIZE = 2048GB , FILEGROWTH = 10%)
GO
ALTER DATABASE [sibeeshpassion] SET COMPATIBILITY_LEVEL = 120
GO
IF (1 = FULLTEXTSERVICEPROPERTY(‘IsFullTextInstalled’))
begin
EXEC [sibeeshpassion].[dbo].[sp_fulltext_database] @action = ‘enable’
end
GO
ALTER DATABASE [sibeeshpassion] SET ANSI_NULL_DEFAULT OFF
GO
ALTER DATABASE [sibeeshpassion] SET ANSI_NULLS OFF
GO
ALTER DATABASE [sibeeshpassion] SET ANSI_PADDING OFF
GO
ALTER DATABASE [sibeeshpassion] SET ANSI_WARNINGS OFF
GO
ALTER DATABASE [sibeeshpassion] SET ARITHABORT OFF
GO
ALTER DATABASE [sibeeshpassion] SET AUTO_CLOSE OFF
GO
ALTER DATABASE [sibeeshpassion] SET AUTO_SHRINK OFF
GO
ALTER DATABASE [sibeeshpassion] SET AUTO_UPDATE_STATISTICS ON
GO
ALTER DATABASE [sibeeshpassion] SET CURSOR_CLOSE_ON_COMMIT OFF
GO
ALTER DATABASE [sibeeshpassion] SET CURSOR_DEFAULT GLOBAL
GO
ALTER DATABASE [sibeeshpassion] SET CONCAT_NULL_YIELDS_NULL OFF
GO
ALTER DATABASE [sibeeshpassion] SET NUMERIC_ROUNDABORT OFF
GO
ALTER DATABASE [sibeeshpassion] SET QUOTED_IDENTIFIER OFF
GO
ALTER DATABASE [sibeeshpassion] SET RECURSIVE_TRIGGERS OFF
GO
ALTER DATABASE [sibeeshpassion] SET DISABLE_BROKER
GO
ALTER DATABASE [sibeeshpassion] SET AUTO_UPDATE_STATISTICS_ASYNC OFF
GO
ALTER DATABASE [sibeeshpassion] SET DATE_CORRELATION_OPTIMIZATION OFF
GO
ALTER DATABASE [sibeeshpassion] SET TRUSTWORTHY OFF
GO
ALTER DATABASE [sibeeshpassion] SET ALLOW_SNAPSHOT_ISOLATION OFF
GO
ALTER DATABASE [sibeeshpassion] SET PARAMETERIZATION SIMPLE
GO
ALTER DATABASE [sibeeshpassion] SET READ_COMMITTED_SNAPSHOT OFF
GO
ALTER DATABASE [sibeeshpassion] SET HONOR_BROKER_PRIORITY OFF
GO
ALTER DATABASE [sibeeshpassion] SET RECOVERY SIMPLE
GO
ALTER DATABASE [sibeeshpassion] SET MULTI_USER
GO
ALTER DATABASE [sibeeshpassion] SET PAGE_VERIFY CHECKSUM
GO
ALTER DATABASE [sibeeshpassion] SET DB_CHAINING OFF
GO
ALTER DATABASE [sibeeshpassion] SET FILESTREAM( NON_TRANSACTED_ACCESS = OFF )
GO
ALTER DATABASE [sibeeshpassion] SET TARGET_RECOVERY_TIME = 0 SECONDS
GO
ALTER DATABASE [sibeeshpassion] SET DELAYED_DURABILITY = DISABLED
GO
ALTER DATABASE [sibeeshpassion] SET READ_WRITE
GO
[/sql]
Now we can create a table and insert few data into it.
Create table in database
Below is the query to create table in database.
[sql]
USE [sibeeshpassion]
GO
/****** Object: Table [dbo].[tbl_Subscribers] Script Date: 06-02-2016 08:21:06 PM ******/
SET ANSI_NULLS ON
GO
SET QUOTED_IDENTIFIER ON
GO
CREATE TABLE [dbo].[tbl_Subscribers](
[SubscriberID] [int] NOT NULL,
[MailID] [nvarchar](50) NOT NULL,
[SubscribedDate] [datetime2](7) NOT NULL,
PRIMARY KEY CLUSTERED
(
[SubscriberID] ASC
)WITH (PAD_INDEX = OFF, STATISTICS_NORECOMPUTE = OFF, IGNORE_DUP_KEY = OFF, ALLOW_ROW_LOCKS = ON, ALLOW_PAGE_LOCKS = ON) ON [PRIMARY]
) ON [PRIMARY]
GO
[/sql]
Insert data to table
[sql]
INSERT INTO [dbo].[tbl_Subscribers] ([SubscriberID], [MailID], [SubscribedDate]) VALUES (1, N’sibikv4u@gmail.com’, N’2015-10-30 00:00:00′)
INSERT INTO [dbo].[tbl_Subscribers] ([SubscriberID], [MailID], [SubscribedDate]) VALUES (2, N’sibeesh.venu@gmail.com’, N’2015-10-29 00:00:00′)
INSERT INTO [dbo].[tbl_Subscribers] ([SubscriberID], [MailID], [SubscribedDate]) VALUES (3, N’ajaybhasy@gmail.com’, N’2015-10-28 00:00:00′)
[/sql]
Our database seems to be ready now. Then we can go ahead and create entity in our project.
Creating entity model
To create an entity, please follows the steps shows in the below images.
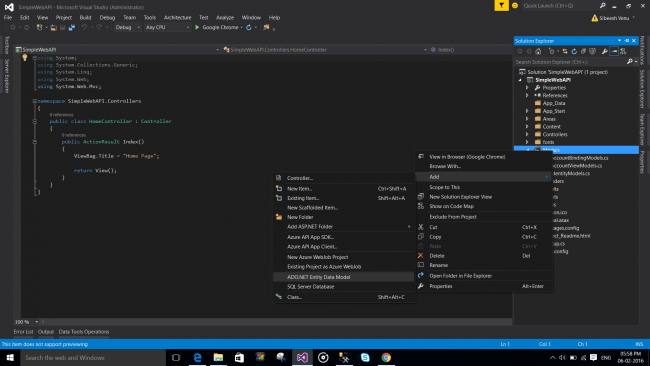
Creating Entity Model 1
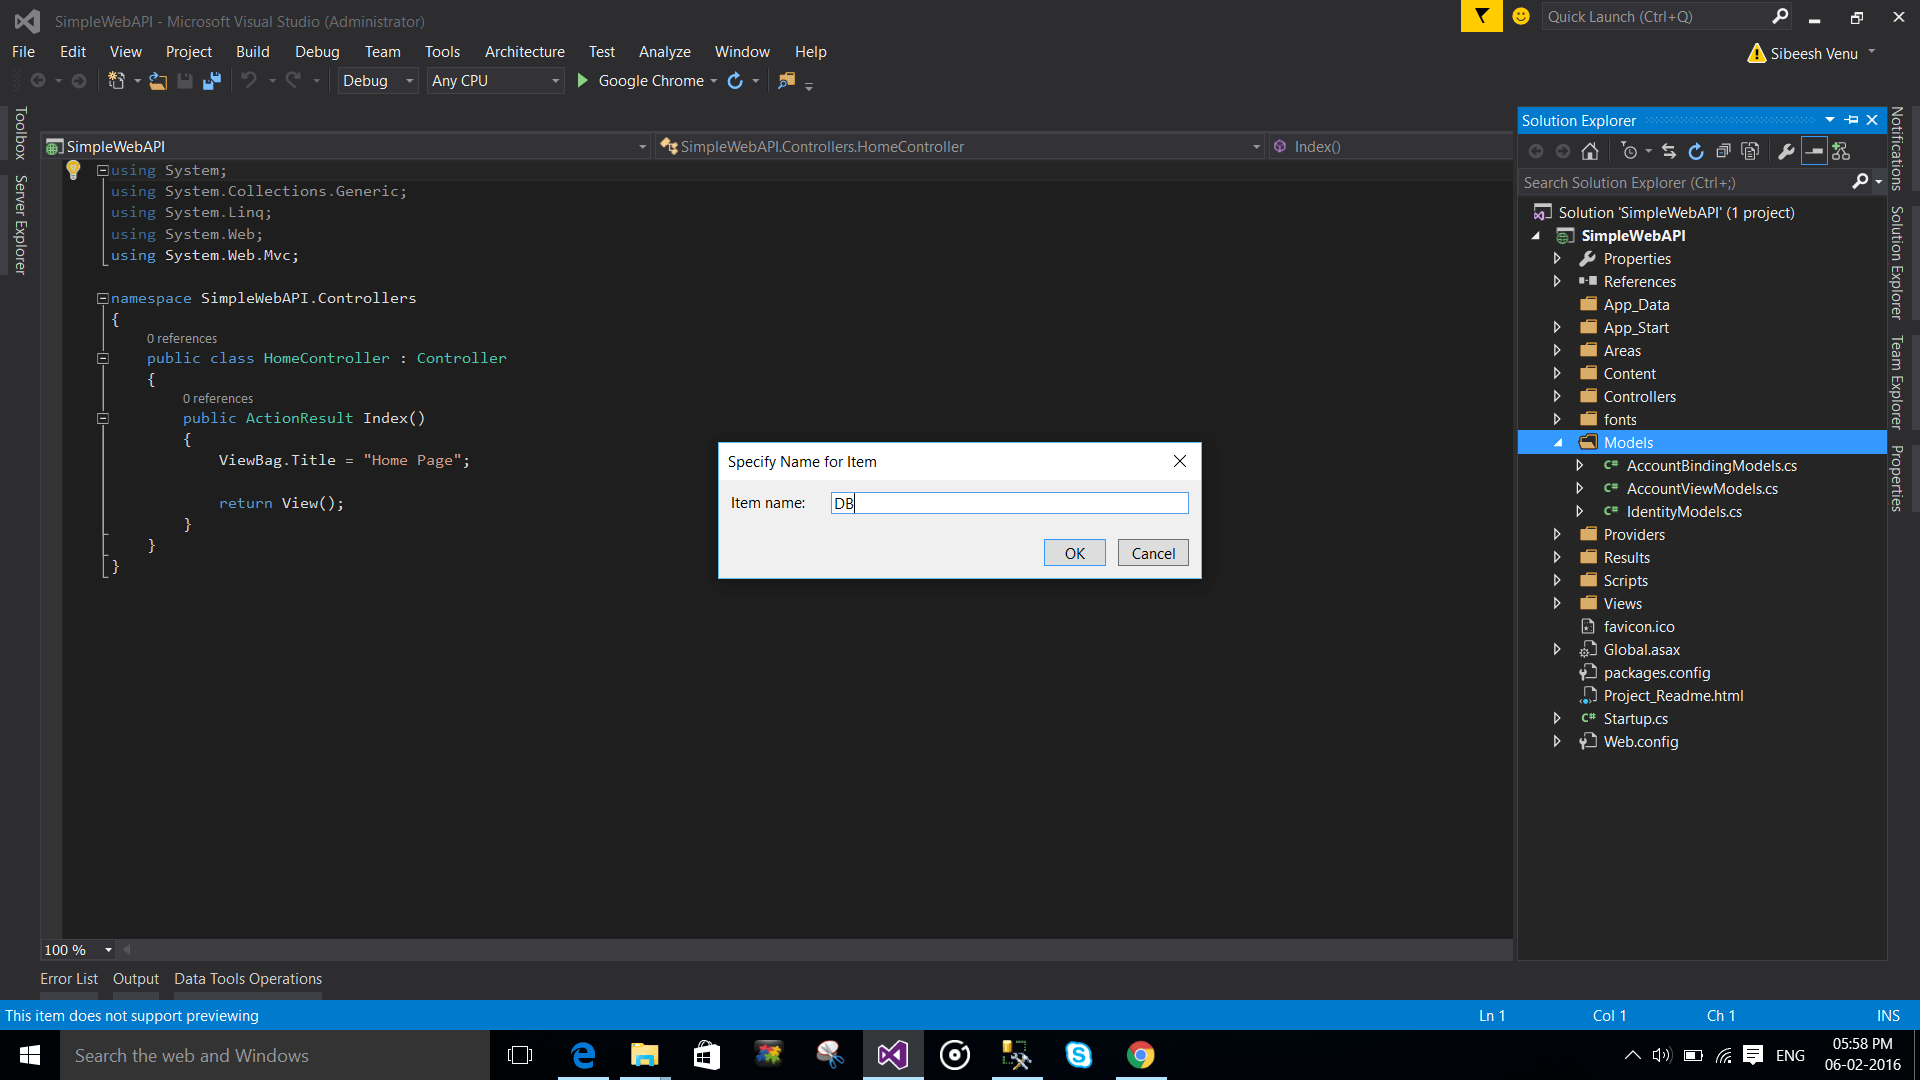
Creating Entity Model 2

Creating Entity Model 3
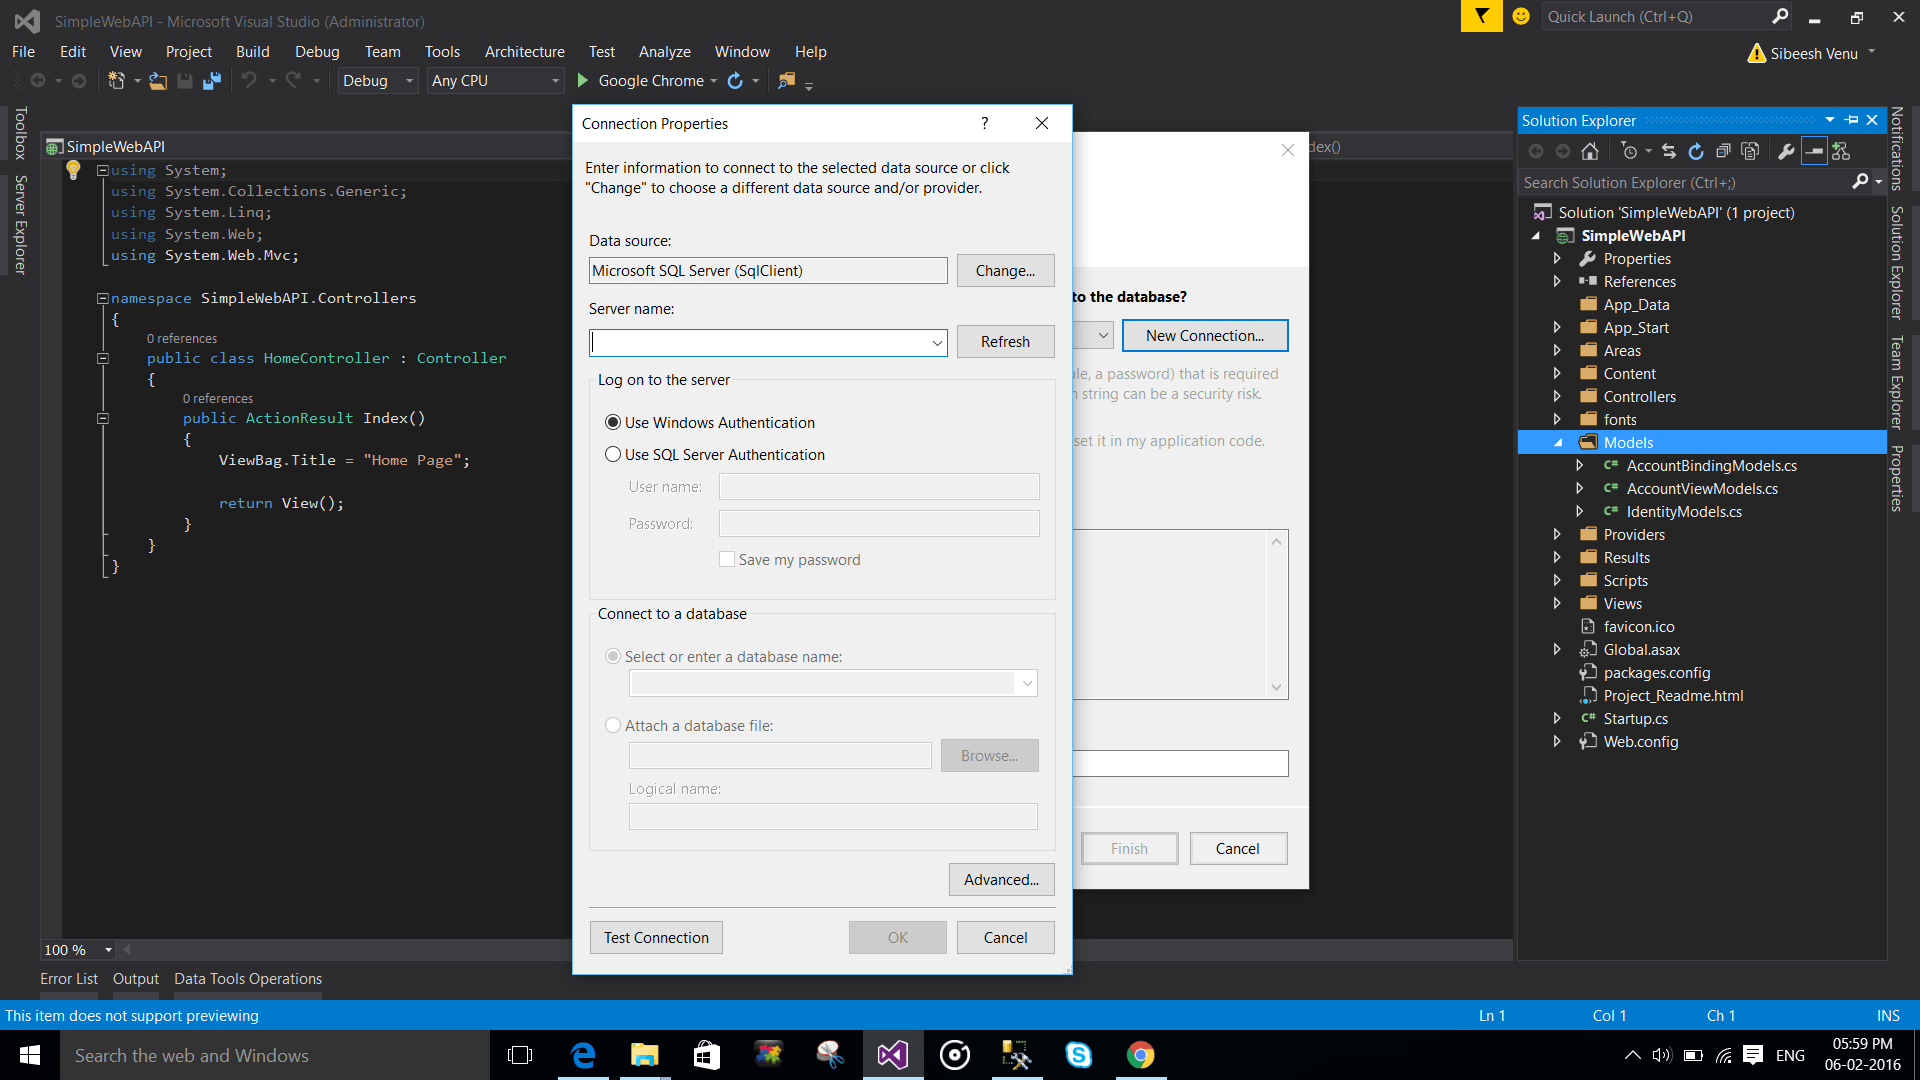
Creating Entity Model 4
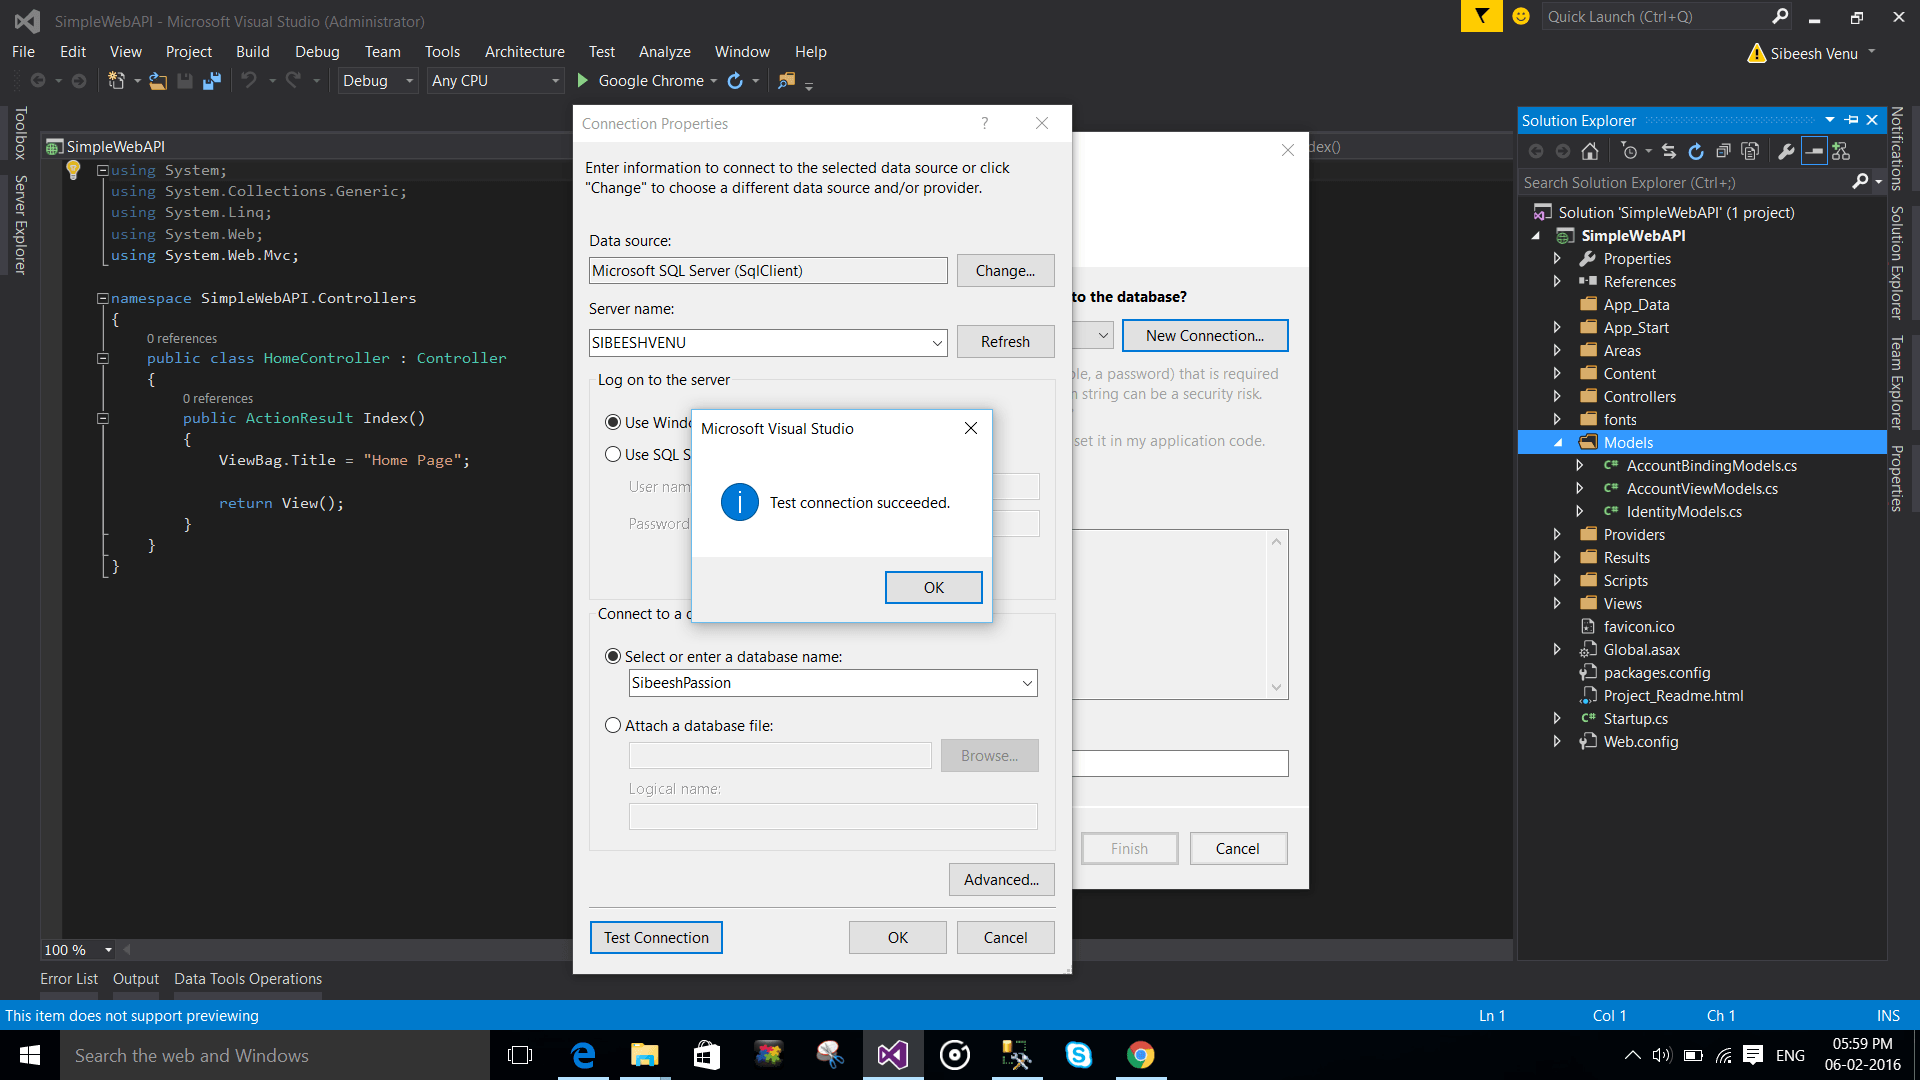
Creating Entity Model 5
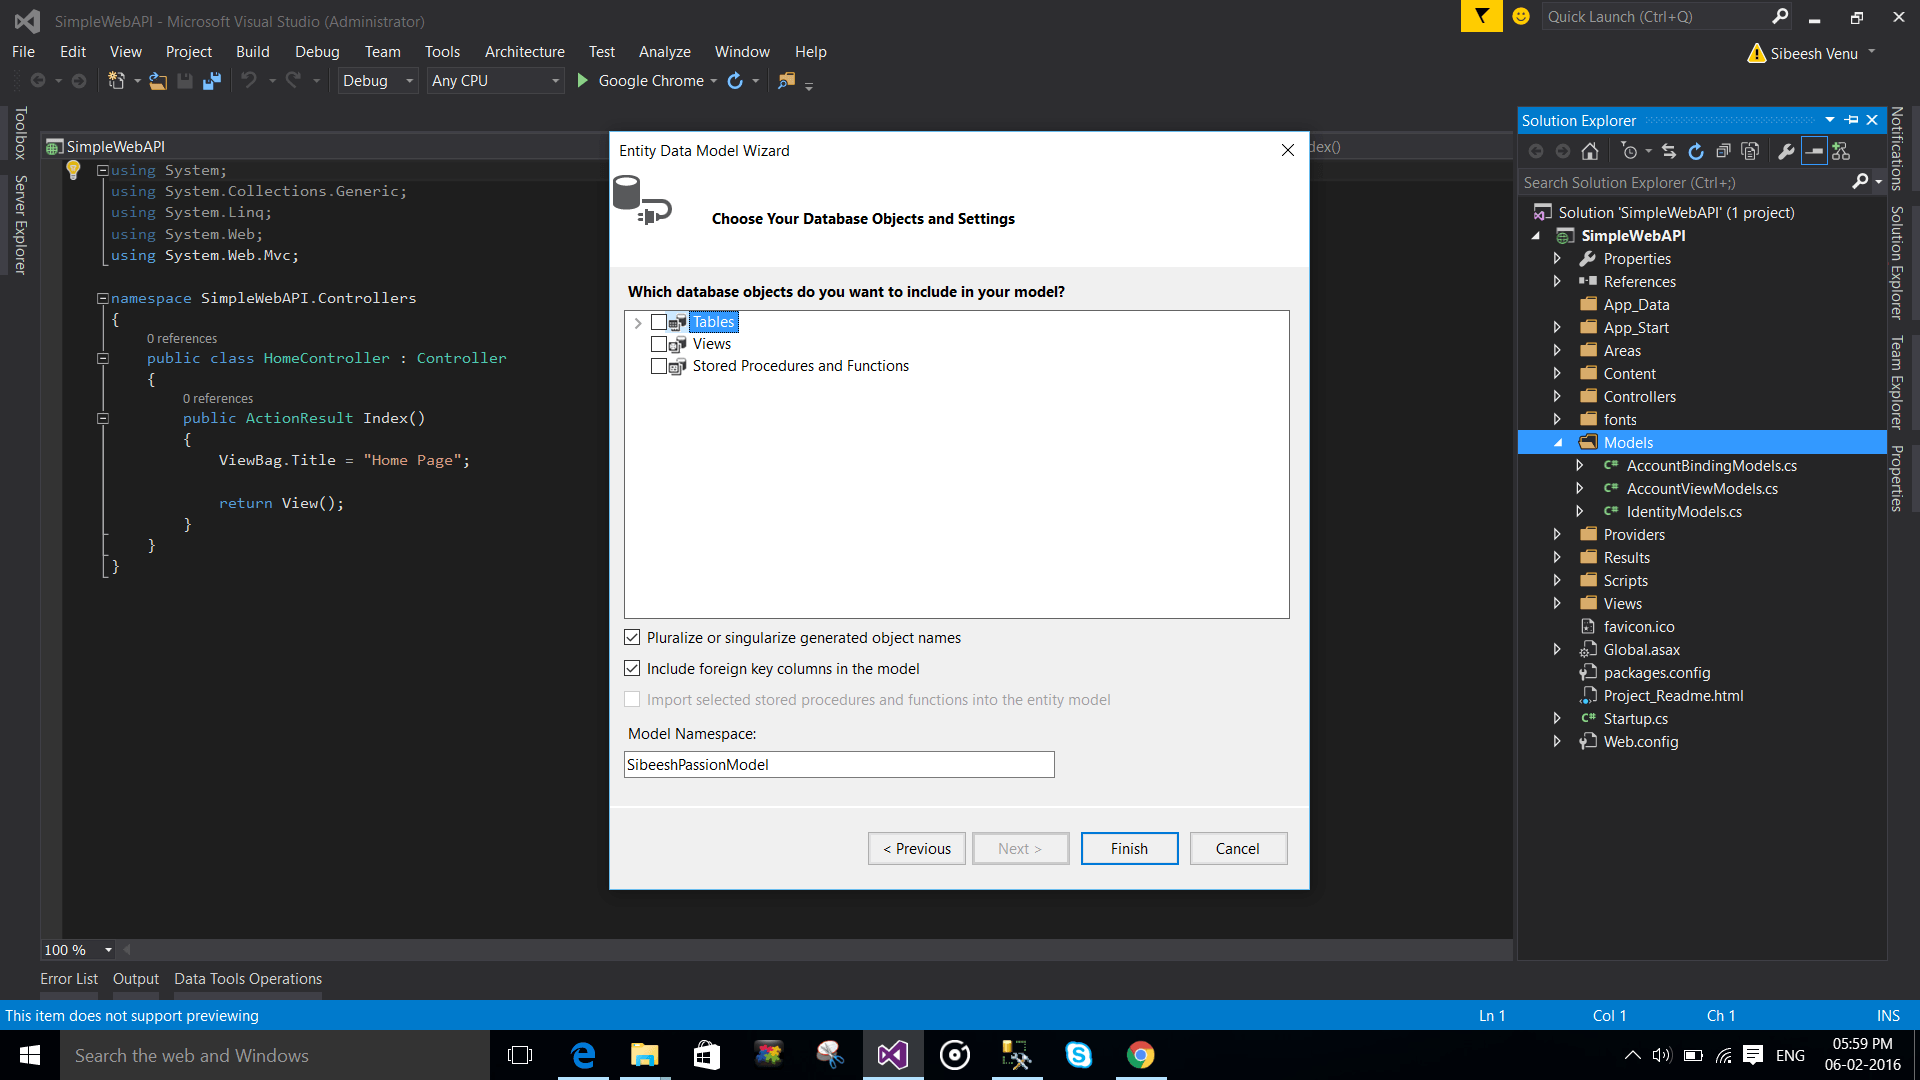
Creating Entity Model 6
Now it is time to create a API controller.
Select Empty API Controller as template.
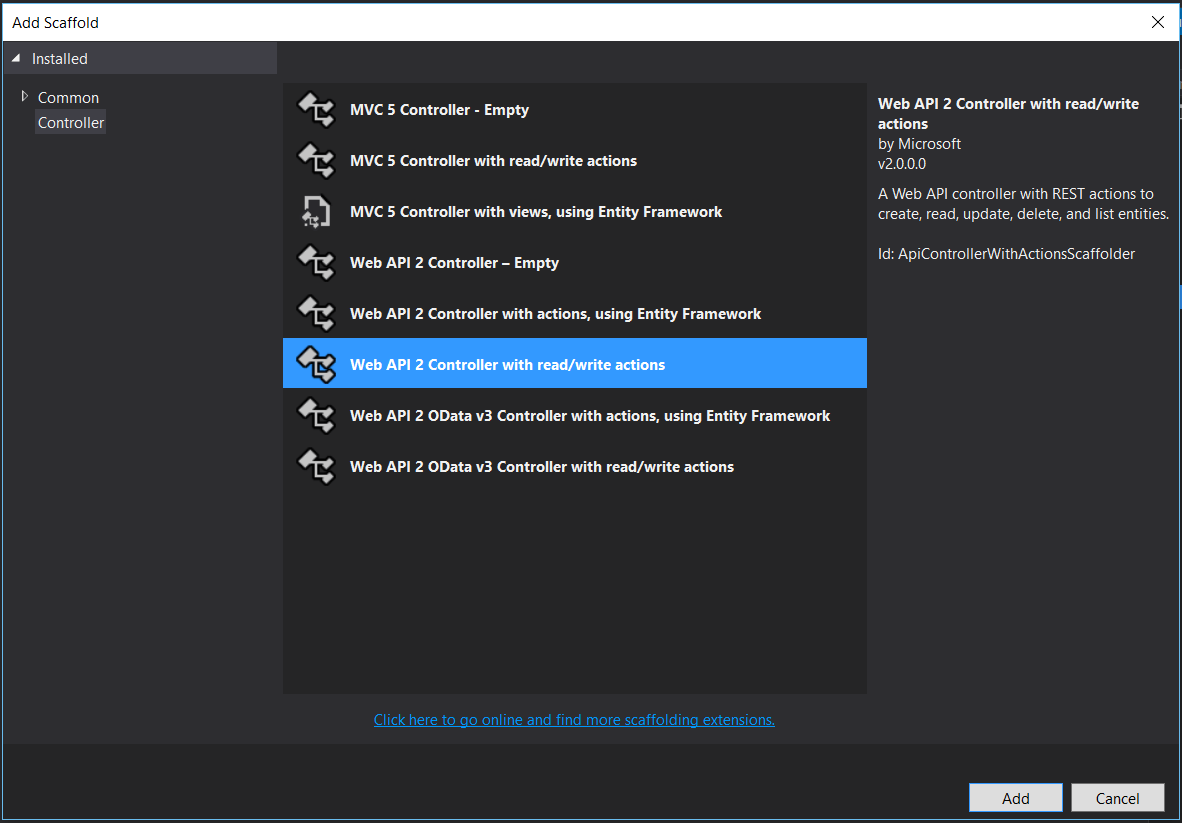
Web API Contoller With Actions
Read Operation
Now you can see some actions are already created for you by default. Cool right? Now as of now we will concentrate only in retrieving the data. So please change the method Get as follows.
[csharp]
public IEnumerable<tbl_Subscribers> Get()
{
return myEntity.tbl_Subscribers.AsEnumerable();
}
[/csharp]
Before the please do not forget to create an instance for your entity.
[csharp]
private sibeeshpassionEntities myEntity = new sibeeshpassionEntities();
[/csharp]
And make sure you have added the needed namespaces with the model.
[csharp]
using System.Data.Entity;
using WebAPIAndAngular.Models;
[/csharp]
As you can notice that we have selected Empty API Controller instead of selecting a normal controller. There are few difference between our normal controller and Empty API Controller.
Controller VS Empty API Controller
A controller normally render your views. But an API controller returns the data which is already serialized. A controller action returns JSON() by converting the data. You can get rid of this by using API controller.
Find out more: Controller VS API Controller
Now our API is ready for action. So it is time to create an another controller and a view. Here I am creating a normal controller with Index view.
Once the view is created, we will created three JS files in the script folder.

Angular JS Operation FIles
Now we will start our Angular JS part. If you are new to Angular JS, I strongly recommend you to check here.Angular JS Basics
Open the file Module.js and create an app.
[js]
var app;
(function () {
app = angular.module(“APIModule”, []);
})();
[/js]
Here APIModule is the name of our module. Check here for more information.
Open the file Service.js and create a service as follows.
[js]
app.service(“APIService”, function ($http) {
this.getSubs = function () {
return $http.get(“api/Subscriber”)
}
});
[/js]
Here APIService is our service name which we will call from our controller. The api/Subscriber will call the Get method in our API controller.

Get Operation In API Controller
Now Open our Controller.JS and write code as below.
[js]
app.controller(‘APIController’, function ($scope, APIService) {
getAll();
function getAll()
{
var servCall = APIService.getSubs();
servCall.then(function (d) {
$scope.subscriber = d.data;
}, function (error) {
$log.error(‘Oops! Something went wrong while fetching the data.’)
})
}
})
[/js]
We are calling the getSubs function which we created in our service. Once we get the data we are assigning it to the $scope.subscriber, so that we can use it in our view.
Now the angular JS part for retrieving all data is done. Can we do the needed changes in the view now?
Updating View
Open the Index.cshtml view and change it as below.
[html]
@{
ViewBag.Title = “Welcome”;
}
<style>
table, tr, td, th {
border: 1px solid #ccc;
padding: 10px;
margin: 10px;
}
</style>
<h2>Welcome to Sibeesh Passion’s Email List</h2>
<body data-ng-app=”APIModule”>
<div id=”tblSubs” ng-controller=”APIController”>
<table>
<tr>
<th>ID</th>
<th>Email ID</th>
<th>Subscribed Date</th>
</tr>
<tbody data-ng-repeat=”sub in subscriber”>
<tr>
<td>{{sub.SubscriberID}}</td>
<td>{{sub.MailID}}</td>
<td>{{sub.SubscribedDate}}</td>
</tr>
</tbody>
</table>
</div>
</body>
<script src=”~/Scripts/angular.js”></script>
<script src=”~/Scripts/angular-route.js”></script>
<script src=”~/Scripts/APIScripts/Module.js”></script>
<script src=”~/Scripts/APIScripts/Service.js”></script>
<script src=”~/Scripts/APIScripts/Controller.js”></script>
[/html]
Please don’r forget to load the needed scripts. Here we have set body as our data-ng-app and table as our ng-controller. We are looping through the data using data-ng-repeat.
If everything is done, we can build the application and see the output.
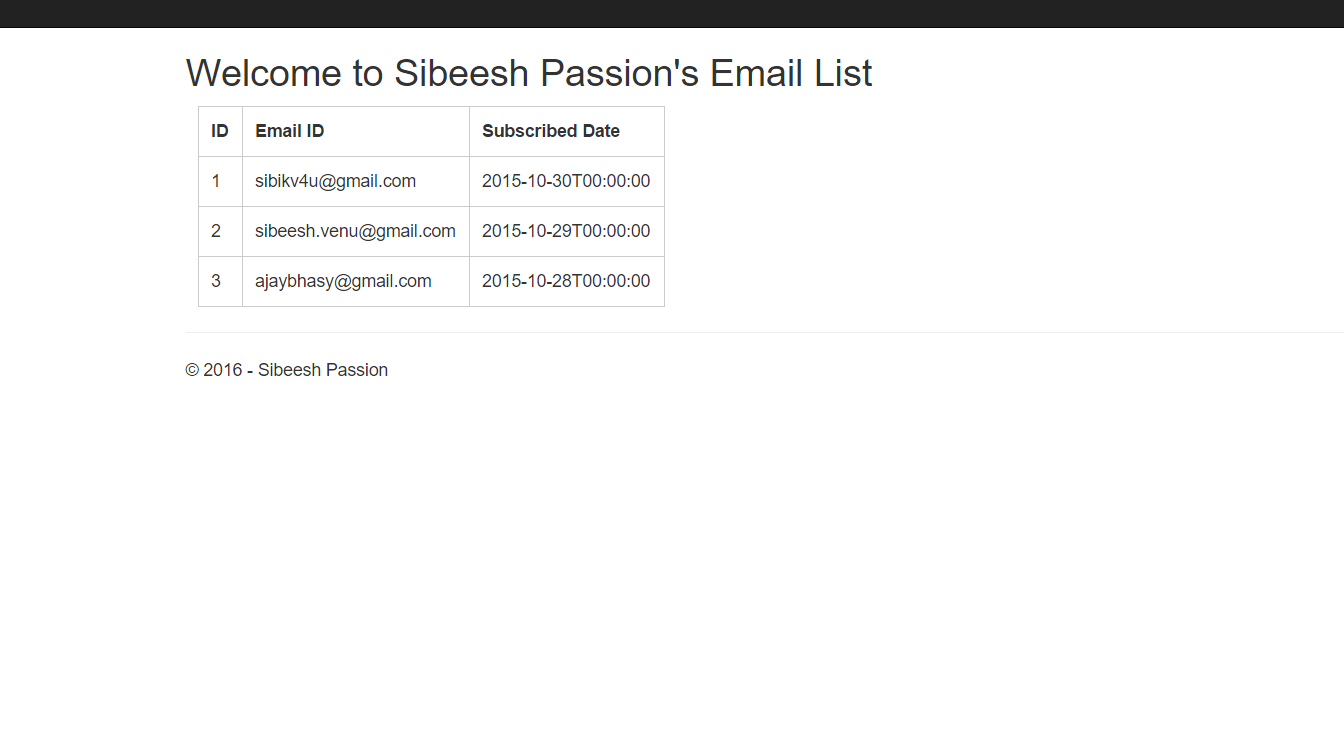
Wep API Get All Record
So far our READ operation is done. Now We will move into CREATE part.
Create Operation
First we will concentrate on the view part as of now. Just add the below codes to your view.
[html]
<div class=”form-group”>
<label for=”email”>Sbscribe here</label>
<input type=”email” class=”form-control” id=”email” placeholder=”Enter email” [required=”string” ] data-ng-model=”mailid” />
</div>
<button type=”button” class=”btn btn-default” data-ng-click=”saveSubs();”>Submit</button>
[/html]
This will give you an output as follows.
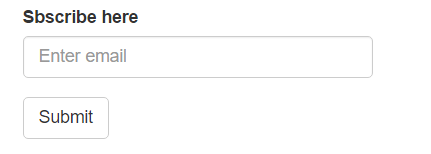
View Design For Create
As you can see, we are firing the function saveSubs() in data-ng-click. So let us see what we need to write in it.
In the Controller.js you need to create a function as below.
[js]
$scope.saveSubs = function () {
var sub = {
MailID: $scope.mailid,
SubscribedDate: new Date()
};
var saveSubs = APIService.saveSubscriber(sub);
saveSubs.then(function (d) {
getAll();
}, function (error) {
console.log(‘Oops! Something went wrong while saving the data.’)
})
};
[/js]
Did you see that we are calling an another function which is in our APIService. So now we need to create a function saveSubscriber in Service.js. Shall we?
[js]
this.saveSubscriber = function (sub) {
return $http({
method: ‘post’,
data: sub,
url: ‘api/Subscriber’
});
}
[/js]
So all set, the rest is to create a function in our API Controller.
[csharp]
// POST: api/Subscriber
public void Post(tbl_Subscribers sub)
{
if (ModelState.IsValid)
{
myEntity.tbl_Subscribers.Add(sub);
myEntity.SaveChanges();
}
}
[/csharp]
That’s cool, now you will be able to create data through our API with the help of Angular JS. Now shall we move into UPDATE operation.
Update Operation
Before going to the code part we will do some changes in our table design. We are going to make one field (Mail ID field) editable when ever user double clicks in it. And of course we will update the edited data to the database when ever user leaves that field. Sounds cool? Now please change the view as follows.
[html]
<div id=”tblSubs” ng-controller=”APIController”>
<table>
<tr>
<th>ID</th>
<th>Email ID ( Double click to update)</th>
<th>Subscribed Date</th>
<th></th>
</tr>
<tbody data-ng-repeat=”sub in subscriber”>
<tr>
<td>{{sub.SubscriberID}}</td>
<td ng-blur=”updSubscriber(sub,$event)” ng-dblclick=”makeEditable($event)”>{{sub.MailID}}</td>
<td>{{sub.SubscribedDate}}</td>
</tr>
</tbody>
</table>
<div class=”form-group”>
<label for=”email”>Sbscribe here</label>
<input type=”email” class=”form-control” id=”email” placeholder=”Enter email” [required=”string” ] data-ng-model=”mailid” />
</div>
<button type=”button” class=”btn btn-default” data-ng-click=”saveSubs();”>Submit</button>
</div>
[/html]
The below is the main change we did.
[html]
<td ng-blur=”updSubscriber(sub,$event)” ng-dblclick=”makeEditable($event)”>{{sub.MailID}}</td>
[/html]
In ng-blur we are calling the function updSubscriber with parameter $event and the current subscriber details. And in ng-dblclick we are calling the function makeEditable with parameter $event which actually holds the UI details and current events.
Below is the code for the function makeEditable in Controller.js
[js]
$scope.makeEditable = function (obj) {
obj.target.setAttribute(“contenteditable”, true);
obj.target.focus();
};
[/js]
As you can see we are setting the attribute contenteditable to true using setAttribute function. Now we will look into the function updSubscriber.
Add a function in Controller.js
[js]
$scope.updSubscriber = function (sub, eve) {
sub.MailID = eve.currentTarget.innerText;
var upd = APIService.updateSubscriber(sub);
upd.then(function (d) {
getAll();
}, function (error) {
console.log(‘Oops! Something went wrong while updating the data.’)
})
};
[/js]
Add a relative function in Service.js
[js]
this.updateSubscriber = function (sub) {
return $http({
method: ‘put’,
data: sub,
url: ‘api/Subscriber’
});
}
[/js]
Now we need to add a function in our Web API controller.
[csharp]
// PUT: api/Subscriber/5
public void Put(tbl_Subscribers sub)
{
if (ModelState.IsValid)
{
myEntity.Entry(sub).State = EntityState.Modified;
try
{
myEntity.SaveChanges();
}
catch (Exception)
{
throw;
}
}
}
[/csharp]
Now you will be able to update your record. What is pending now? Yes, DELETE operation.
Delete Operation
Make some changes in the view as follows.
[html]
<tbody data-ng-repeat=”sub in subscriber”>
<tr>
<td>{{sub.SubscriberID}}</td>
<td ng-blur=”updSubscriber(sub,$event)” ng-dblclick=”makeEditable($event)”>{{sub.MailID}}</td>
<td>{{sub.SubscribedDate}}</td>
<td>
<input type=”button” id=”Delete” value=”Delete” data-ng-click=”dltSubscriber(sub.SubscriberID)” />
</td>
</tr>
</tbody>
[/html]
Now add the new function in Controller.js
[js]
$scope.dltSubscriber = function (subID) {
var dlt = APIService.deleteSubscriber(subID);
dlt.then(function (d) {
getAll();
}, function (error) {
console.log(‘Oops! Something went wrong while deleting the data.’)
})
};
[/js]
Create a service in Service.js now.
[js]
this.deleteSubscriber = function (subID) {
var url = ‘api/Subscriber/’ + subID;
return $http({
method: ‘delete’,
data: subID,
url: url
});
}
[/js]
Now it is time to create our delete method in Web API controller.
[csharp]
// DELETE: api/Subscriber/5
public void Delete(int id)
{
tbl_Subscribers dlt = myEntity.tbl_Subscribers.Find(id);
if (dlt != null)
{
try
{
myEntity.tbl_Subscribers.Remove(dlt);
myEntity.SaveChanges();
}
catch (Exception)
{
throw;
}
}
}
[/csharp]
That is all. We did it. Now build your application and see an output as follows.

Web API With Angular JS
Have a happy coding.
Conclusion
Did I miss anything that you may think which is needed? Did you try Web API yet? Have you ever wanted to do this requirement? Could you find this post as useful? I hope you liked this article. Please share me your valuable suggestions and feedback.
Your turn. What do you think?
A blog isn’t a blog without comments, but do try to stay on topic. If you have a question unrelated to this post, you’re better off posting it on C# Corner, Code Project, Stack Overflow, Asp.Net Forum instead of commenting here. Tweet or email me a link to your question there and I’ll definitely try to help if I can.
Kindest Regards
Sibeesh Venu