

When do you actually think about the deployment? Is it from the day you start developing your application or once after finished developing? If you are in the second category, it is already late to move to the first category. The word pipeline comes into the picture when we talk about deployment. This way we can easily achieve Continuous Integration and Continuous Delivery. So, here in this post, we are going to see how we can create a multi-stage pipeline, for our Asp.Net core and Angular application, and at the end to deploy it to the Azure App Service. I am going to use Azure DevOps, but the steps may look similar if you use any other public cloud. Let’s start then.
Asp.Net Core Application with Angular
I already created both Asp.Net and Angular applications using the Angular project template. There are many advantages that I can think of if you are using this template. Some of them are listed below.
- Angular CLI integration. In development mode, there’s no need to run ng serve. It runs in the background automatically, so your client-side resources are dynamically built on demand and the page refreshes when you modify any file.
- Efficient production builds. In production mode, development-time features are disabled, and your dotnet publish configuration automatically invokes ng build to produce minified, ahead-of-time compiled JavaScript files.
You can read more about this template here. Open your application once it is created, and you should be able to see your Angular application in the ClientApp folder. Now, go to the file Startup.cs and check the method ConfigurationServices, here we are setting to serve the angular project from dist folder for the production.
Look the Configure method and that is where we set the SPA.
Enough of the details about the application. Let’s start creating the pipeline now.
Azure Multi-Stage Pipeline
Go to your Azure DevOps project and click on the Pipelines, you should see an option to create a dummy YAML file there. And when it is created, just replace it with the preceding content.
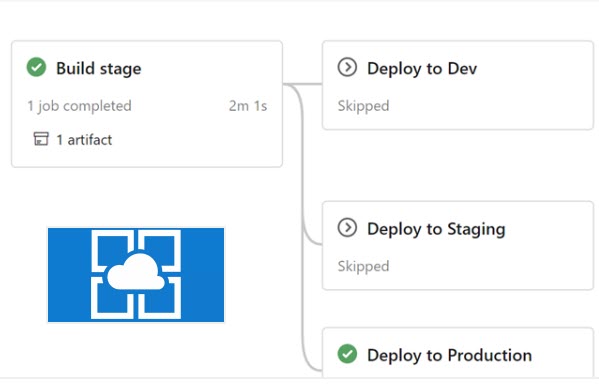
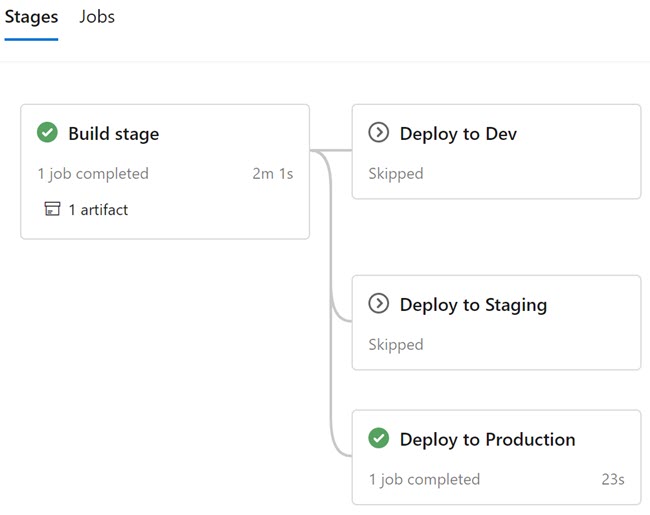
From the pipeline, you can see that we have 4 stages Build, Deploy_to_dev_environment, Deploy_to_staging_environment, Deploy_to_production_environment. In the stage build, we build the application and save the output to the publish_out folder. If you don’t provide any folder name, most likely you will get an error “Program does not contain a static ‘Main’ method suitable for an entry point”, and I have already answered this question on StackOverflow. Please feel free to check that.
After the build, we run the task publish, and please remember that your Angular application will also be ready for production as we use the Angular template from Visual Studio. In the other stages, we added a task to deploy the package to the Azure App Service. Please be noted that you need Azure Service Connection to do this. Please follow this doc to do that.
Once everything is done, just go to your Azure DevOps project and run your pipeline. If everything goes well, you should now see the output as in the preceding image. Please remember that the stages depend on the branch you run, that is the condition we added. For example, for dev we added the condition condition: and(succeeded(‘Build’), eq(variables[‘build.sourceBranch’], ‘refs/heads/dev’))

Conclusion
Here in this post, we have seen how to create an azure multi-stage pipeline fou our Asp.Net core and Angular application, that will also deeply to an Azure App Service.
About the Author
I am yet another developer who is passionate about writing and video creation. I have written close to 500 blogs on my blog. And I upload videos on my YouTube channels Njan Oru Malayali and Sibeesh Passion. Please feel free to follow me.
Your turn. What do you think?
Thanks a lot for reading. Did I miss anything that you may think which is needed in this article? Could you find this post useful? Kindly do not forget to share your feedback.
Kindest Regards
Sibeesh Venu