


Did you know that you can change the mobile number of a user from Azure AD, by using PowerShell? Here in this post, we will see how easy it is to change the user properties of an AD user. To get started, we need to install the AzureAD module from the PowerShell Gallery You can get more details about this module here.
Install-Module -Name AzureADYou will be prompted to accept the installation, give Yes or A.
Untrusted repository
You are installing the modules from an untrusted repository. If you trust this repository, change its InstallationPolicy value by running the Set-PSRepository cmdlet. Are you sure you want to install the modules from 'PSGallery'?
[Y] Yes  [A] Yes to All  [N] No  [L] No to All  [S] Suspend  [?] Help (default is "N"): A
You can also check whether this module is installed or not by using the command Get-Module AzureADPreview
Once you are done, it is time to connect to your Azure AD by using the command Connect-AzureAD. That will give you an output as in the preceding image.

Now, use the command below to change the properties of your user.
Set-AzureADUser -ObjectId user1@domain.com -OtherMails @("user2@domain.com") -Mobile "+353 000000000" -TelephoneNumber "+353 000000000"You can also verify the changes by running the commands below.
Get-AzureADUser -ObjectID user@domain.com | select otherMails
Get-AzureADUser -ObjectID user@domain.com | select Mobile
Get-AzureADUser -ObjectID user@domain.com | select TelephoneNumber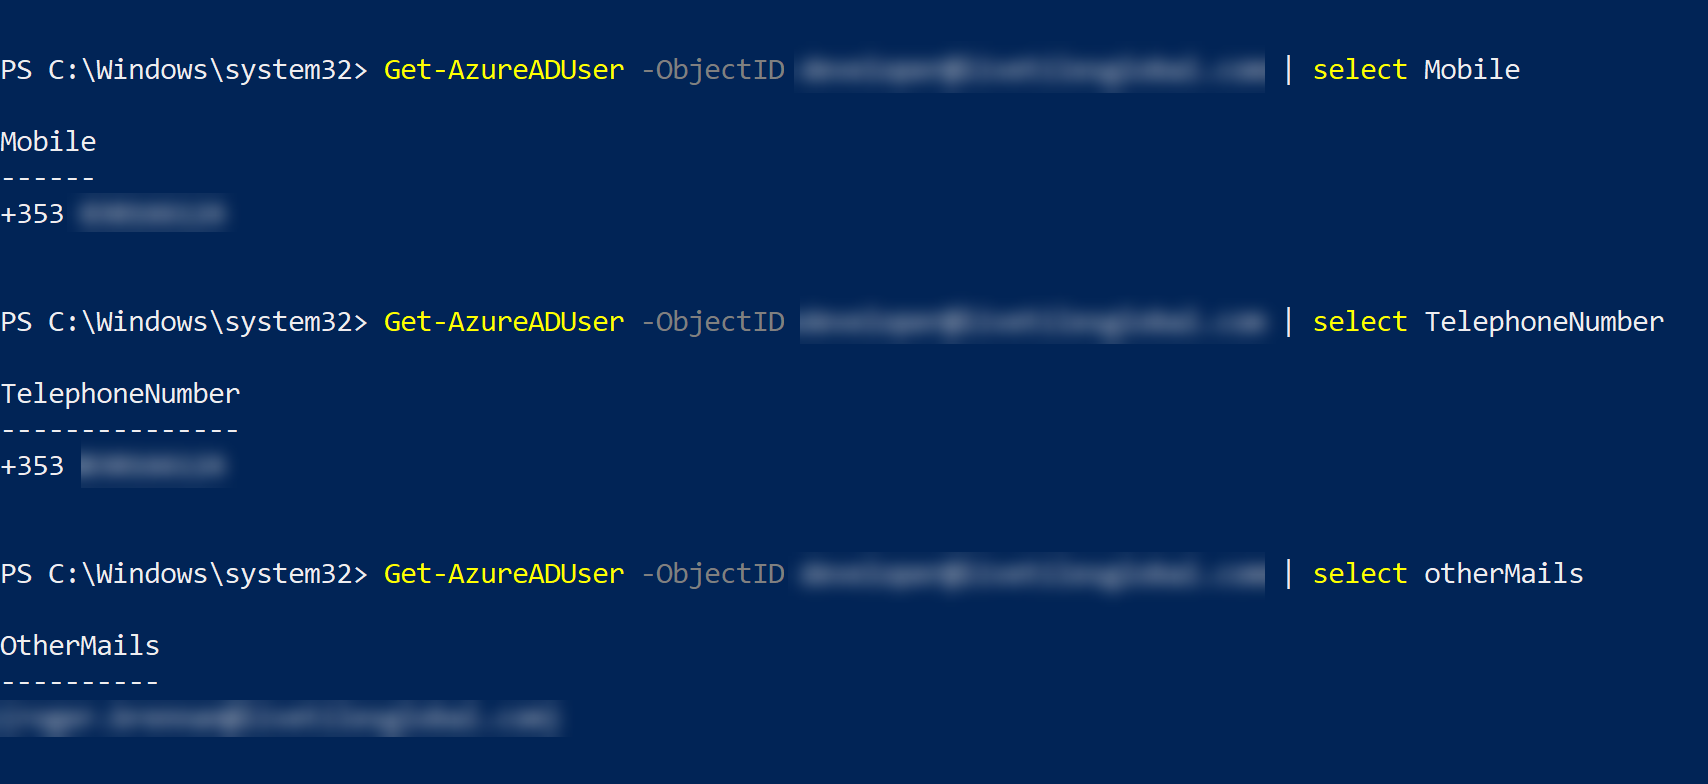
After you have changed your mobile number, verify the same when it is asked, and you should be able to Enable the Two-Step Verification on the Security Information page.
