Create Azure AD Application with Configurations Using PowerShell
There are different ways that you can create an Azure AD application aka Azure AD app registration. Sometimes, you may have to create it using the portal or by using PowerShell modules. When you use PowerShell to do this, you can save the script and reuse the same in the future, one of the many advantages of using this approach is that it will help you remove human errors. Let’s see how we can do this.
Creating Azure AD application
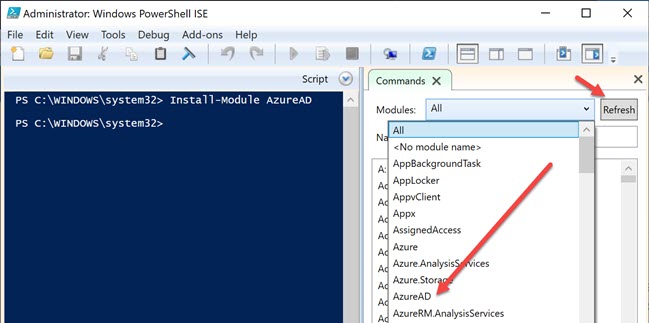
Before we run the command to create the application, make sure that you have installed the AzureAD module. Open your PowerShell ISE with administrator access, and then type the preceding command.
PS C:\WINDOWS\system32> Install-Module AzureADThis will install the module for you. You can see this in the modules list in the ISE. Click on the refresh button if you don’t see it.
Now run the command “Connect-AzureAD” to connect to your Azure Account. If you have multiple directories with your account, then you must connect it with the tenant parameter. You can get the tenant id from the Tenant Properties window. Switch to the directory in the Azure Portal and search for the Tenant Properties in the search bar. Copy the Tenant ID from there and run it with the preceding command.
Connect-AzureAD -TenantId YourTenantIDHereLogin again if you are asked again. And you are ready to run the command to create the AD application.
Here the parameter “-Oauth2AllowImplicitFlow” is to enable the OAuth flow and the -AvailableToOtherTenants is to make sure that my app is available to other tenants. You can see more options here.
If you are getting an error as “Message: Hostname in ‘http://’ in property identifierUris is not on any verified domain of the company or its subdomain, make sure that you are giving the “$appUri” as your Azure AD primary domain or subdomain. You can get this value from the Azure AD applications overview window.
If you get an error as “Message: The URI scheme in property identifierUris is invalid or unsupported.”, make sure that you have included “http://” with your URI.
If you don’t see any other errors in your PowerShell, then it is more likely that the application is been created for, go to the Azure AD application registration page and see it yourself. In the overview page of your application, you can see that our application support multiple organization. If you go to the “Expose an API” section, that is where you can see your application ID URI configured. Make sure that you have created a service principal for your API application to use in the front end application.
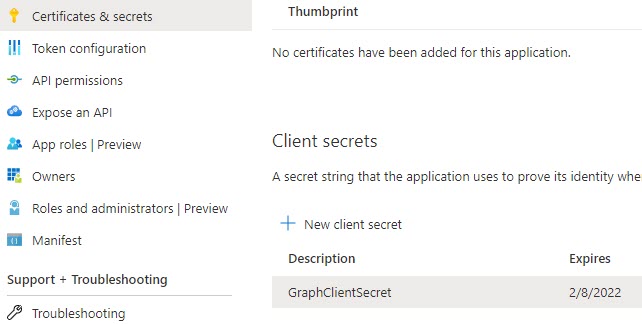
It is also possible to create a secret of our Azure AD application using PowerShell, in one of my application it was required as I am using the Graph to fetch the users from multiple tenants with a Daemon user. You can read more about that here. Here is the command to add a secret.
$secret = New-AzureADApplicationPasswordCredential -ObjectId $myAdApp.ObjectId -CustomKeyIdentifier "GraphClientSecret"You can see the value of the secret if you just output the same. And later, you can save this value to your Azure Key Vault and read it in your application. By default, the end date of your secret will be 1 year, and if you want to change it, you need to provide the start date and end date in your command.
Now, this is how our updated script looks like.
I have one front end application and a backend api application, I need to make sure that the consent screen of the AD application shows the permission required of my backend application too. To do this, we have something called “-KnownClientApplications”, we can set this in our script to create the backend ad application.
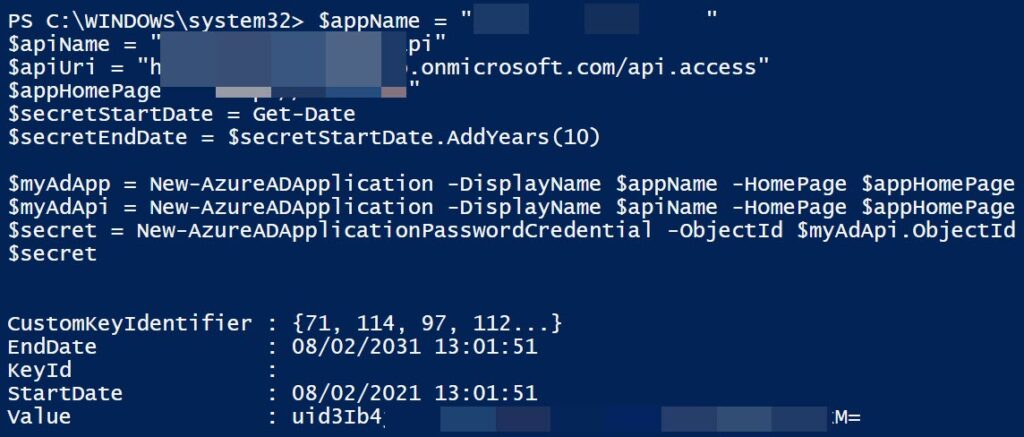
Here is the entire PowerShell command.
What this will do its that,
- Create an Azure AD application for the front end application
- Create an Azure AD application for API application
- Set both applications available to multiple tenants
- Set the front end application to use OAuth flow
- Add the Application ID of front end application to the KnownClientApplications of API application
- Expose the API application and add an Application ID URL, that can be added as permission to the front end application
- Create an application secret in the API application and set the expiry after 10 years
If everything correct, then you should have the secret values shown in the PowerShell window.
Conclusion
Congratulations and thanks a lot for being with me this far. Happy Coding!.
About the Author
I am yet another developer who is passionate about writing and video creation. I have written close to 500 blogs on my blog. And I upload videos on my YouTube channels Njan Oru Malayali and Sibeesh Passion. Please feel free to follow me.
Your turn. What do you think?
Thanks a lot for reading. Did I miss anything that you may think is needed in this article? Could you find this post useful? Kindly do not forget to share your feedback.
Kindest Regards
Sibeesh Venu

