Creating a Chat Application in Node JS with Express, MongoDB, Mongoose and Socket.io
[toc]
Introduction
In this article, we are going to a chat application in Node JS with the back end MongoDB. We will also be using Mongoose for creating the MongoDB models and Socket.io for making multi directional chats on multiple client window. If you are really new to the Node JS, I strongly recommend you to read some articles on the same here. You can also see how you can create a sample Node application with MongoDB and Mongoose here. At the end of this article, I guarantee that you will be having some basic knowledge on the mentioned technologies. I hope you will like this article.
Source Code
You can always clone or download the source code here
Background
Creating a chat application is always an interesting this to do. And it is a good way to learn a lot, because you are creating some interactions on your application. And with the release of few technologies we can create such application without any hassle. It is much more easier than ever. Here we are also going to create a chat application. A basic knowledge of Node JS, MongoDB, JavaScript, JQuery is more than enough to create this project. So, please be with me. Let’s just skip the talking and start developing.
Setting up Node application
This step requires some basic knowledge, please see some of that here. So as mentioned in that article, we have successfully created our Package.json file and installed the required packages. Let’s review our package.json file.
{
 "name": "chatapp",
 "version": "1.0.0",
 "description": "A chat application in Node JS, which uses MongoDB, Mongoose and Socket.io",
 "main": "index.js",
 "scripts": {
 "test": "echo \"Error: no test specified\" && exit 1"
 },
 "keywords": [
 "Node",
 "JS",
 "MongoDB",
 "Mongoose",
 "Socket.io"
 ],
 "author": "Sibeesh Venu",
 "license": "ISC",
 "dependencies": {
 }
}
Let’s install the packages now by running the below commands.
npm install --save express
npm install --save mongoose
npm install --save body-parser
npm install --save socket.io
Now that we have all the dependencies added to the package.json file.
"dependencies": {
    "body-parser": "^1.18.2",
    "express": "^4.16.2",
    "mongoose": "^4.13.6",
    "socket.io": "^2.0.4"
  }
Creating an App using Express
Let’s create a file server.js and build an app using Express.
var express = require("express")
var app = express()
app.listen(3020,()=>{
 console.log("Well done, now I am listening...")
})
I hope you are getting the desired output, if not, please don’t worry, just double check the codes you had written.
Running our application on browser
Let’s run our application on port 3020 and see what we are getting http://localhost:3020/..
Yes you will get an error as Cannot GET / , no worries. To fix that you need to add the following code block to your server.js file
app.use(express.static(__dirname))
Creating Index page
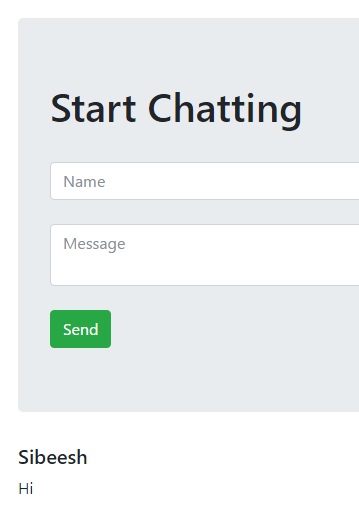
Here I am going to create a HTML 5 page with JQuery and Bootstrap referenced in it.
<!DOCTYPE html>
<title>Creating a Chat Application in Node JS with Express, MongoDB, Mongoose and Socket.io</title>
<link rel="stylesheet" href="https://maxcdn.bootstrapcdn.com/bootstrap/4.0.0-beta.2/css/bootstrap.min.css" crossorigin="anonymous">
<script src="https://code.jquery.com/jquery-3.2.1.min.js" crossorigin="anonymous"></script>
<script src="https://cdnjs.cloudflare.com/ajax/libs/popper.js/1.12.3/umd/popper.min.js" crossorigin="anonymous"></script>
<script src="https://maxcdn.bootstrapcdn.com/bootstrap/4.0.0-beta.2/js/bootstrap.min.js" crossorigin="anonymous"></script>

<div class="container">
    <br>
    <div class="jumbotron">
        <h1 class="dispaly-4">Start Chatting</h1>
        <br>
        <input id="txtName" class="form-control" placeholder="Name" type="text">
        <br>
        <textarea id="txtMessage" class="form-control" placeholder="Message"></textarea>
        <br>
        <button id="send" class="btn btn-success">Send</button>
    </div>
    <div id="messages"></div>
</div>
As you can see, the page has two text boxes and one button. We will be creating some scripts very soon which uses these controls.
Start developing the chat app
Till now, it was all basic, and we have done it well. Now it is time to go and write some advanced codes. So, are you ready?
Create model from page data
Here we are going to create the model from the page data, that is, from the controls we have in our page. We will be using JQuery to do so.
<script>
    $(() => {
        $("send").click(() => {
            var chatMessage = {
                name: $("#txtName").val(), chat: $("#txtMessage").val()
            }
            postChat(chat)
        })
    })

    function postChat(chat){
        console.log(chat)
    }

</script>
Now that we have got the model from the user, let’s save it to the DB.

Model values on browser console
Setting up database
We are going to set up our database in mLab as mentioned in this article Using MongoDB on Node JS Application Using Mongoose. So let’s just require Mongoose and do the needed changes.
var express = require("express")
var mongoose = require("mongoose")

var app = express()

var conString = "mongodb://admin:admin@ds038319.mlab.com:38319/mylearning"
app.use(express.static(__dirname))

var Chats = mongoose.model("Chats", {
    name: String,
    chat: String
})

mongoose.connect(conString, { useMongoClient: true }, (err) => {
    console.log("Database connection", err)
})

app.listen(3020, () => {
    console.log("Well done, now I am listening...")
})
Creating a Post request
Now let’s create a post requests in our index.html file which will the post API in our server.js file.
index.html
function postChat(chat) {
        $.post("http://localhost:3020/chats", chat)
}
server.js
app.post("/chats", async (req, res) => {
    try {
        var chat = new Chats(req.body)
        await chat.save()
        res.sendStatus(200)
    } catch (error) {
        res.sendStatus(500)
        console.error(error)
    }
})
Let’s just run our application and test it out.
You may be getting an error as “(node:10824) DeprecationWarning: Mongoose: mpromise (mongoose’s default promise library) is deprecated, plug in your own promise library instead: http://mongoosejs.com/docs/promises.html””, here to fix this, we need to use the default promise instead of the Mongoose promise. Let’s change that. Add this code mongoose.Promise = Promise to our server.js file. Give it a try after setting it.
Still it is not working right, you are getting undefined at the place, var chat = new Chats(req.body) in our Post API . At this stage, we will have to use our body-parser packages, do you remember the package we have installed? Let’s just require that package var bodyParser = require("body-parser") add the preceding codes to our server.js file.
app.use(bodyParser.json());
app.use(bodyParser.urlencoded({ extended: false }))
Now this will convert the request to a JSON object by default. Give it a try again, I am sure you will get the actual value instead of undefined.
Creating a Get request for all the chat data
We have written codes to write our data into our database, we will have to show this data on our page right? Here we are going to write the get requests in out index.html page which will call the get API.
index.html
function getChats() {
     $.get("/chats", (chats) => {
         chats.forEach(addChat)
     })
}

function addChat(chatObj){
    $("#messages").append(`<h5>${chatObj.name} </h5><p>${chatObj.chat}</p>`);
}
And call the function getChats() in document ready event.
server.js
app.get("/chats", (req, res) => {
    Chats.find({}, (error, chats) => {
        res.send(chats)
    })
})
Here we are passing {} to our find function, this means, we are going to get all the chats without any filter. Just run your application now, and check whether you are getting the chat messages you had sent.
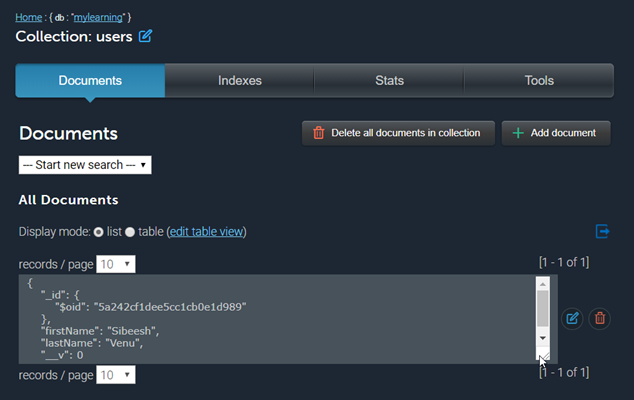
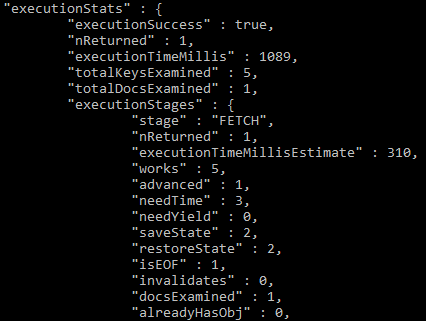
Retrieving data from a MongoDB
Implementing Socket.io
Now the chat we are sending is getting saved to our database and we are able to load the same on page load. Is it the behavior of a perfect chat application? Absolutely no, a perfect chat application will be able to,
- Show the chat message to the UI right after the data gets inserted to database
- Show the chats in multiple clients, here in our application, if you are opening the URL in multiple browser instance, and if you need to show the chats to both instances, you will have to refresh the pages right? This is not a recommended way
That’s why we are going to implement Socket.io in our application.
Require the package
Unlike the other packages, adding socket.io to the application is a different process, we will have to require the http server first, then, set our app. You can see more information on socket.io here.
var http = require("http").Server(app)
var io= require("socket.io")(http)
Enabling the connection
To enable the connection, we need to use the function io.on.
io.on("connection", (socket) => {
    console.log("Socket is connected...")
})
Listen using new http server
Now that we have a new http server, and we should change our listen code to our new http.
var server = http.listen(3020, () => {
    console.log("Well done, now I am listening on ", server.address().port)
})
Changes in script
Let’s do listen for the event “chat” now in our html page.
var socket = io()
socket.on("chat", addChat)
Please do not forget to include the socket.io.js reference in our index page, other wise you may get an error as “Uncaught ReferenceError: io is not defined”
Emits the event
Once the above step is completed we need to make sure we are emitting the new event on our Post API.
app.post("/chats", async (req, res) => {
 try {
 var chat = new Chats(req.body)
 await chat.save()
 res.sendStatus(200)

 //Emit the event
 io.emit("chat", req.body)

 } catch (error) {
 res.sendStatus(500)
 console.error(error)
 }
})
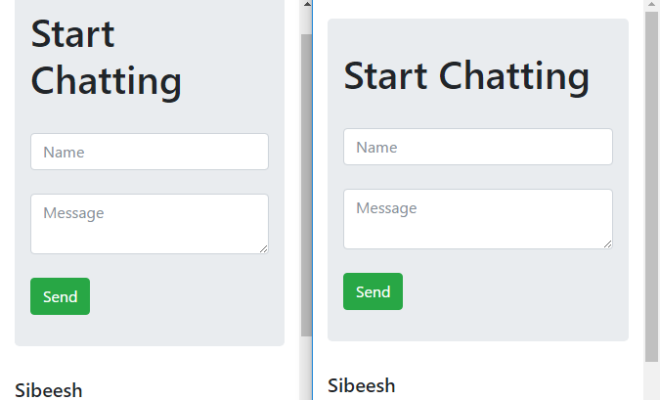
Let’s just run our application in two browser instances and check for the output.

Socket.io Output
Please make sure that you are getting the chats in the second instance when you send it from the first instance of the browser and vice versa.
Conclusion
Thanks a lot for reading. Did I miss anything that you may think which is needed? Could you find this post as useful? I hope you liked this article. Please share me your valuable suggestions and feedback.
Your turn. What do you think?
A blog isn’t a blog without comments, but do try to stay on topic. If you have a question unrelated to this post, you’re better off posting it on C# Corner, Code Project, Stack Overflow, Asp.Net Forum instead of commenting here. Tweet or email me a link to your question there and I’ll definitely try to help if I can.
Kindest Regards
Sibeesh Venu