
[toc]
Introduction
When you have an on premises Virtual Machine and if you need to move the same to a cloud, you should create a Virtual Hard Disk. The virtual hard disks are of two types, one is VHD and the other is VHDX. Unfortunately the Microsoft Azure cloud supports only the generation 1 VMs which are VHD, These VHDs are fixed size and the maximum size allowed is 1023 GB. Here in this article, we are going to see how we can spin up a Virtual Machine in Azure from the VHD file we have. I will explain why I came to this situation in the Background section. I hope you will find this article useful.
Background
I was working with a product called UCS (Univention Corporate Server), you can consider it as a private play store where you can install and use your custom applications, you are also allowed to use the existing ones as well. Now I wanted to create an Azure VM with the UCS in it, but all I had in my hand was a VHDX file, which is not supported in Azure.
Steps
In this article, we will be doing the following tasks.
- Converting the VHDX file to VHD
- Upload it to the Azure Blob storage
- Create a Managed Image from the VHD
- Create the Virtual Machine from the Managed Image
Spin up the Azure VM from VHDX
As we have discussed, the first step is to convert the VHDX file to VHD.
Convert VHDX to VHD
We are going to use PowerShell for the conversion as it has some modules already to support this conversion.
Convert-VHD –Path c:\CreateVM\ucs.vhdx –DestinationPath c:\CreateVM\ucs.vhd -VHDType FixedPlease be noted that the Argument -VHDType is very important, you may be getting an error as when you try to create the Managed image using the command New-AzImage.
New-AzImage : Only blobs formatted as VHDs can be imported.
ErrorCode: InvalidParameter
ErrorMessage: Only blobs formatted as VHDs can be imported.
ErrorTarget: disks
StatusCode: 400
ReasonPhrase: Bad Request
OperationID : 16baa116-be93-4054-8ba9-265eda636f0c
At line:1 char:10
+ $image = New-AzImage -ImageName $imageName -ResourceGroupName $rgName ...
+          ~~~~~~~~~~~~~~~~~~~~~~~~~~~~~~~~~~~~~~~~~~~~~~~~~~~~~~~~~~~~
    + CategoryInfo          : CloseError: (:) [New-AzImage], ComputeCloudException
    + FullyQualifiedErrorId : Microsoft.Azure.Commands.Compute.Automation.NewAzureRmImage
Once you are done a new VHD image will be created in the destination path you have given. Please be noted that the size of this file may be huge, and when you upload it to the Blob storage, it may take a longer depends on the network speed you have.
Upload the VHD file to Azure Blob Storage
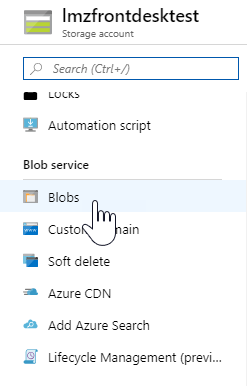
As a prerequisite, you should create a storage account before you start this process. Once you have created the storage account, you are good to go and start the upload. Go to your Storage account, and click on the Blobs under blob services.
Now you can click on the +Container menu item and create a new container which is nothing but the container for your files. Now we can go inside the container and click on the Upload button. In the upcoming pop up you can select the VHD file using the file picker option and upload the file. As I said earlier, this process is totally depends on your network speed.
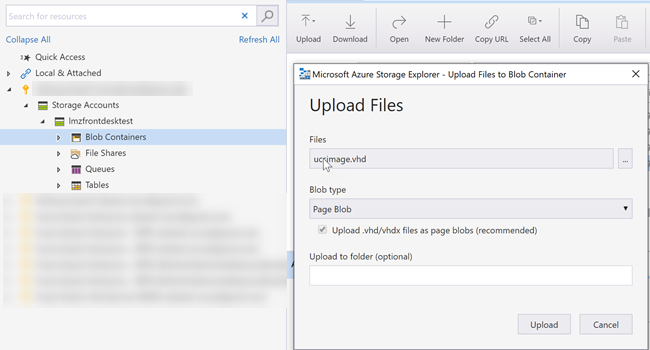
Sometimes, due to the browser inactivity, the uploading of the heavy files to the blobs using Azure portal can be a headache as it throws error. One of the suggestion I can give you here is to use Azure Storage Explorer tool, which is quite easy to use and effective. Once you download the tool, login with your Azure credentials and got to the storage accounts and click on Blob Containers. In the new window click on Upload and then Upload files.
Please make sure that you are selecting the Blob type as Page Blob and then click upload. The uploading is really faster if you are using the tool instead of the portal.
Create a Managed Image from the VHD file
As we have our VHD file in our Blobs, now it is time to create an Image from the file. We are going to write some PowerShell commands to do the work for us. To set the configuration we are going to use the command New-AzImageConfig. If you are getting the error “The term New-AzImageConfig ‘ is not recognized as the name of a cmdlet”, you should install and import the module Az.
Install-Module Az.Compute
import-module Az.Compute
It is possible to get some additional error when you try to install the Az module. In that case, you can try the preceding command.
Install-Module Az.Compute -AllowClobberOnce that is done, we can set some variables in the PowerShell as follows.
$vmName = "ucs"
$rgName = "ucs"
$location = "West Europe"
$imageName = "ucs"
$osVhdUri = "https://ucs.blob.core.windows.net/files/ucs.vhd"
Now we can start the image creation as preceding.
$imageConfig = New-AzImageConfig -Location $location
$imageConfig = Set-AzImageOsDisk -Image $imageConfig -OsType Linux -OsState Generalized -BlobUri $osVhdUri
$image = New-AzImage -ImageName $imageName -ResourceGroupName $rgName -Image $imageConfig
As the UCS is a Linux based system, I had given the -OsType as Linux, you may have to change it as per your needs. If you are trying to run the command New-AzImage with the VHDX blob, you will get an error as below.
New-AzImage : Blob name in URL https://ucs.blob.core.windows.net/files/ucs.vhdx must end with ".vhd" extension.
ErrorCode: InvalidParameter
ErrorMessage: Blob name in URL https://ucs.blob.core.windows.net/files/ucs.vhdx must end with ".vhd" extension.
ErrorTarget: blobUri
StatusCode: 400
ReasonPhrase: Bad Request
OperationID : 668b8e66-85b3-4c7b-a182-4f155e16b66d
At line:1 char:10
+ $image = New-AzImage -ImageName $imageName -ResourceGroupName $rgName ...
+          ~~~~~~~~~~~~~~~~~~~~~~~~~~~~~~~~~~~~~~~~~~~~~~~~~~~~~~~~~~~~
    + CategoryInfo          : CloseError: (:) [New-AzImage], ComputeCloudException
    + FullyQualifiedErrorId : Microsoft.Azure.Commands.Compute.Automation.NewAzureRmImage
But we don’t need to worry about it as we already converted our VHDX file to VHD format. Once the New-AzImage command is successful, you can see the image in the Azure portal if you go to the Images section. You can search for the keyword “Images” in the portal.
Create a VM from the Managed Image
As we have the image now, we can create our VM easily from the Azure portal. Go to the Images and select your image and then click on the button +Create VM. In the next page, you can give the details of your VM. You can also create the VM by using the PowerShell command as preceding.
New-AzVm `
    -ResourceGroupName "myResourceGroup" `
    -Name "myVMfromImage" `
    -ImageName "myImage" `
    -Location "East US" `
    -VirtualNetworkName "myImageVnet" `
    -SubnetName "myImageSubnet" `
    -SecurityGroupName "myImageNSG" `
    -PublicIpAddressName "myImagePIP" `
    -OpenPorts 3389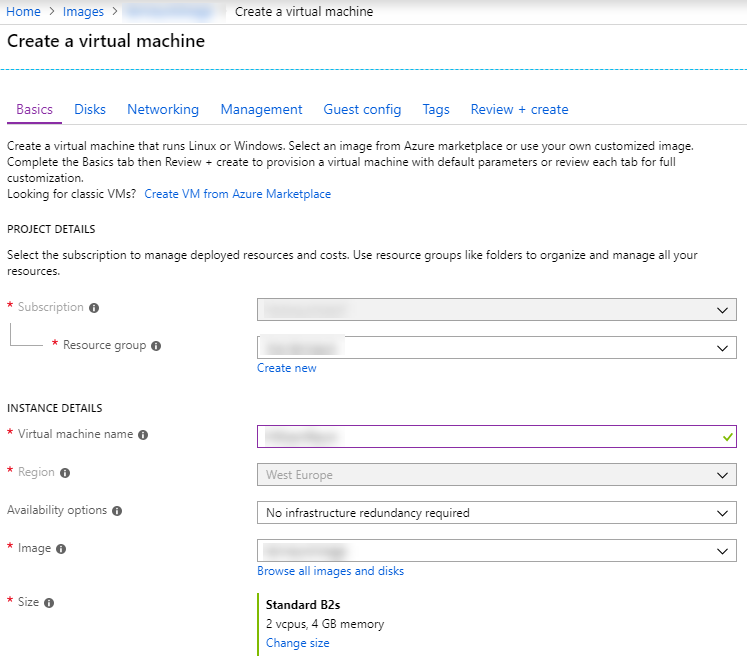
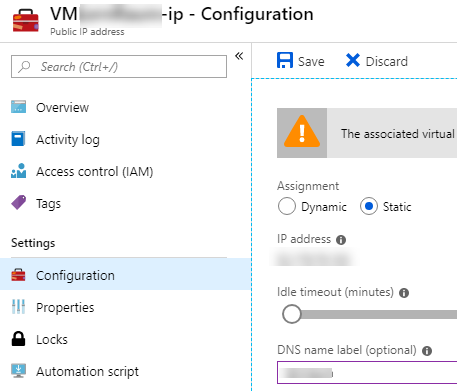
Once you had filled all the details, you can either click on the Review+Create or you can go through each step. The creation of VM can take a few minutes. Once the task is done, you can go to your Virtual Machine and spin up the same. I would also recommend you to assign a static IP and DNS name to your VM.
Conclusion
In this article, we have learned,
- What are VHDX and VHD files
- How to convert the VHDX file to VHD
- How to upload VHD files to Azure Blob storage
- How to create Managed Image from the VHD file in Azure
- How to create Virtual Machine using the Managed Image
Your turn. What do you think?
Thanks a lot for reading. Did I miss anything that you may think which is needed in this article? Could you find this post as useful? Kindly do not forget to share me your feedback.
Kindest Regards
Sibeesh Venu