
[toc]
Introduction
I understand that you need to move all of your Azure DevOps Work Items from one of your organization to another. And that is the reason why you are reading this article, no worries, you came to the right place. At the end of this article, I am sure that you will be able to achieve this. In my previous article, I had shown you how you can move your repository from one organization to another, if you have not read it, consider reading it.
Move Work Items to Another DevOps
As I mentioned in my previous post I had already set up a sample project in my source DevOps organization and another in my destination DevOps organization. Then I created a sample user and gave access to both projects.
Check the DevOps Project Process
Now before we start we need to make sure that both of the projects follow the same Process in the DevOps.

Change the Project Process
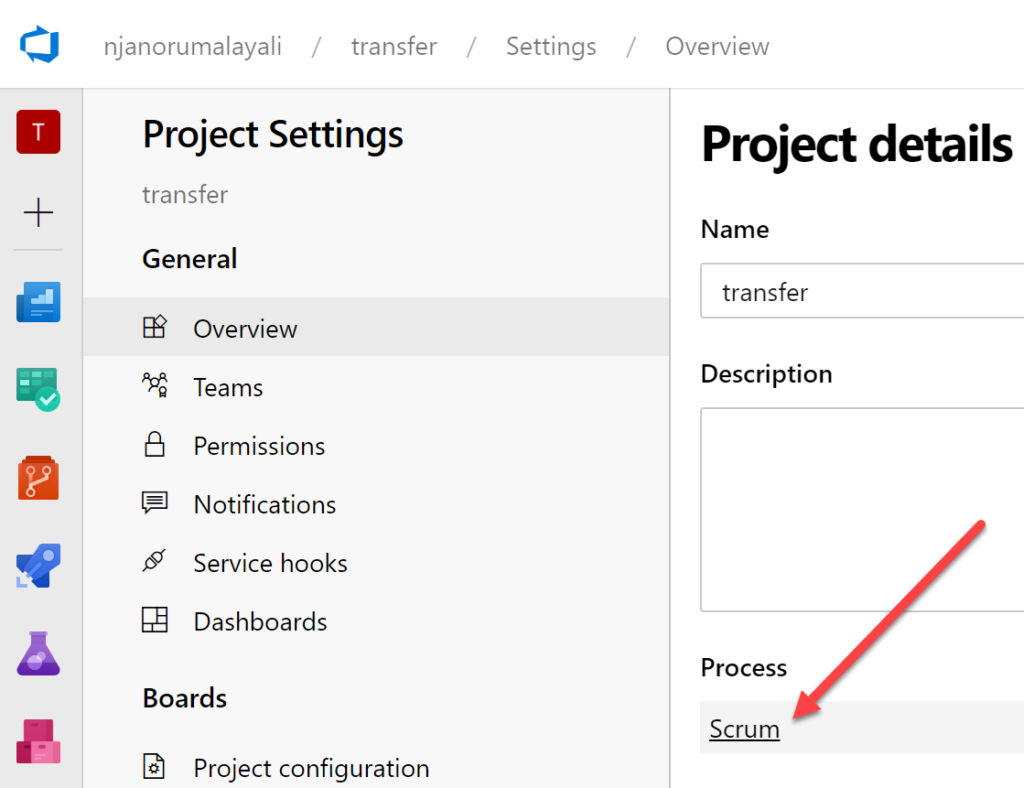
If the process of the two projects is different, then you will end up in many issues in the publishing steps, thus changing it to one is very important. To change, you need to have certain permissions as mentioned in this post. Once you have enough permission, go to your organization settings and click on the Process menu under Boards.

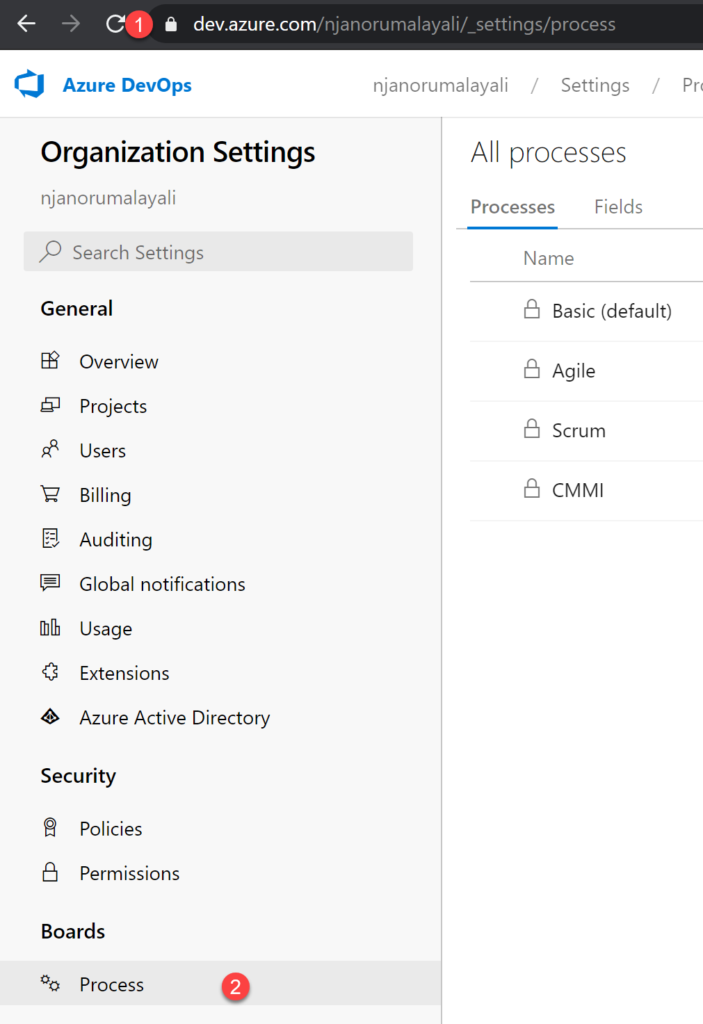
Now you should be able to select the projects which are assigned to each process, clicking the project number will redirect you to the list.


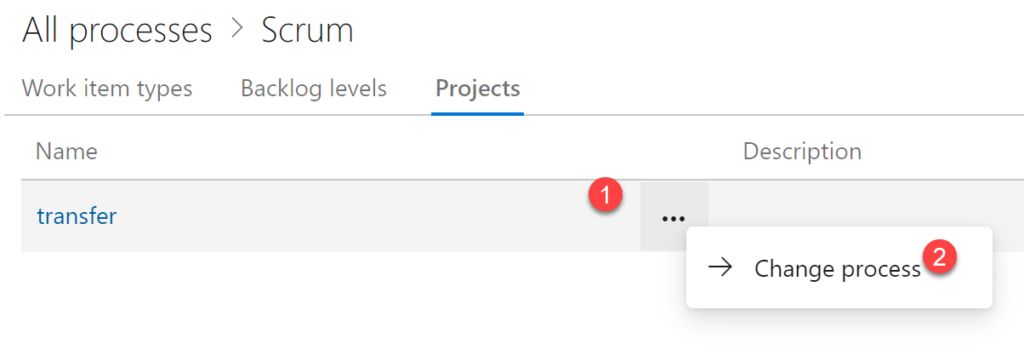
Now click on the three dots you see near to the project name and then click on the Change button.

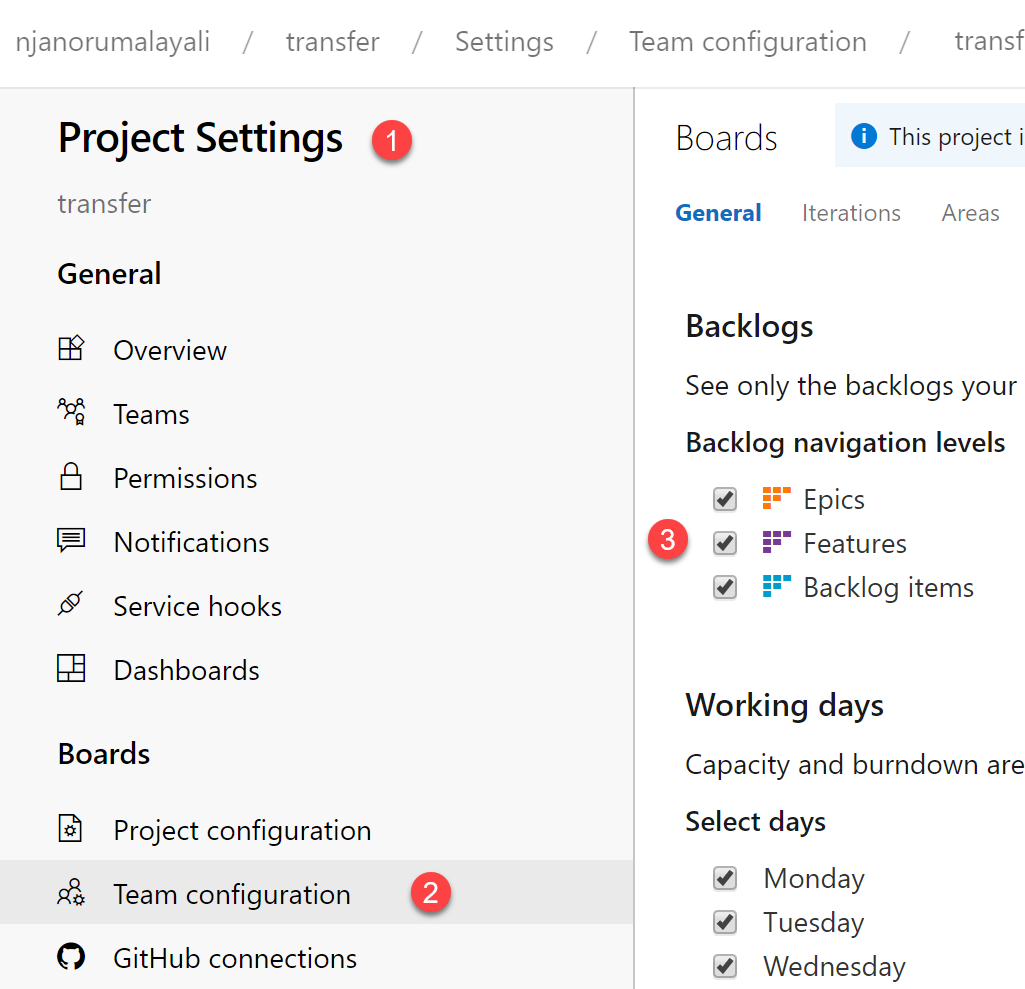
Just select the process and click Save. And also make sure that you have enabled all the Backlog Navigation Levels.

You are done!.
Create Query to Get the Work Items
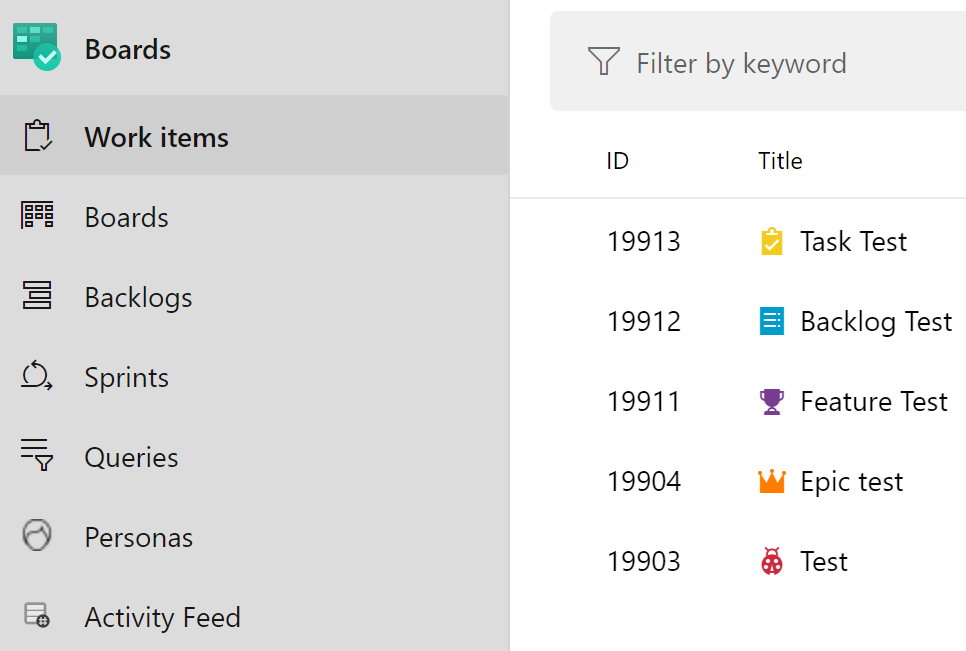
Now let’s say that I have below sample work items, and I need to create a query to get all these work items.

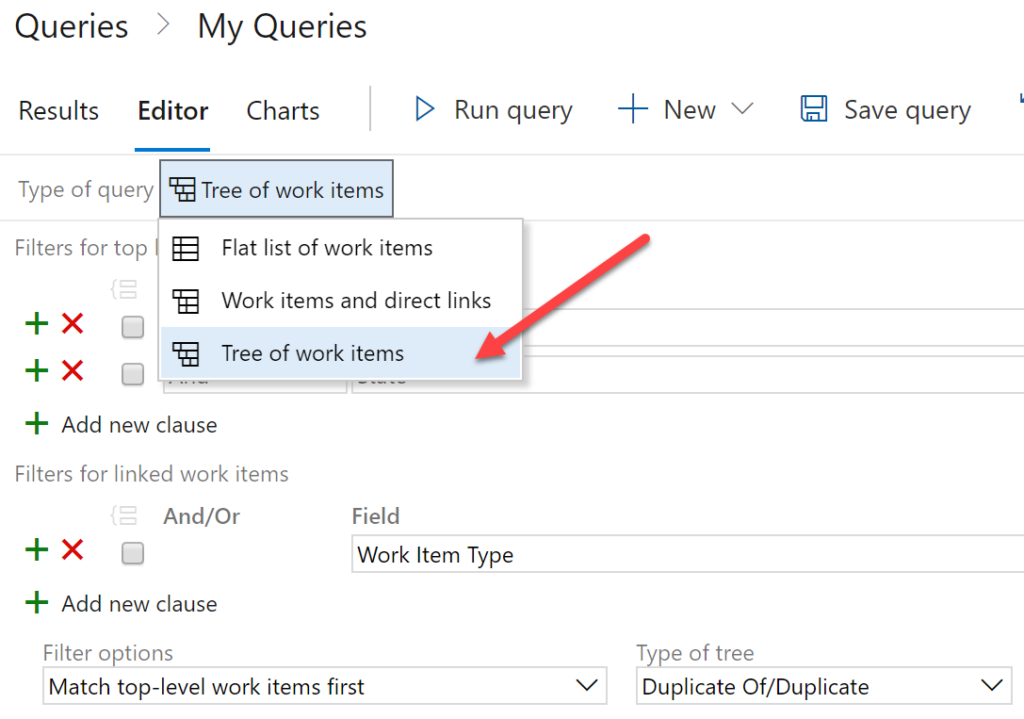
Click on the Queries menu on the left side and then click on the +New Query button. In the Type of Query button, click on the “Tree of work items” if you need the tree structure in the work items otherwise just click on “Flat list of work items”

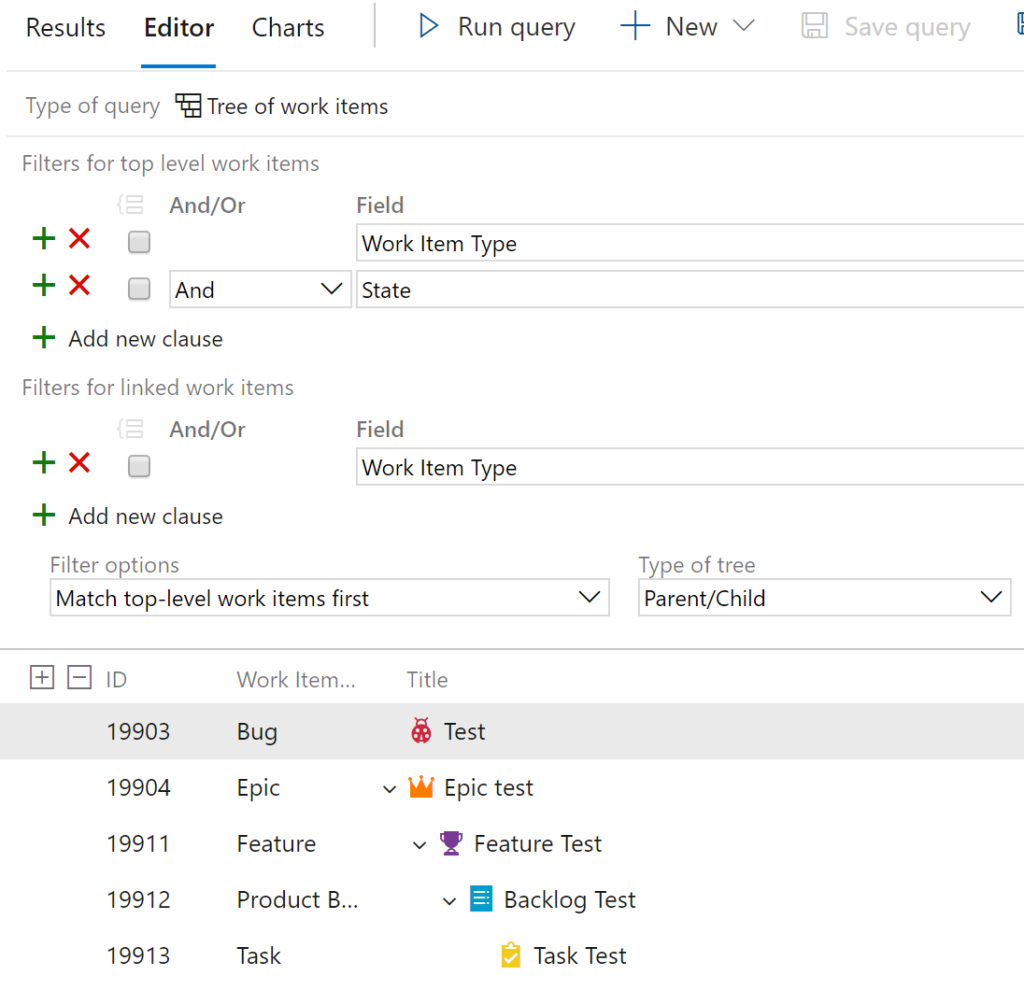
Change the Type of tree dropdown value to Parent/Child, and then run the query.

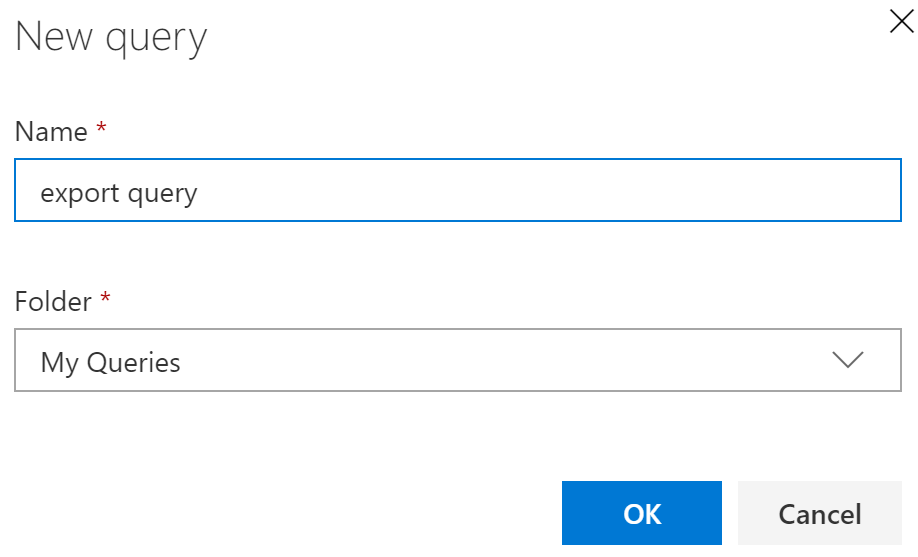
Just save the query, we will be using that very soon.

Install the Azure DevOps Office Integration Tool
To download the tool, please visit here. Once you install the same, you should see a Team tab in your Excel, yes, we are going to play with Excel now.
Get Data From Azure DevOps in Excel
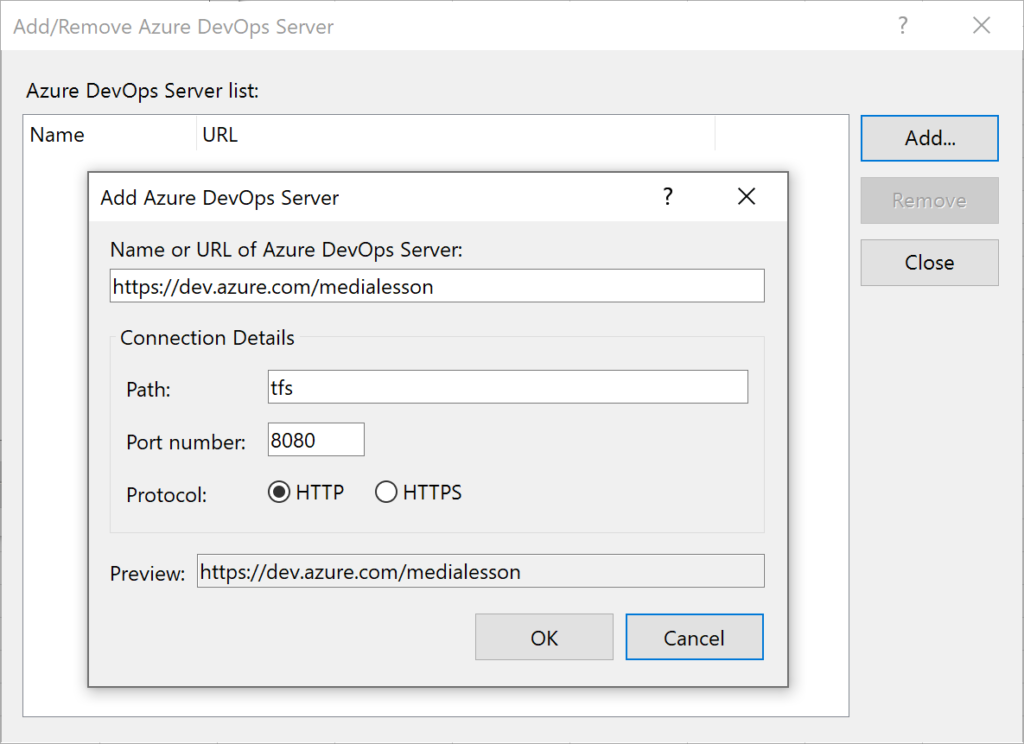
Click on the Team button and then New List, you will see an option to select the server, or if you don’t have any you need to add it by clicking the servers button.


Now add both Source and Destination DevOps servers.

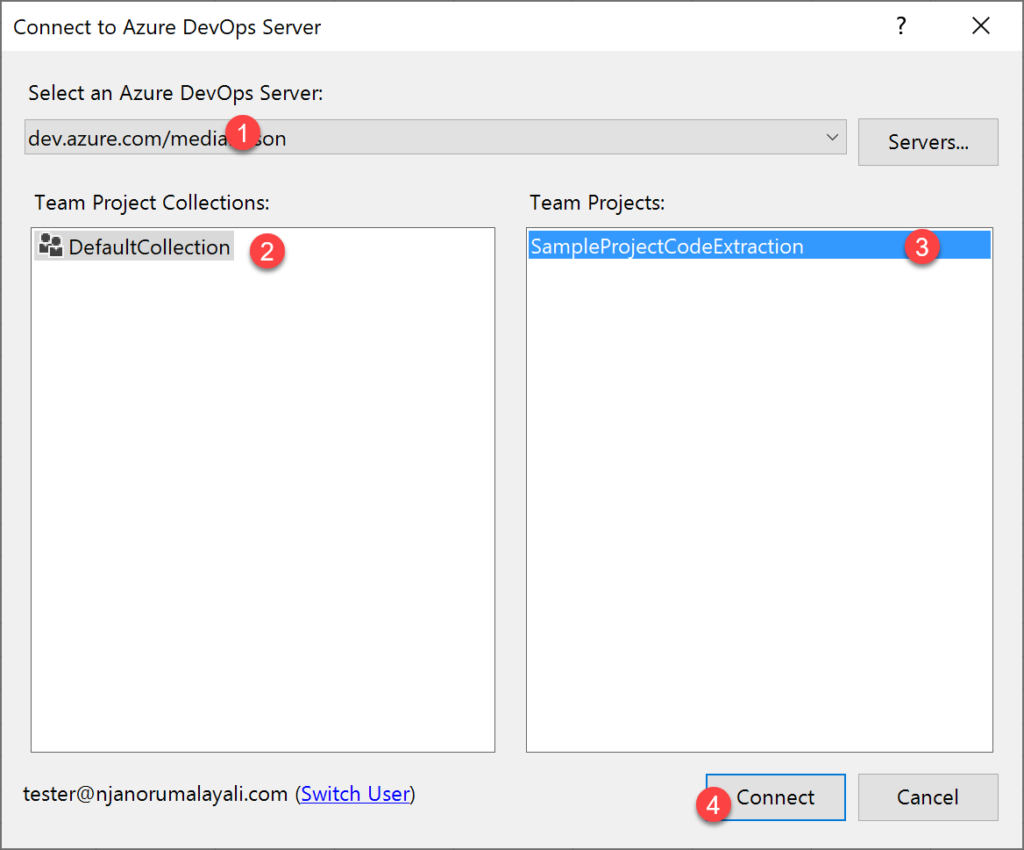
Now it is time to connect our Source DevOps server.

Click on the New List under the Team tab, will give you an option to select the query that we created before, just select the same and press Ok.

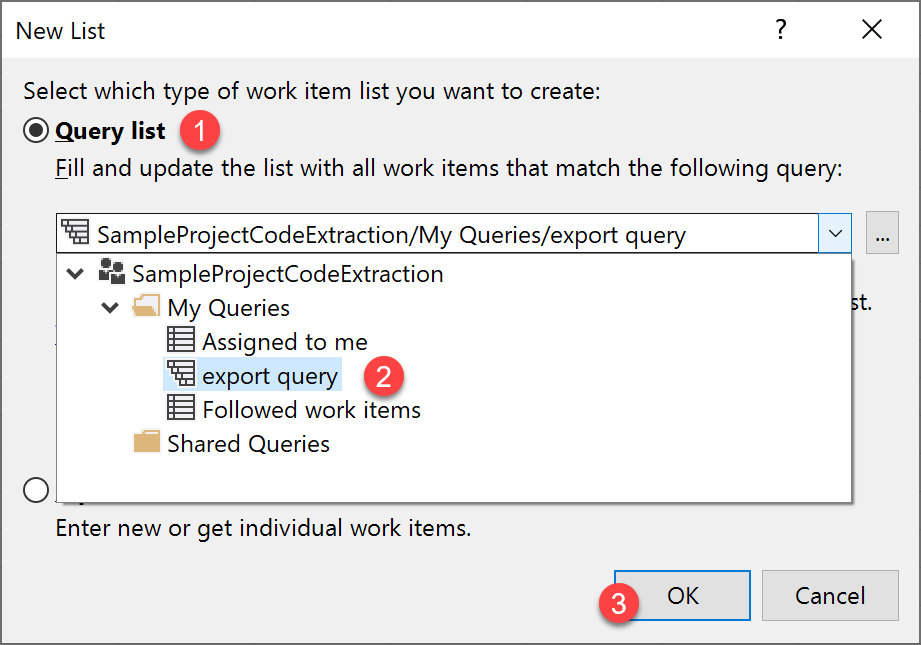
This will fetch all the work items from your source DevOps.


Click on the Team button, select any columns in the excel sheet, click on the Choose Column. Select All Work Items Types in the dropdown and then move all the columns to the right side.

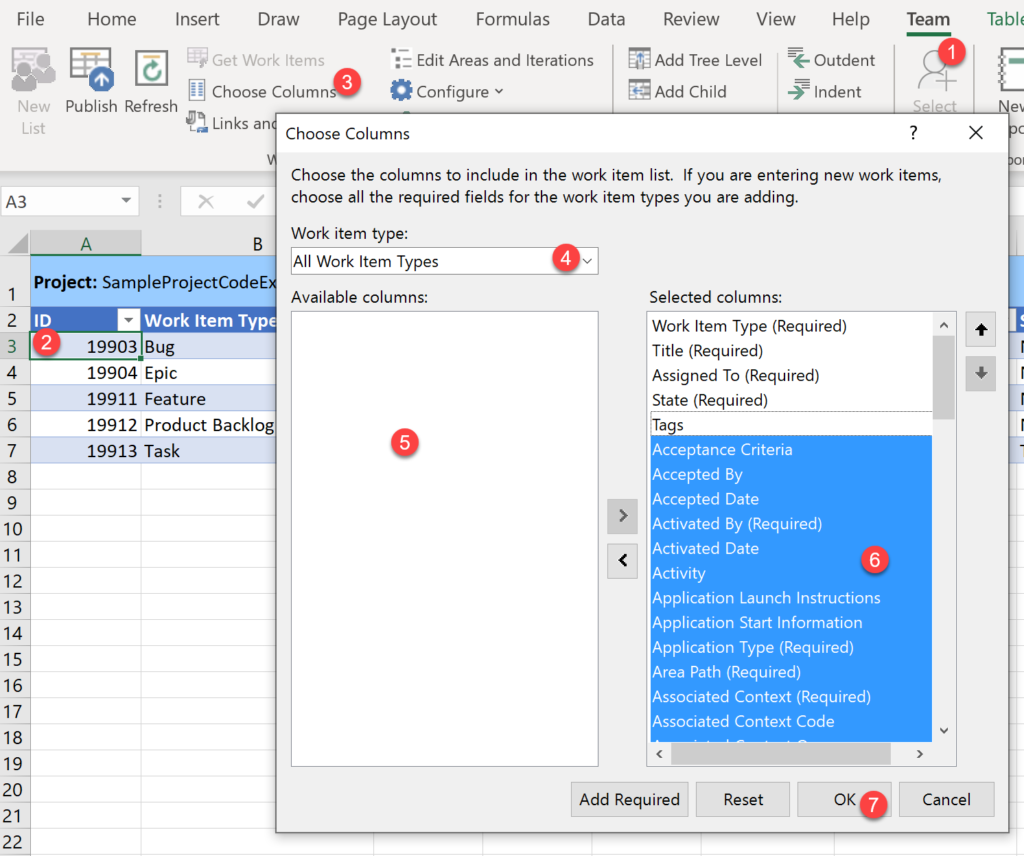
This will show all the columns in the excel sheet with data. Now it is time to publish these work items to our destination DevOps.
Publish Work Items to Destination DevOps
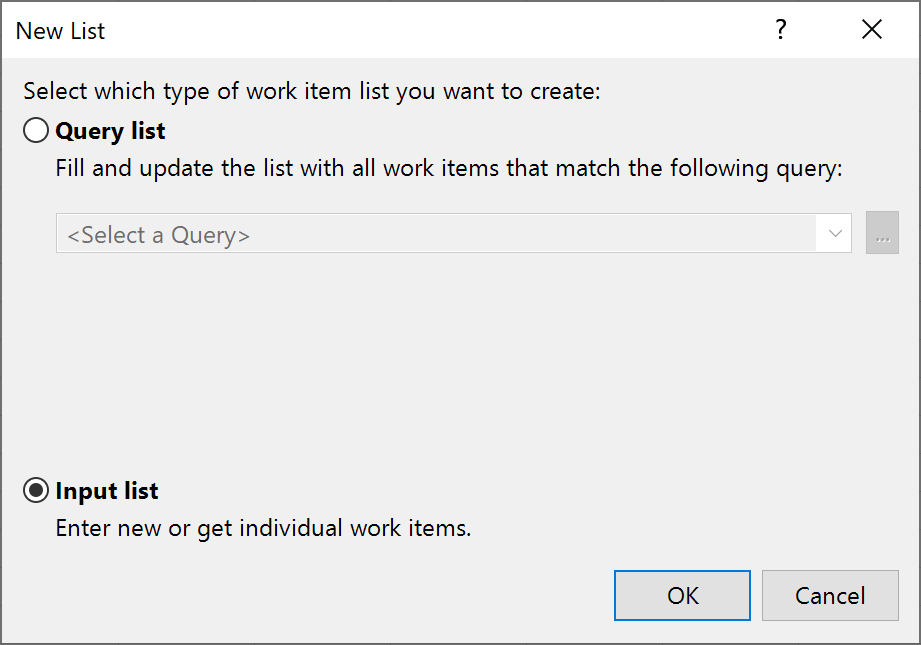
To do this, open another Excel then click on the New List button under the Team Tab. Now select the destination DevOps and connect. In the next Pop up, select the Input List option.
You will be seeing some columns in the excel sheet now. Click the Team button and then Add Tree Level, this will make sure that we have the tree structure in our DEstination DevOps too.
Please make sure that you are adding as many levels you have in your Source DevOps Excel sheet. In our case, it is 4.
Tree Level
Now click on the Choose Columns and add all the columns as we did with the Source Excel Sheet. Please make sure that both Excel sheet columns are in the same order. You can order the fields in the order you wish. Once both excel sheet has the same order, then select the data from the source and then select the first data cell in the destination excel sheet and then press Enter. This is how the data looks like in the destination Excel.

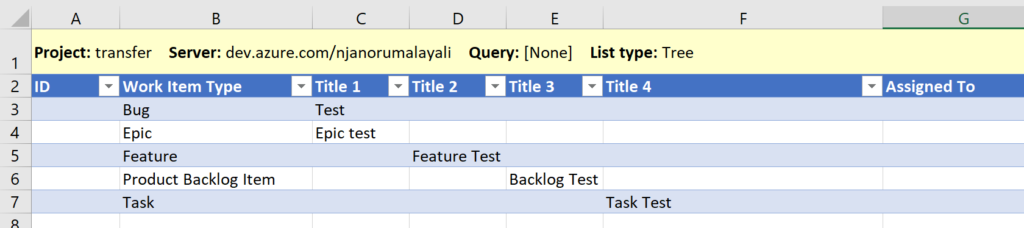
Please be noted that the above screenshot doesn’t include all the columns. In your case, it should be there in the excel sheet.
Now select any column in the Excel sheet and then click on the Publish button under the Team tab. By chance, if you are getting any errors you may have to manually review the same and assign the right values.


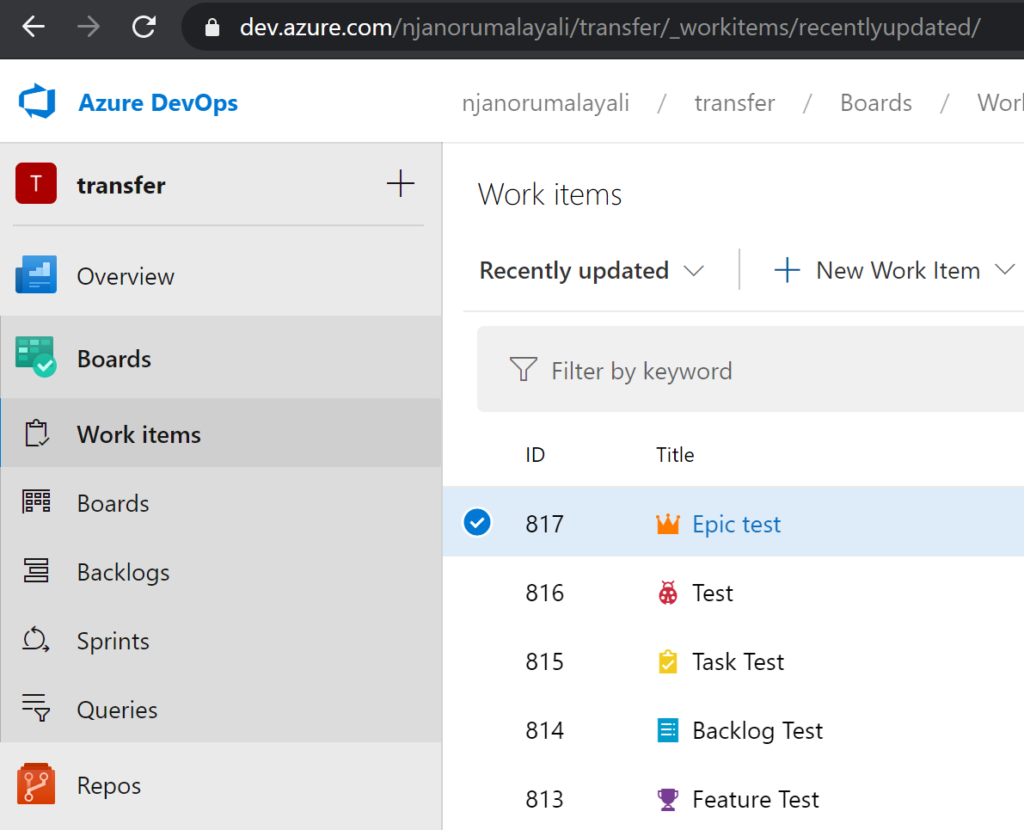
If everything goes well, you should see all your work items in your destination Azure DevOps.

Conclusion
Thanks a lot for reading this article. I hope now you have learned about
- how to use queries in Azure DevOps
- how to use Azure DevOps integration tools for Office
- how to change the project Process
- how to move the work items from one DevOps to another
If you have learned anything else from this article, please let me know in the comment section.
Follow me
If you like this article, consider following me, haha!.
Your turn. What do you think?
Thanks a lot for reading. Did I miss anything that you may think which is needed in this article? Could you find this post useful? Kindly do not forget to share your feedback.
Kindest Regards
Sibeesh Venu