Publish Your Angular GitHub Repository as a GitHub Page
[toc]
Introduction
In this article, we will see how we can publish one of our GitHub repository as a GitHub page. We will be discussing the problems I have faced while doing so, with screenshots. If you are ready, let’s just go ahead and create the page.
Background
I am sure that there are many related articles available on internet, but some of them are only explaining the steps to achieve this, but not the problems faced, so I thought I could write about the problems I faced while creating a page for my GitHub repository.
Prerequisites
- A User/Organization GitHub account
- An Angular repository
Publish GitHub Page
Selecting the repository
In this phase, you can select any Angular repository you have in your profile. I am going to select my repository Azure-AI-Image-Text-Reader.
Creating the GitHub page
Now let’s build our repository. Please make sure to change the base href property of your index.html file. Usually the value of the base href is “/”, now we are going to change the same with the argument
–base-href in our build command.
ng build --prod --base-href "https://sibeeshvenu.com/Azure-AI-Image-Text-Reader/"I am already using GitHub page for my user account and I have also enabled the custom domain for the same, that is the reason why I had given the custom URL in the base href. In your case, you should provide the URL as https://<username>.github.io/<repositoryName>/
Case sensitive repository URL
Please do not remove the slash (/) at the last of the URL and also remember that the repository name is case sensitive.
The above command will create a new folder if you are using angular cli 6 or the above, the folder name will be the project name specified in the angular.json file.
{
  "$schema": "./node_modules/@angular/cli/lib/config/schema.json",
  "version": 1,
  "newProjectRoot": "projects",
  "projects": {
    "azure-ai-image-text-reader": {
      "root": "",
      "sourceRoot": "src",
      "projectType": "application",
      "prefix": "app",
      "schematics": {
        "@schematics/angular:component": {
          "styleext": "scss"
        }
      }
}
With the help of the npm package angular-cli-ghpages, we can easily upload the build contents to our repository.
npm i angular-cli-ghpages --save-devAnd then use the command below.
npx ngh --dir=dist/Azure-AI-Image-Text-ReaderIf you are not sure about the difference between npm and npx, I recommend you to read my article here.
Here the –dir property is used to specify the folder where the build contents are generated. Please be noted that by default the directory name is dist, so if your angular cli version is below 6, you don’t need to specify the folder name.
If you are getting an error as preceding, while you run the ngh command, please make sure that you had installed the package
PS C:\Users\SibeeshVenu\source\repos\Azure-AI-Image-Text-Reader> npx ngh --dir='dist/azure-ai-image-text-reader' --branch=page
npx: installed 87 in 8.588s
Path must be a string. Received undefined
(node:16984) [DEP0022] DeprecationWarning: os.tmpDir() is deprecated. Use os.tmpdir() instead.
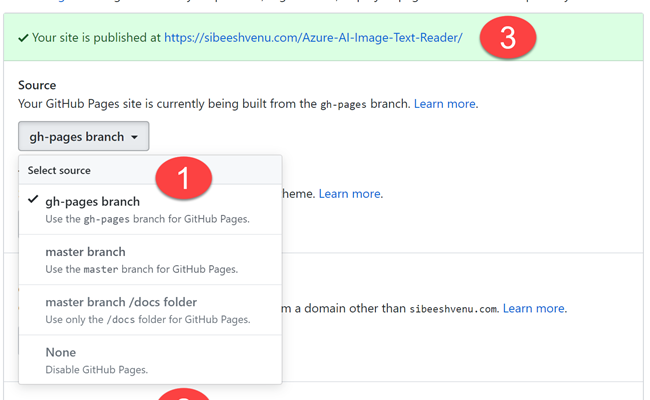
Once the task is done, we can go to our repository settings and activate the GitHub page for our repository. Click on the settings and go to the section GitHub Pages.
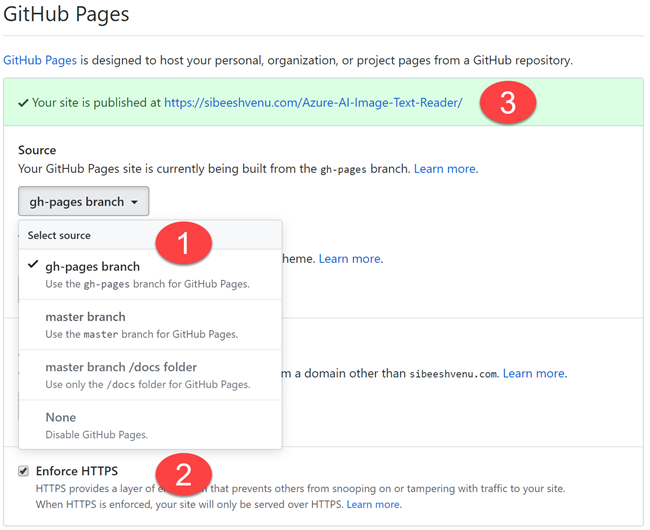
Now you can go to the page URL and check whether you angular application is loading correctly or not. In my case, I can go to the URL
https://sibeeshvenu.github.io/Azure-AI-Image-Text-Reader/ or
https://sibeeshvenu.com/Azure-AI-Image-Text-Reader/
Conclusion
Wow!. Now we have learned, how we can publish a GitHub page of our GitHub repository. We have also covered possible small mistakes and the remedies for the same.
Your turn. What do you think?
Thanks a lot for reading. Did I miss anything that you may think which is needed in this article? Could you find this post as useful? Kindly do not forget to share me your feedback.
Kindest Regards
Sibeesh Venu

