How to Consolidate Data in Excel
Introduction
Today I came across the requirement to determine the consolidated data in Excel. I was just calculating my monthly expenses for the past few months. So I thought of sharing how to consolidate the data in Excel, so that it will be more readable.
How
Let us say I have the data as follows.
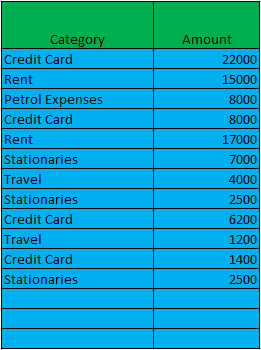
You can see that some of the categories are repeating in that list. So we need to consolidate the items, right? So that I can get an overview of how much money I have spent in each category, so let us do that.
Step 1
Create the headers.

Step 2
Click on the adjacent cell below “Consolidated Category”, so that you can consolidate the data there.
Step 3
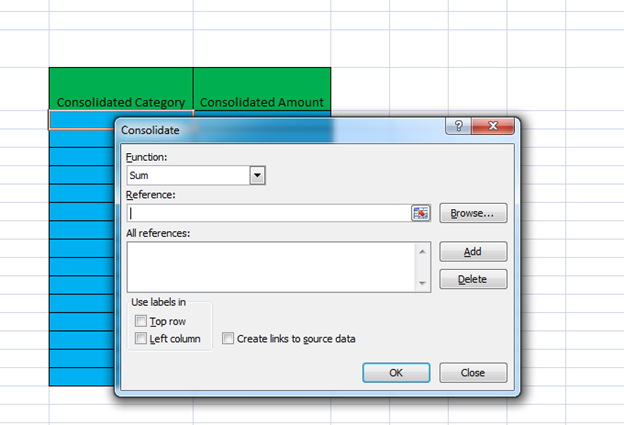
Go to Data and click on the tab Consolidate.

The moment you clicked, a pop-up will open as follows.
Step 4
Now click on the reference icon just near to the Browse button.
Once you click on the reference, please select the data that is not consolidated as follows.
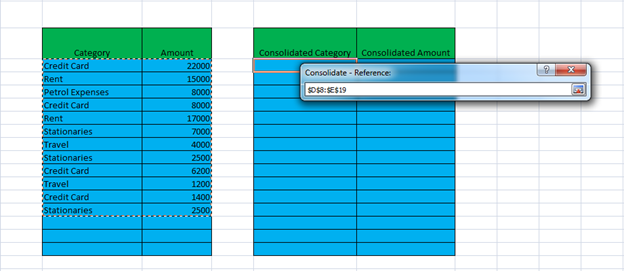
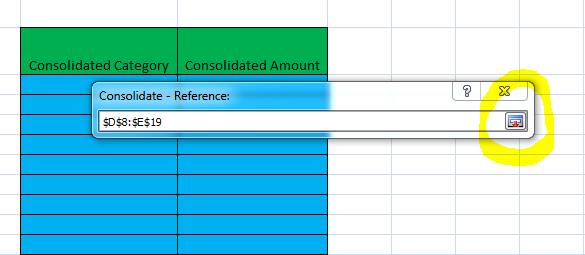
Please note that a reference formula has been added to the reference box.
Step 5
Now click on the reference icon again as follows.
Step 6
Please click on the Add button so that your formula can be used the next time also. Once you have clicked on that, you can see that your formula has been added to all the references.
Step 7
Now an important part is, since our data is based on the category and the category is left column in the selection, you need to check the Left column.
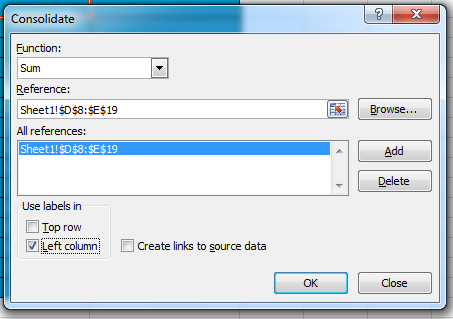
Once you are done, please click OK.
Output
Now you will get output as follows.
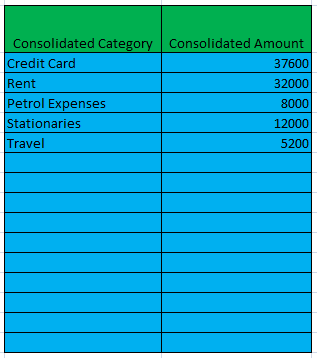
Cool! You have done it.
Conclusion
Please provide your valuable suggestions and comments. Thanks in advance.
Kindest Regards,
Sibeesh Venu


