Setting Up Your First Raspberry PI
[toc]
Introduction
Wow!. You have a Raspberry PI in your hand. You can consider this as a small computer. When you have something which computes things, you can call it a computer right? Have you ever imagined a computer without maths? A Raspberry PI can do many things in real life, the performance will be less when you are comparing your super laptop/computer with a Raspberry PI, but is not meant be compared with that. There are many cases, where a Raspberry PI can do the things you want perfectly, in this post we are not going to cover those, instead, we will be going through how we can set up your Raspberry PI. Let’s just start then.
Background
I wanted to connect a Bluetooth iBeacon to a Raspberry PI and as an initial step, I had to configure the Raspberry PI. So I just thought to write this article while I am doing the configuration. I hope you will find it useful.
Prerequisites
- Raspberry PI
- SD card
- Internet connection
- Ethernet, if your Raspberry PI supports wifi, you can skip this.
Setting up the Raspberry PI
Before you continue this step, please make sure that you have all the mentioned prerequisites.
Formatting an SD card
I am a person who likes to start everything from scratch, so as a first step, we are going to format our SD card. You can either use the normal Format option your Operating System offers. I always use the tool called SD Card Formatter. You can easily download the tool from the Internet. Once you have it installed, open the tool, and select the SD card to be formatted.
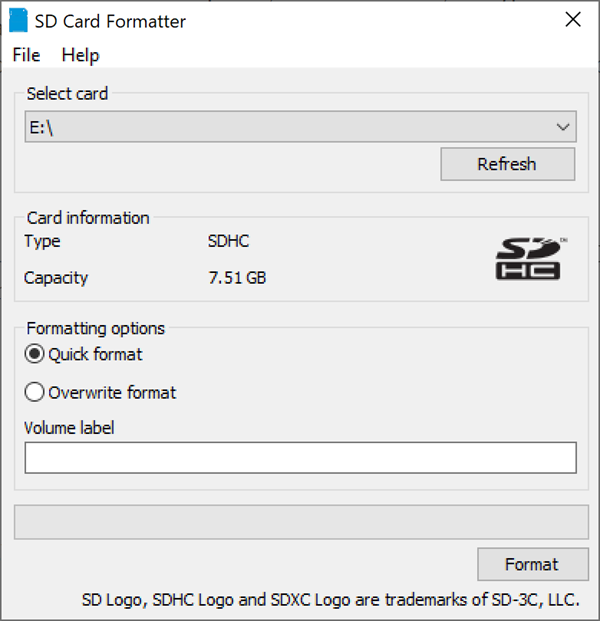
SD Card Formatter
Installing Raspbian Operating System
The Raspbian is the official operating system of the Raspberry PI and you can easily download and mount to your SD card. There is two version of Raspbian you can potentially install, one is the full version and the other is the Lite version. I will install the Lite version now as it requires only a less amount of space when it is compared to the full version. But remember, if you are using the Lite version, you may have to handle the SSH by your own, but it is not as tough as you think.
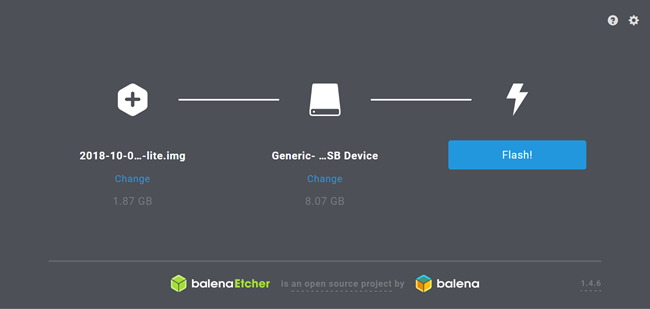
You will get a zipped folder once you download the Raspbian and you should extract the same. Once you do that, you can see the image of Raspbian. Now it is time to write this image to your SD card. To do so, we will have to install an application called Etcher. Etcher is a graphical SD card writing tool, with Etcher you don’t even need to unzip the file to flash it to your SD card. It supports Mac OS, Windows, and Linux.
Once you have downloaded the Etcher, open the tool and select the image you want to flash and click Flash. Booom!. Isn’t that simple?
Flashing Content to SD Card
Once the flashing is done, you should be able to see the Raspian OS content on your SD card.

Falshed Raspbian
Configure SSH
The SSH (Secure Socket Shell) or Secure Shell, is a protocol which gives us the provision to connect to a computer in a secure way over an unsecured network. In our case, we need to connect to our Raspberry PI, which is connected to our LAN or WLAN network, from our Laptop/computer. To enable the SSH, you need to create a file called ssh without extension. There are many ways you can do that, but I usually will just go to the drive or folder I need to create the file and perform the below command.
C:\Users\SibeeshVenu>d:

D:\>echo > ssh
Connect Raspberry PI to the Network
Once the SSH is enabled, we can eject the SD card from our computer and place it in our Raspberry PI and then you need to connect your Raspberry PI to your local network. I am going to connect the same by using a LAN cable. Once it is done you can power on your Raspberry PI, just plug your adapter and plug the other end to the Raspberry PI. Please be noted that there is no On/Off buttons in the Raspberry PI. Please make sure that the lights are blinking once you have connected the power source.
Connect Your Raspberry PI from Your Computer
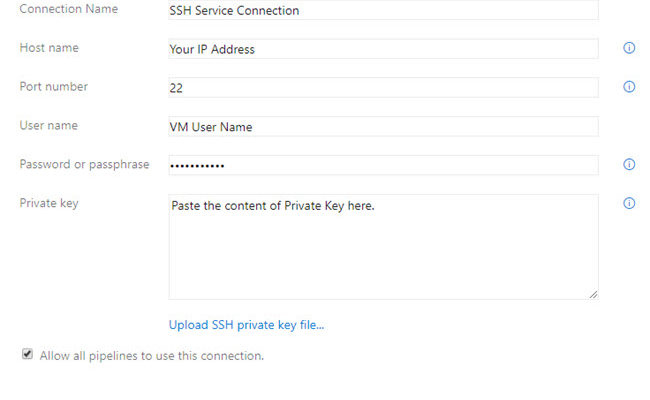
As we have connected our Raspberry PI to our network already, we can just use any SSH client and connect to it easily. But remember, we need either the Host name or the IP address of our Raspberry PI to connect to the same. To connect, I am going to use a tool called PuTTy. The PuTTy is an open source SSH and Telnet client. You can download that from the PuTTy website.
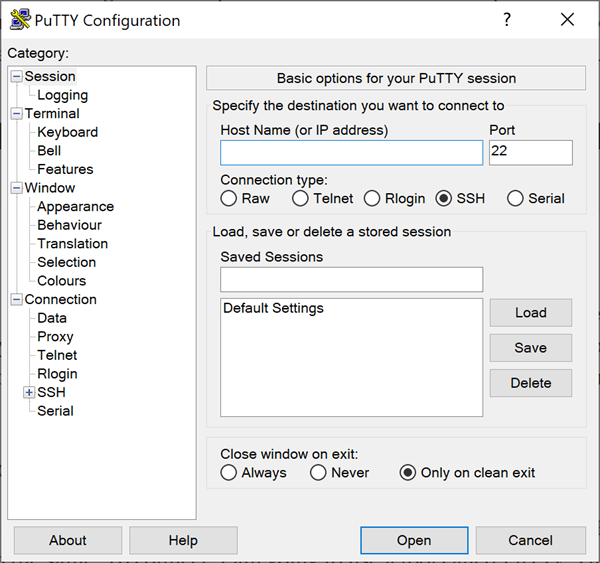
PuTTy Configuration
Now we need to find out the IP address of our Raspberry PI, to find the same I am using a tool called Nmap. The Nmap or Network Mapper is an open source utility for network discovery and many other things, if you want to know what are all the things you can do with Nmap, I recommend you to read it here.
You can also find the IP address of your Raspberry PI by login to your router gateway. To do so, you should have the credentials with you. For now, let’s stick with Nmap. Open the command prompt once you have installed the Nmap, and type ipconfig, which result in all of your configuration of IP. To find the IP addresses of all the resources, you need to use the preceding command.
nmap -sP 192.168.2.0/24
This will give you an output as similar as below.
Starting Nmap 7.70 ( https://nmap.org ) at 2018-11-15 15:32 W. Europe Standard Time
Nmap scan report for 192.168.2.63
Host is up (0.0020s latency).
MAC Address: B8:27:EB:00:B3:60 (Raspberry Pi Foundation)
Here 192.168.2.63 is your Raspberry PI IP address, now you can go ahead and connect to the same by opening the PuTTy tool again. Please make sure that you have selected the option SSH and the port number is 22, for other option the port numbers are different. Once you are done entering the details, just click on the button Open.
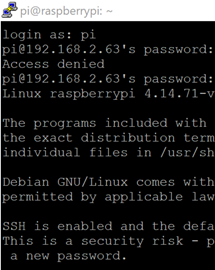
You will also get a security warning as you are trying to connect to a different computer, as we are sure about the IP address of the computer (Raspberry PI) we are going to connect to, and moreover, we are the owners of the same, we don’t need to worry about it. Just click Yes. Now it will ask you to login to your Raspberry PI, where you need to give the username as pi and password as raspberry.
Now you will see a message as below saying that you had successfully logged in to your Raspberry PI. You will also get a warning to change the password of the user pi.
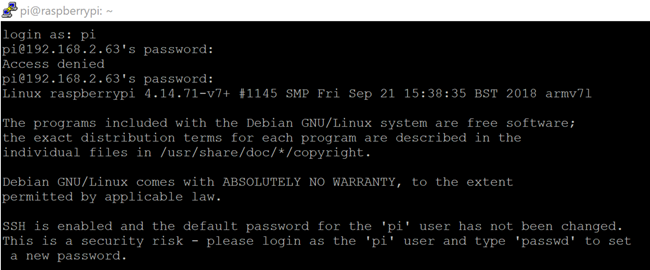
Login to the raspberry pi
You can either do that by using the command passwd or by using the raspi-config command. The rasp-config command will give you an option to set some other additional configurations too.
Configuring raspberry pi
Conclusion
Wow!. Congratulations. Now you have a small, lightweight, functioning computer in your hand, which is nothing but Raspberry PI. To summarize the things we have done in this article.
- Format the SD card
- Flash the Raspbian OS to SD Card
- Add SSH
- Find the IP address of Raspberry PI
- Connect to the Raspberry PI over SSH
- Login to Raspberry PI
- Change the Raspberry PI configuration
Your turn. What do you think?
Thanks a lot for reading. In the next article, we will install Node JS in our Raspberry PI and connect an iBeacon to it over Bluetooth. Did I miss anything that you may think which is needed in this article? Could you find this post as useful? Kindly do not forget to share me your feedback.
Kindest Regards
Sibeesh Venu