Using MVC Grid In MVC
In this post we will see how we can develop a MVC grid in our MVC application. There are so many grids are available in the industries, most of them are useful. Here we are going to use a grid called MVC grid, which uses bootstrap and jQuery. We will create some dynamic data using list first, once it is done, we will send this data to the MVC grid. Sounds good? I hope you will like this article.
Download Source Code
Background
I have been working with the Grid controls for a long long time. So far I have worked with jQX Grid, jQ Grid, jQuery Datatables, Pivot tables, KO grid etc. It is always interesting to work with some controls. I always loved it. recently I worked with MVC grid. So I thought of sharing that experience with you all.
Create a MVC application
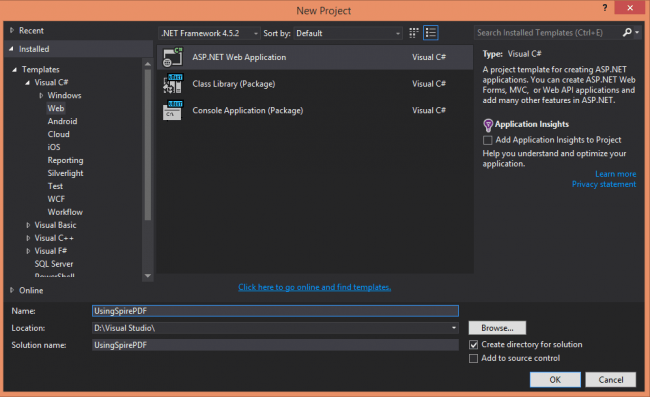
First, we will start with creating an MVC application. Open your visual studio, then click File->New->Project. Name your project.
Install MVC Grid
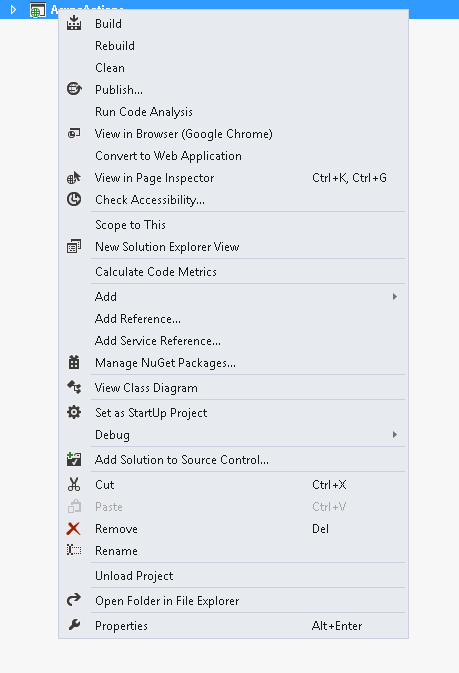
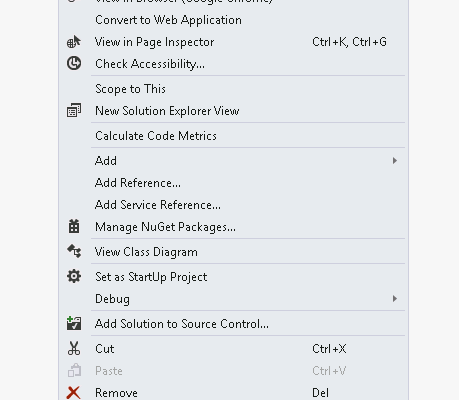
The next step we are going to do is, installing the MVC grid to our project. To install, please right click your solution and click on Manage NuGet packages.
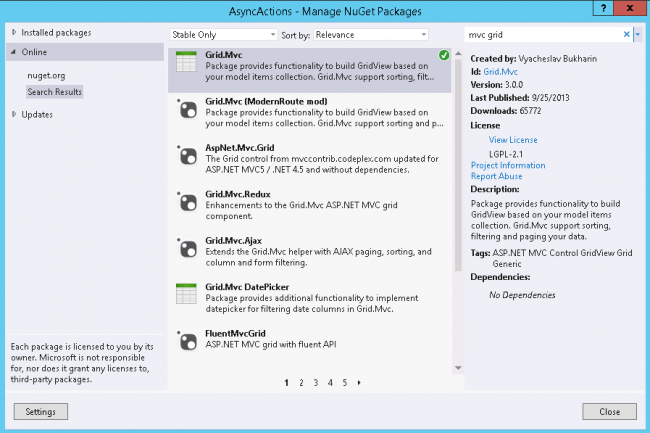
Now you can see a new window, please search for MVC grid in the search box. And then click Install.
Once you installed, you can see there is a new reference file has been added(GridMVC), you can also notice that two views are created (_Grig.cshtml,_GridPager.cshtml) and one CSS file and some scripts. Now we will move to our next step.
Dependencies
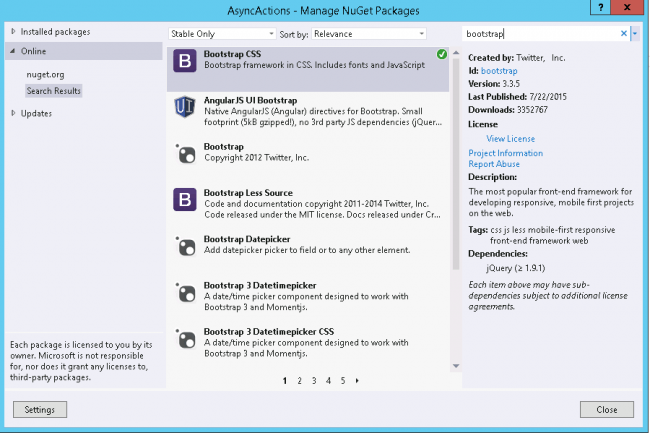
As I said before, MVC grid uses bootstrap for design. So the next thing we need to is to install bootstrap in our project. For that, go to NuGet packages again and search for bootstrap.
You can see some new CSS files and scripts has been added to our project. So the set up has been done. Now what we need to do is to move on the coding part.
Create a controller
Now we can create a new controller, in my case I created a controller ‘HomeController’. In my controller I am going to call a model action which will return some dynamic data. See the code below.
[csharp]
public class HomeController : Controller
{
//
// GET: /Home/
public ActionResult Index()
{
Test t = new Test();
var myList= t.GetData();
return View(myList);
}
}
[/csharp]
As you can see I am creating an instance of my model Test, now we will create our model class. Shall we?
Create Model
I have create a model class with the name Test. Here I am creating some data dynamically using a for loop and assign those values to a list. Please see the codes below.
[csharp]
namespace AsyncActions.Models
{
public class Test
{
public List<Customer> GetData()
{
try
{
List<Customer> cst = new List<Customer>();
for (int i = 0; i < 100; i++)
{
Customer c = new Customer();
c.CustomerID = i;
c.CustomerCode = "CST" + i;
cst.Add(c);
}
return cst;
}
catch (Exception)
{
throw new NotImplementedException();
}
}
}
public class Customer
{
public int CustomerID { get; set; }
public string CustomerCode { get; set; }
}
}
[/csharp]
As you can see I am creating a list of type Customer. Is that fine? Now what is pending? Yes, a view.
Create a strongly typed view
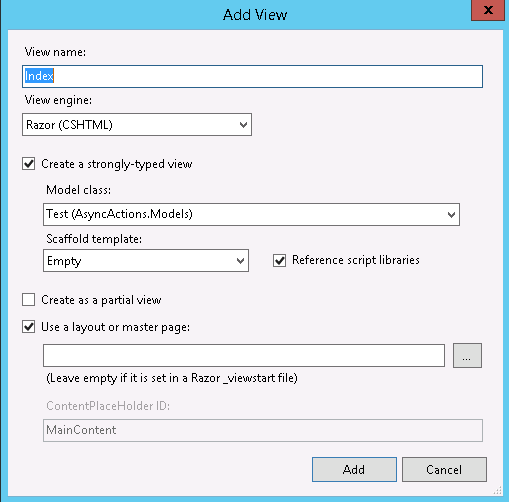
Now we are going to create a strongly typed view.
When you create a view as strongly typed view, your view header will be as follows. @model List
So our view is ready, now we can do some codes in our view to populate our grid. Are you ready? First thing is you need to include the needed references to our view, you can do this in the file called Layout.cshtml. Here I am going to add those references directly to the view.
[html]
<link href="~/Content/bootstrap-theme.css" rel="stylesheet" />
<link href="~/Content/bootstrap.css" rel="stylesheet" />
<script src="~/Scripts/jquery-2.1.3.min.js"></script>
<link href="~/Content/Gridmvc.css" rel="stylesheet" />
<script src="~/Scripts/gridmvc.min.js"></script>
[/html]
Add the grid namespace
You can add the grid namespace as follows.
[html]
@using GridMvc.Html
[/html]
Next thing is to add grid implementation.
MVC Grid Implementation
To add a MVC grid as our requirement, you need to add the codes as below.
[csharp]
@Html.Grid(Model).Columns(columns =>
{
columns.Add(foo => foo.CustomerID).Titled("Customer ID").SetWidth(50).Sortable(true).Filterable(true);
columns.Add(foo => foo.CustomerCode).Titled("Customer Code").SetWidth(50).Sortable(true).Filterable(true);
}).WithPaging(20)
[/csharp]
As you can see we are using the columns Customer.CustomerID and Customer.CustomerCode.
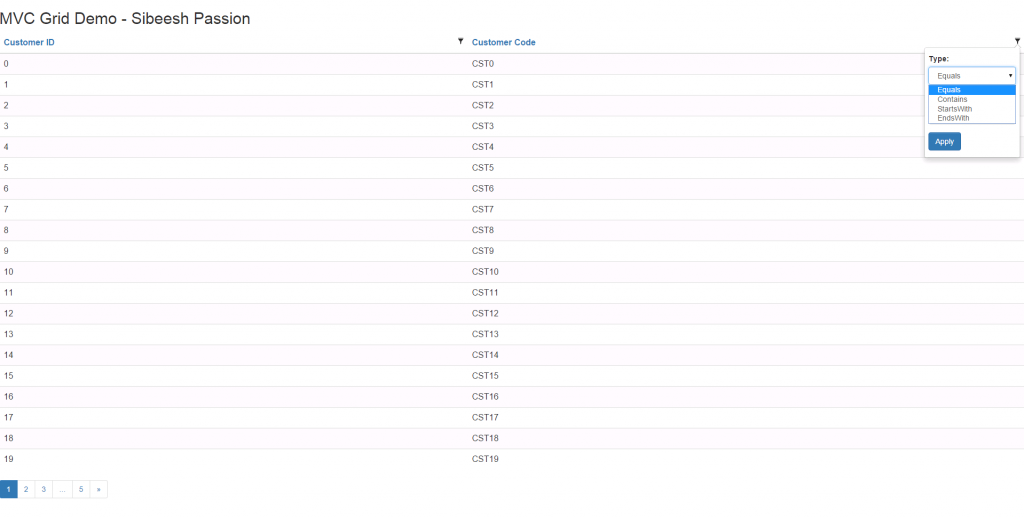
Output
Add more Grid features
To set the paging we can use the option WithPaging(20).
To add title we can use Titled property.
To set width we can use SetWidth property.
To set sort we can use Sortable property.
To set filter we can use Filterable property.
You can always see the additional options here .
Conclusion
Did I miss anything that you may think which is needed? Could you find this post as useful? I hope you liked this article. Please share me your valuable suggestions and feedback.
Your turn. What do you think?
A blog isn’t a blog without comments, but do try to stay on topic. If you have a question unrelated to this post, you’re better off posting it on C# Corner, Code Project, Stack Overflow, Asp.Net Forum instead of commenting here. Tweet or email me a link to your question there and I’ll definitely try to help if I can.
Kindest Regards
Sibeesh Venu

