How to map your domain name to your Azure website

In this post we are going to learn how we can map our domain name to Azure. We all do have our own websites, but in Azure it is known as Web Apps, and you will get a URL with azurewebsites.net concatenated with it. And you will definitely need to customize it to your own right? Here I will show you the steps to be followed. I hope you will like it.
What is Azure?
Azure contains managed services, pre built templates, integrated tools which makes easier to build mobile,enterprise, IOT applications. It is pretty much faster and it provides much spaces on the cloud for us. The simplicity of Azure makes any user to be more productive.
Background
Few days before , I have hosted my website in Azure, and at that time I faced some Issues, with the help of Prabhjot Sir and Romil Sir, I could resolve those issue, so I thought of sharing those information with you.
If you are new to Azure, please read some basics here : Azure Basics
Steps to map your domain name to your Azure Web App
I registered my Domain with GoDaddy, So here I am showing you the settings from GoDaddy DNS manager. But the procedure will be same for other DNS managers too. Go to your Web hosting Account by giving your credentials.
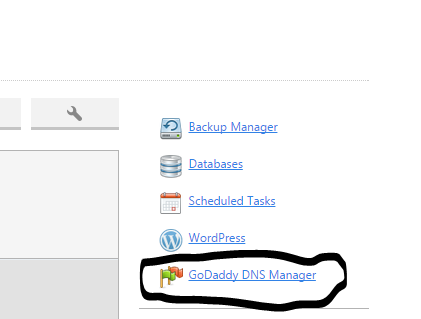
Now click on the GoDaddy DNS Manager
Then you will be getting a grid with the available Domain name with your account. Click on the Edit Zone.
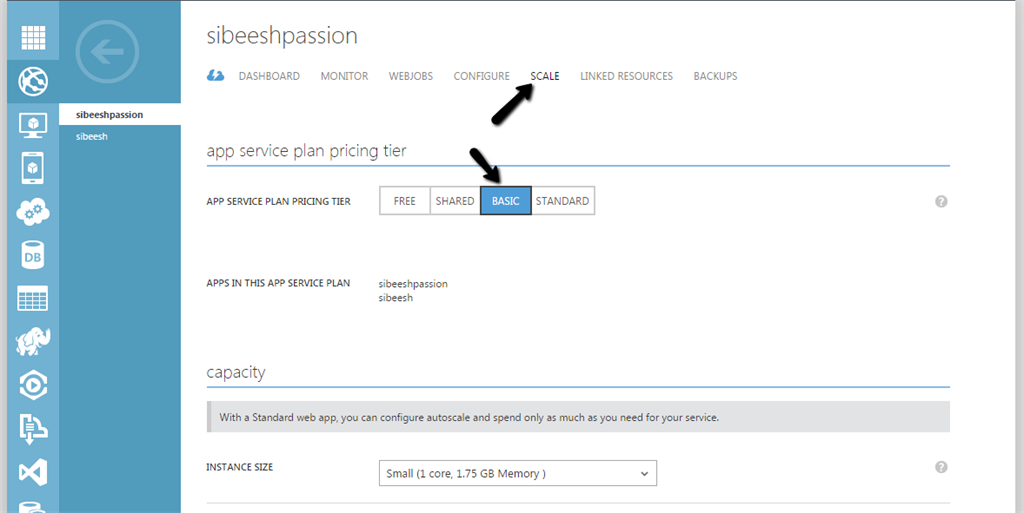
Now you will be redirected to a page, where it will ask for some details like IP address and all. To get those information, please login to your Azure account and click on the Web App -> Scale and select BASIC. (It may be different according to your hosting plan.)
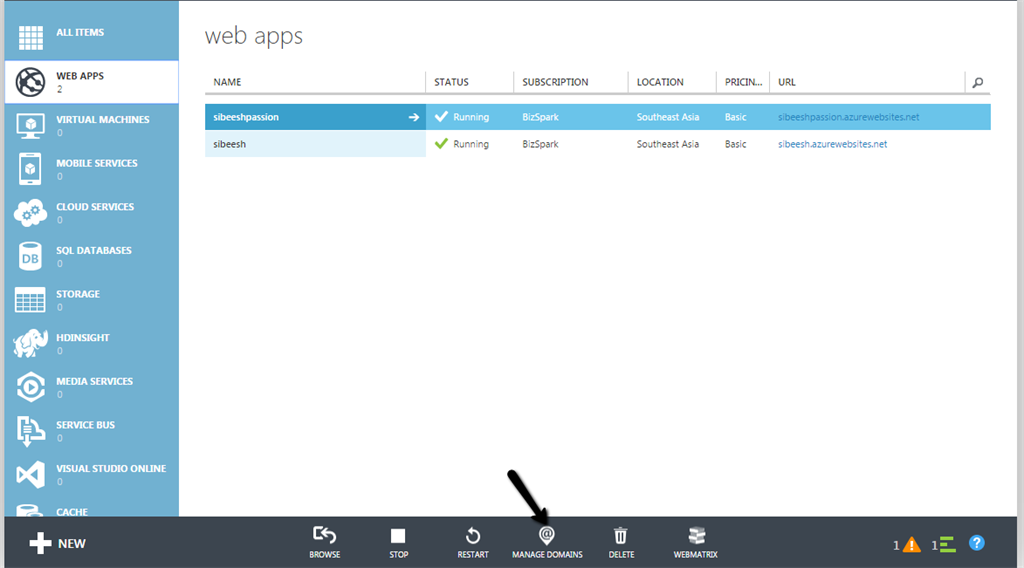
Now go back to web app and click on manage domains in the bottom side.
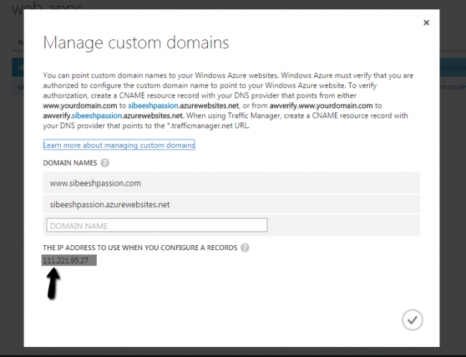
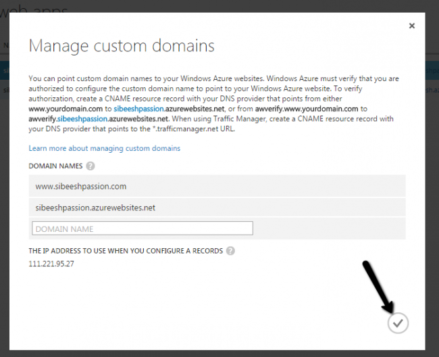
You can see a pop up as follows.
Just copy that IP address and go to your web login in GoDaddy, paste the IP address in the area shown in the below image.
No we have set the A Host. Our next step is configuring the CNAME. You can find another set of information if you come down in the current page.
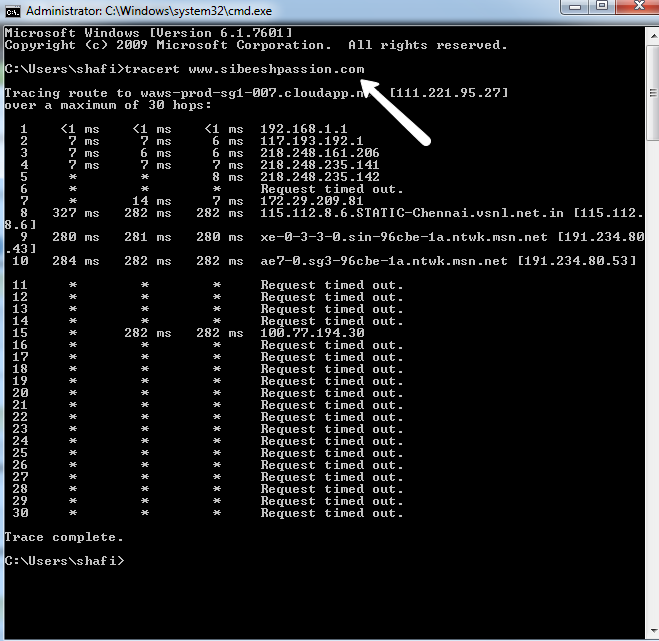
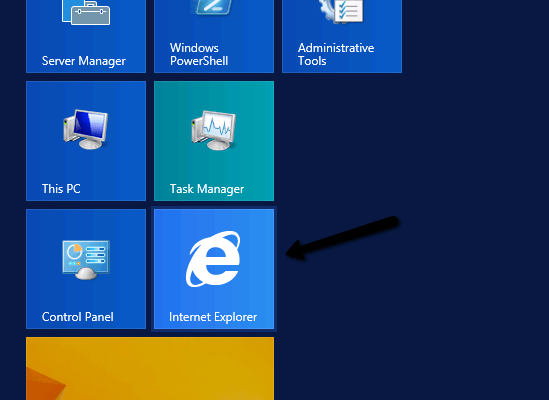
Create a Host as “www” and points to “to your azure website URL”. Now go to your command prompt (Window+R) type cmd. ANd follow the instruction shown in the below image.
Now go to your Azure Manage Domains
Add an entry for your CNAME like www.sibeeshpassion.com. Now if your run your azure website, it will redirect to your web domain. ie www.sibeeshpassion.com.
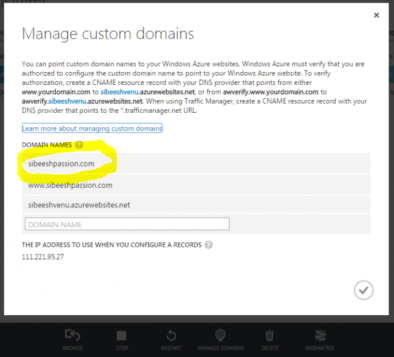
Now what will happen if you type sibeeshpassion.com alone without www. It will throw you an Azure error. So to resolve this you need to go back to your GoDaddy DNS server and an another entry. Please see the images below. Make an entry in CNAME host as “awverify” and point it to awverify. your azure website URL (eg: awverify.sibeeshvenu.azurewebsites.net)
Now it is time to add this entry in your Azure manage domain. Please add an entry for your website without www as shown below.
Wow, we have done everything. Cool now you can browse your website with or without “www”. Heard about Bizspark? Find out here if not http://sibeeshpassion.com/how-to-join-bizspark/
Conclusion
Did I miss anything that you may think which is needed? Have you ever tried Azure Web Apps? Could you find this post as useful? I hope you liked this article. Please share me your valuable suggestions and feedback.
Your turn. What do you think?
A blog isn’t a blog without comments, but do try to stay on topic. If you have a question unrelated to this post, you’re better off posting it on C# Corner, Code Project, Stack Overflow, Asp.Net Forum instead of commenting here. Tweet or email me a link to your question there and I’ll definitely try to help if I can.
Kindest Regards
Sibeesh Venu


